قوة المؤسسة
13 مايو 2025كيفية اكتشاف أعطال المحولات بسهولة: دليل التصوير الحراري للمعايير الصناعية
14 يوليو 2025

- متطلبات التكوين
1 النظام
Android 6.0(M)وما فوق
تمكين وظيفة OTG(يتطلب Oppo تمكينًا يدويًا)
دعم Armeabi-V7a
2 الأجهزة
واجهة Type-C
كاميرا حرارية 384x288
تحميل التطبيق
عرض الصور الحرارية
ستنقل الكاميرا البيانات مرة أخرى إلى الجهاز، ولكن هذا يتطلب تفويضك. في الأجهزة التي تعمل بنظام Android قبل 6.0، بعد قبول جميع الأذونات عند تثبيت التطبيق، لا يلزم اتخاذ أي إجراء. لقد حصل التطبيق بالفعل على إذن استخدام الكاميرا الخارجية. في إصدارات Android 6.0 وما فوق، يلزم التفويض اليدوي.
مثال: عرض صور الأشعة تحت الحمراء.
أدخل الكاميرا في واجهة Type-C وانتظر لحظة.
حدد [موافق] في النافذة المنبثقة للتفويض باستخدام كاميرا مستشعر خارجية.
سيتم فتح الغالق ويمكنك عرض صورة الأشعة تحت الحمراء.
الغالق التلقائي
أثناء الاستخدام، يحتوي الجهاز على وظيفة تصحيح الغالق التلقائي. كل 3 دقائق متتالية من الاستخدام، يسحب الجهاز الحاجز تلقائيًا لتحديث الشاشة. بالإضافة إلى ذلك، عند استدعاء الجهاز (مثل عند التشغيل أو بدء معاينة الشاشة)، سيتم سحب الحاجز أيضًا لضمان وضوح الإطار الأول من الشاشة. يمكنك أيضًا الضغط يدويًا على [تصحيح الغالق]. عندما تشعر أن درجة الحرارة غير دقيقة أو الشاشة ليست واضحة بما فيه الكفاية، انقر على أيقونة الزر
في الزاوية العلوية اليسرى لتصحيح الحاجز يدويًا.
4.صورة داخل صورة
انقر على الزر الأيسر , ، سيتم عرض زر صغير
 على الجانب الأيمن، والنقر على هذا الزر سيعرض صورة داخل صورة. تم تحديد الزر باللون الأصفر.
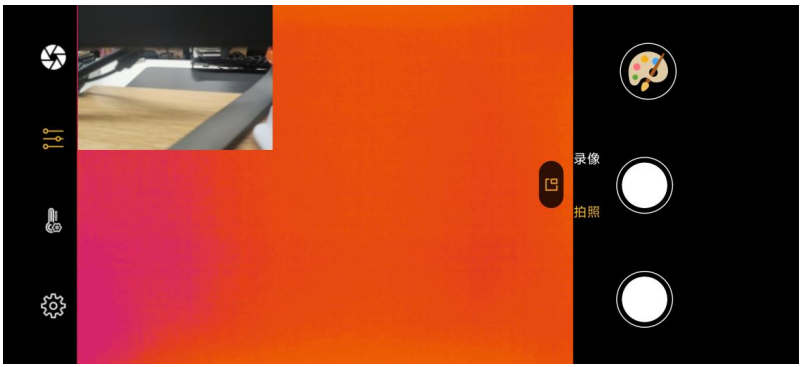
يمكن سحب الأصابع أثناء الضغط على شاشة الضوء المرئي. استخدام إصبعين للانزلاق للخارج يمكن أن يكبر شاشة الضوء المرئي، بينما الانزلاق للداخل يمكن أن يصغرها.
5.وظيفة قياس درجة الحرارة
انقر على هذا الزر , ، وستظهر سلسلة من الأزرار على الجانب الأيمن
 وهي قياس درجة الحرارة بالإطار والخط والنقطة.
1 قياس درجة الحرارة بالمربع:
بعد النقر على المربع المستطيل , ، سيتحول إلى اللون الأصفر ويتم تحديده. ثم، استخدم أصابعك للرسم على الشاشة اليمنى، انقر على الشاشة، واسحب أصابعك. سيتم عرض منطقة قياس درجة الحرارة على الشاشة، حيث سيتم عرض درجات الحرارة العالية والمنخفضة.
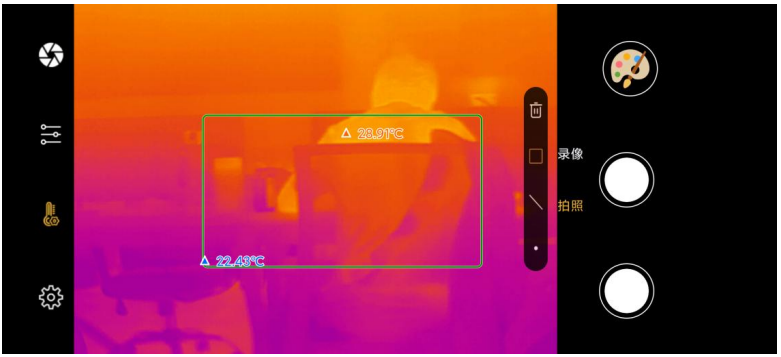
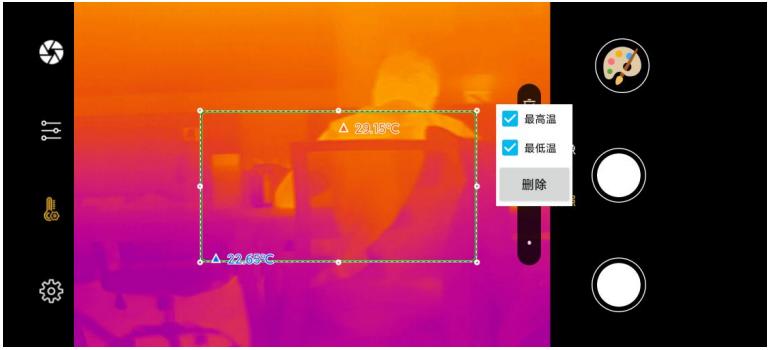
النقر على مربع قياس درجة الحرارة سيعرض لوحة، والتي تحدد افتراضيًا أعلى وأدنى درجات الحرارة، بالإضافة إلى زر الحذف. هنا، يمكنك تعيين عدم عرض أعلى أو أدنى درجة حرارة، أو عدم عرض درجة الحرارة، أو حذف مربع قياس درجة الحرارة الحالي.
2 قياس درجة الحرارة بالخط:
لرسم خط لقياس درجة الحرارة، انقر على الزر وارسم خطًا مستقيمًا على الشاشة، والذي سيعرض أعلى وأدنى درجات الحرارة.
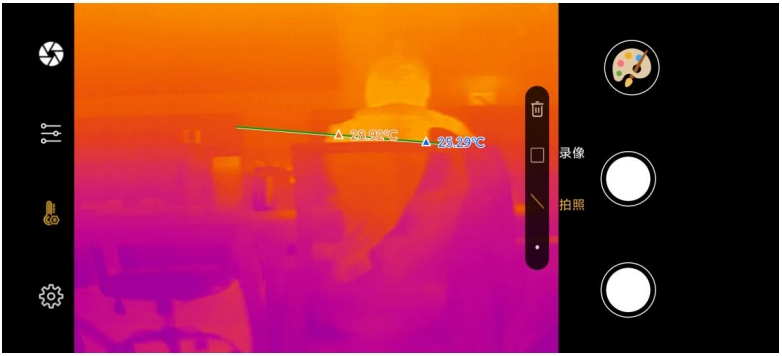
النقر على الخط سيعرض لوحة، والتي تحدد افتراضيًا أعلى وأدنى درجات الحرارة، بالإضافة إلى زر الحذف. هنا، يمكنك تعيين عدم عرض أعلى أو أدنى درجة حرارة، أو عدم عرض درجة الحرارة، أو حذف مربع قياس درجة الحرارة الحالي.
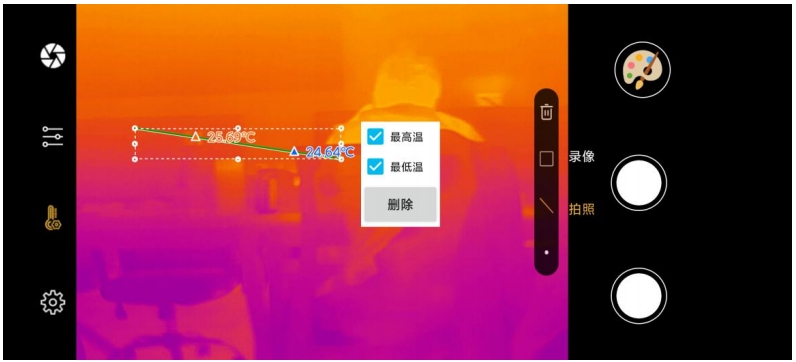
3 قياس درجة الحرارة بالنقطة:
انقر على الزر , ، ثم انقر مرة أخرى على الشاشة لعرض درجة الحرارة عند تلك النقطة.
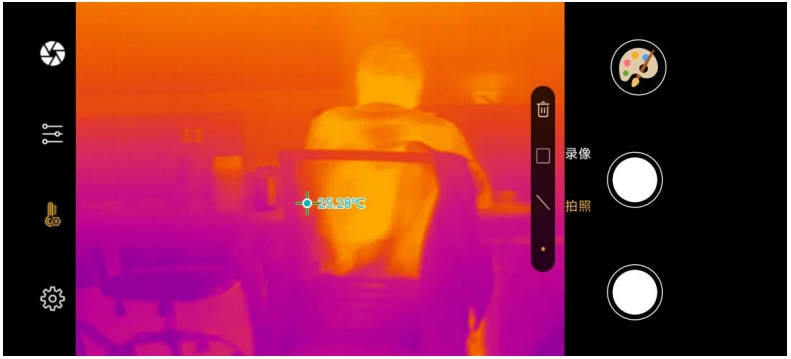
النقر على هذه النقطة سيعرض زر حذف، والذي يمكنه حذف النقطة الحالية.
تغيير الألوان الزائفة
يوفر التطبيق 6 لوحات ألوان زائفة، وهي الأبيض الساخن، والأسود الساخن، والأحمر الحديدي، وقوس قزح عالي التباين، والرمادي الحديدي، وعند بدء التشغيل، يتم استخدام لوحات الأبيض الساخن الشائعة بشكل افتراضي (يُنصح بالتبديل إلى الأحمر الحديدي في صناعة الطاقة). لتبديل اللوحات، انقر فوق زر اللوحة وسيتم عرض علامة تبويب اللوحة المقابلة. يمكنك تحديد اللوحة المقابلة للتبديل.
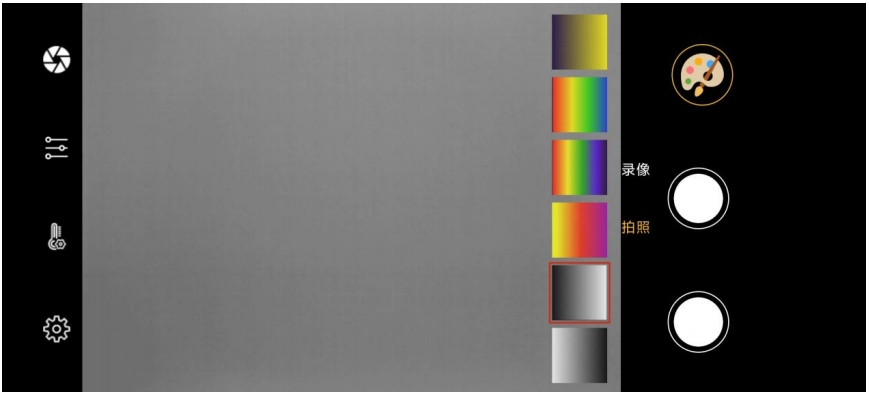
الصورة والفيديو:
يتم تحديد وظيفة التقاط الصور بشكل افتراضي وتكون حالة التحديد باللون الأصفر. يمكنك النقر فوق الزر لالتقاط صورة. بعد التقاط الصورة، سيتم تخزينها في مجلد تخزين الهاتف المحمول. المسار هو: الهاتف - الدليل الجذر\مجلد الأشعة تحت الحمراء. إذا تم التقاط صورة مع مربع قياس درجة الحرارة، أو خط، أو نقطة، فستتضمن الصورة معلومات مثل مربع قياس درجة الحرارة، والخط، والنقطة، ودرجة الحرارة.
حدد الزر لبدء التسجيل. حالة التحديد باللون الأصفر، ويمكنك أيضًا النقر فوق زر الدائرة على اليمينلبدء التسجيل. أثناء عملية التسجيل، يكون الزر باللون الأحمر، والحد الأقصى لوقت التسجيل هو 3 دقائق. بعد التسجيل، تتم إعادة تعيين حالة الزر إلى الأبيض. سيتم تخزين الفيديو المسجل في مخزن الهاتف، ومسار التخزين هو الملف الذي ينتهي بـ .mp4 في مجلد الهاتف - الدليل الجذر \ الأشعة تحت الحمراء.
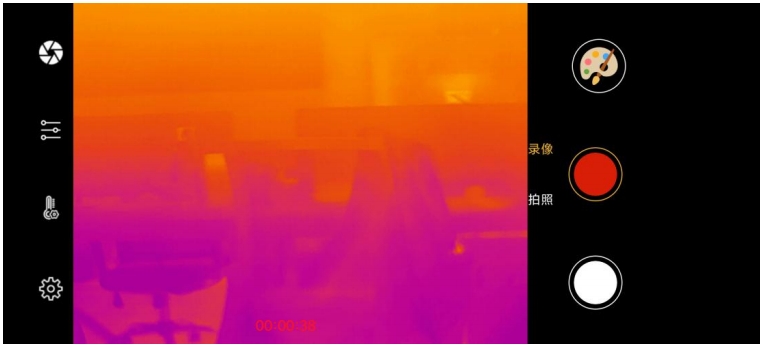
عرض الألبوم
1. الألبوم
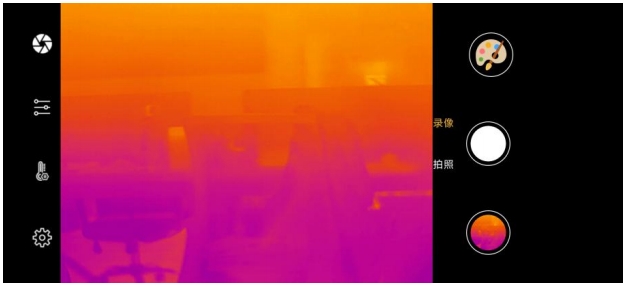
Clicking the button in the bottom right corner  will redirect you to the album viewing interface.
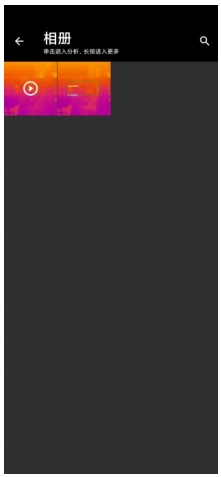
Here, you can view the photos and video information taken.
You can perform temperature measurement operations in these multimedia, such as creating a temperature measurement box in temperature measurement. Not only in photos, but also in videos. Example: View infrared image and video images in the device.
Click the [Library Management] button in the bottom right corner to enter the album interface.
- Swipe up and down (if there are many multimedia files, they may overflow the screen), click on the multimedia file you want to view, and enter the album interface.
- You can also slide left and right, these are the multimedia files you just saved.
- Slide to the video page and click [▶] The icon starts playing the video.
- Drag the slider to any timestamp and start playing the video from here.
- Click the [Pause] icon to stop playing the video.
- situations with a large number of multimedia files, you can also use search to
- find them. Click on the upper right corner[ ], enter the search keyword, and all
- infrared files containing that keyword will be listed.
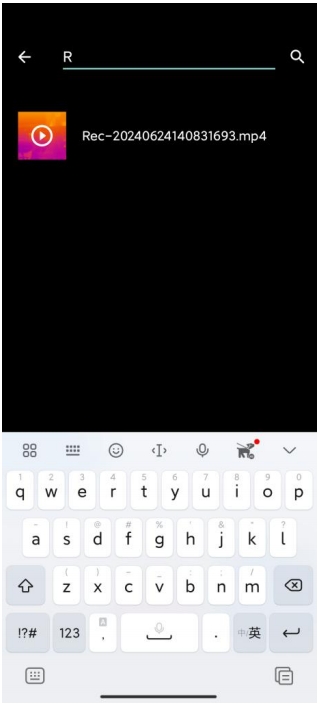
You can also rename these multimedia and click the "Save As…" icon on the left to save infrared images and videos. If the infrared image contains visible light thumbnails, it will be saved at the same time. The save directory is located in the/root directory/Informed.
8.2. Album Modification
You can manually save infrared images in different formats, supported image formats include JPG, PNG, and BMP, and video formats include MP4. Click to enter the multimedia file in the album, click on the third "Save As…" icon on the left, and choose a format to save. You can also delete the current file through the fourth [Delete] button.
9. Settings
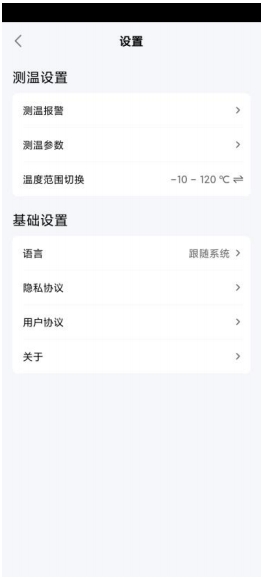
Click the settings button in the bottom left corner to jump to the settings page.
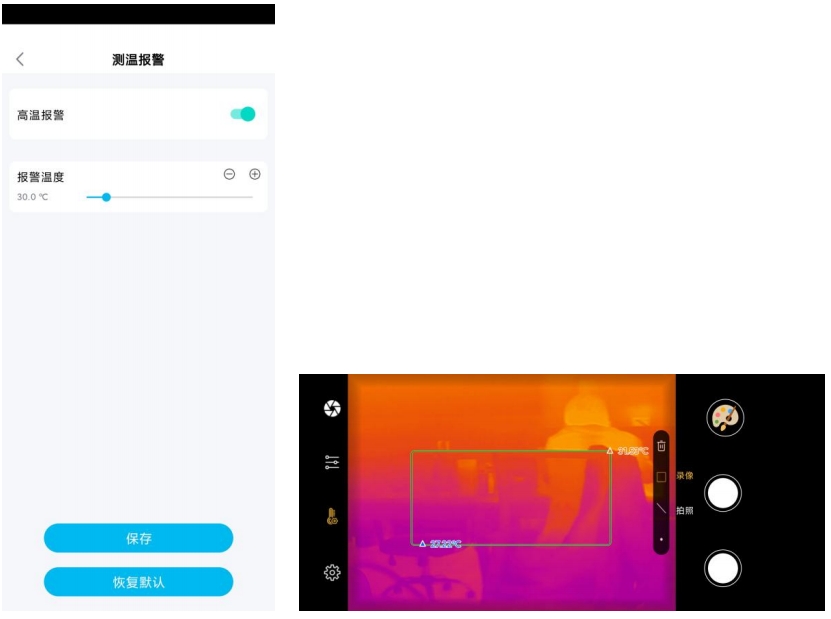
Click on [Temperature Alarm] to enter the interface and set the temperature alarm parameters. Slide the switch to turn on/off the over temperature alarm button, pull the slider, and adjust the threshold value of the alarm. Returning to the real-time analysis interface, among all analysis tools, any temperature measurement tool with a temperature higher than the threshold will be set to a red alarm state. At the same time, the phone will emit an alarm sound, and the image border will dynamically display an orange red alarm flashing alarm.
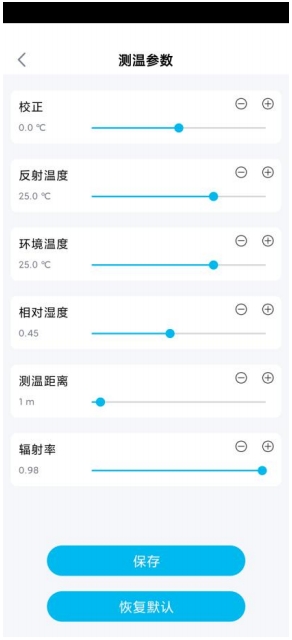
Click on [Temperature Measurement Parameters] to enter the interface and set some temperature measurement parameters.
Click on [Temperature Range Switching] to set the temperature range.
Click on [Language] to switch to the language.
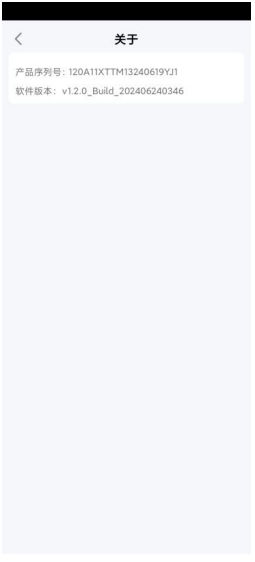
Click on "About" to view the product serial number and software version number.