Mini 640 niechłodzony moduł kamery termowizyjnej LWIR | Ultra-kompaktowa termowizja 640×512 o wysokiej czułości do dronów, inspekcji przemysłowych i bezpieczeństwa
22 maja 2026 r.
Przewodnik po termowizyjnych modułach kamery: Wybór odpowiedniego rdzenia LWIR dla dronów, DIY i strumieniowania w czasie rzeczywistym
4 czerwca 2026
Przewodnik po modułach kamer termowizyjnych: Wybór odpowiedniego niechłodzonego czujnika IR do projektów DIY, dronów i Linuxa
Słuchaj, jeśli spędziłeś ostatnie kilka tygodni, przeskakując między wątkami na Reddicie, ofertami na AliExpress i forami o częściach z odzysku z motoryzacji, próbując znaleźć moduł kamery termowizyjnej który faktycznie jest dostarczany z dokumentacją, to już znasz ten ból. Znajdujesz płytkę z obiecującym czujnikiem — może Tiny1-C, RTR-225M albo wyciągniętą z samochodu jednostkę noktowizyjną — a potem odkrywasz, że nie ma sterownika dla Linuxa, mapy rejestrów, opublikowanego formatu ramki ani specyfikacji wyjścia temperatury. Nagle twój "projekt na weekend" zamienia się w wielomiesięczną ekspedycję polegającą na podsłuchiwaniu protokołów, gdzie sondujesz linie danych analizatorem logicznym, zamiast budować drona, lunetę czy robota, którego faktycznie chciałeś. Stawka jest realna: jeden zły zakup może cię kosztować miesiące zmarnowanego wysiłku i szufladę pełną bezużytecznego sprzętu.
Oto sedno sprawy. Ten przewodnik jest napisany z perspektywy producenta OEM, który kontroluje cały proces projektowania — od detektora mikrobolometrycznego aż po oprogramowanie układowe. To oznacza, że kiedy mówimy o NETD, rozmiarze piksela, protokołach interfejsu czy kalibracji radiometrycznej, opisujemy dokładnie te decyzje, które podejmujemy na hali produkcyjnej. W ciągu kolejnych ponad 3000 słów otrzymasz kompletny, neutralny dostawczo schemat decyzyjny: jak faktycznie działają niechłodzone mikrobolometry, jak czytać prawdziwą kartę katalogową (rozdzielczość, NETD, rozmiar piksela, liczba klatek na sekundę, pole widzenia), jak zintegrować moduł z Raspberry Pi, NVIDIA Jetson lub Androidem, a na koniec, który moduł pasuje do drona, lunety, bramki do pomiaru gorączki i zastosowań wbudowanych. Zakończymy konkretnymi rekomendacjami produktów i zasobami do pobrania, abyś mógł przejść od badań do integracji w ciągu dni, a nie lat.
Widziałem wystarczająco dużo nieudanych konstrukcji, żeby powiedzieć ci prawdę na wstępie: czujnik rzadko jest problemem. Problemem jest dokumentacja wokół czujnika. Miej to z tyłu głowy podczas czytania, bo to kształtuje każdą rekomendację tutaj.
Przejdźmy do rzeczy.
Spis treści
Szacowany czas czytania: 14 minut · Przejdź do specyfikacji produktu ➔
- 👉 Czym jest moduł kamery termowizyjnej?
- 👉 Jak działają niechłodzone czujniki IR: Mikrobolometr
- 👉 Chłodzone vs. niechłodzone: Którego potrzebujesz?
- 👉 Rozszyfrowanie kluczowych specyfikacji
- 👉 Typy interfejsów: USB, CVBS, MIPI i SPI
- 👉 Integracja z Linuxem, Raspberry Pi i Jetsonem
- 👉 Przewodnik wyboru według zastosowania
- 👉 Nasze moduły kamer termowizyjnych (tabela specyfikacji)
- 👉 Wyjaśnienie radiometrycznego pomiaru temperatury
- 👉 Częste błędy przy zakupie, których należy unikać
- 👉 Często zadawane pytania
Czym jest moduł kamery termowizyjnej?
A moduł kamery termowizyjnej jest samodzielnym podzespołem zaprojektowanym do integracji, a nie do użytku na półce sklepowej. W swoim rdzeniu łączy cztery kluczowe elementy: detektor podczerwieni (matrycę płaszczyzny ogniskowej), specjalistyczną optykę (zazwyczaj soczewkę germanową lub chalkogenidkową, która jest przezroczysta dla długofalowego promieniowania podczerwonego), układ odczytowy (ROIC), który przekształca sygnały detektora w użyteczne dane, płytkę przetwarzania obrazu, która obsługuje korekcję i ulepszanie, oraz interfejs wyjściowy, który dostarcza wideo lub surowe ramki do twojego systemu hosta.
Oto rozróżnienie, które sprawia ludziom trudność. Moduł nie jest gotową kamerą termowizyjną. Gotowa kamera to obudowane, gotowe do użytku konsumenckiego urządzenie z ekranem, baterią i obudową. Moduł natomiast to produkt na poziomie płytki, zaprojektowany do osadzenia wewnątrz twojego produkt — gimbal do drona, robot, kiosk do pomiaru gorączki lub niestandardowy zestaw Raspberry Pi. Większość modułów niechłodzonych działa w paśmie długofalowej podczerwieni (LWIR) o długości fali około 8–14 µm, które jest dominującym zakresem spektralnym do wykrywania ciepła emitowanego przez ludzi, maszyny i środowisko naturalne.
Podział kluczowych komponentów
- ⚙️ Matryca detektora: Niechłodzona mikrobolometru matryca w płaszczyźnie ogniskowej, która pochłania promieniowanie IR.
- ⚙️ Optyka: Soczewka germanowa lub chalkogenkowa zaprojektowana do transmisji LWIR.
- ⚙️ ROIC: Odczytuje sygnał każdego piksela i digitalizuje go.
- ⚙️ Potok obrazowania: Korekcja niejednorodności (NUC) i automatyczna regulacja wzmocnienia (AGC) dla czystego, stabilnego obrazu.
- ⚙️ Płytka interfejsu: Wyprowadza USB/UVC, analogowe wideo CVBS, MIPI CSI-2 lub sterowanie SPI/I²C.
Dlaczego modułowość ma znaczenie dla OEM i twórców
Podejście modułowe daje trzy istotne korzyści: możliwość osadzenia, możliwość uruchamiania niestandardowego oprogramowania układowego i swobodę w zakresie formy. Nie jesteś ograniczony cudzą obudową ani zestawem funkcji. Zarówno dla producentów OEM skalujących produkcję, jak i twórców prototypujących pojedyncze jednostki, moduł z udokumentowanym interfejsem jest fundamentem, który decyduje o tym, czy projekt zakończy się sukcesem w ciągu tygodni, czy utknie na czas nieokreślony.
Jak działają niechłodzone czujniki IR: Mikrobolometr
Fizyka jest elegancko prosta, gdy przedstawi się ją jasno. Każdy obiekt powyżej zera absolutnego emituje promieniowanie podczerwone proporcjonalnie do swojej temperatury. Niechłodzona matryca mikrobolometryczna to siatka maleńkich, izolowanych termicznie pikseli. Gdy promieniowanie IR pada na piksel, piksel ten lekko się nagrzewa, a jego opór elektryczny zmienia się. ROIC mierzy te zmiany oporu w całej matrycy wiele razy na sekundę i składa je w mapę intensywności termicznej — obraz, który widzisz, gdzie cieplejsze obszary wyraźnie odróżniają się od chłodniejszych.
Materiały mikrobolometrów — VOx vs. a-Si
Dwa materiały dominują w świecie mikrobolometrów. Tlenek wanadu (VOx) oferuje doskonałą czułość i dojrzałą bazę produkcyjną, zazwyczaj zapewniając niższy NETD (lepszą rozdzielczość termiczną), ale przy większej złożoności procesu. Krzem amorficzny (a-Si) jest tańszy i łatwiejszy w produkcji przy użyciu standardowych linii półprzewodnikowych, z nieco wyższym poziomem szumów w niektórych implementacjach. W większości zastosowań DIY, dronowych i wbudowanych praktyczna różnica w wydajności jest niewielka, a dobra kalibracja na poziomie oprogramowania układowego ma znacznie większe znaczenie niż wybór surowego materiału. Wiele razy widziałem w warsztacie, jak dobrze dostrojona płytka a-Si przewyższała niedbale wykonaną płytkę VOx.
Rozmiar piksela i dlaczego mniejszy nie zawsze jest lepszy
Rozmiar piksela — odległość między środkami pikseli, zwykle 17 µm lub 12 µm — jest często źle rozumiany. Mniejszy rozmiar (12 µm) pozwala upakować więcej pikseli w mniejszym, lżejszym sensorze i użyć mniejszej, tańszej soczewki. Jednak mniejsze piksele zbierają mniej promieniowania, co może zmniejszyć czułość, chyba że zostanie to skompensowane przez konstrukcję detektora. Rozmiar 17 µm często zapewnia nieco lepszy sygnał na piksel. "Właściwy" rozmiar zależy od priorytetów: kompaktowość i waga (kluczowe dla dronów) kontra maksymalna czułość na piksel.
Korekcja niejednorodności (NUC) i kalibracja migawki
Żadne dwa piksele w mikrobolometrze nie reagują identycznie, dlatego każdy moduł okresowo przeprowadza Korekcję Niejednorodności (NUC). Usłyszysz cichy "klik" — to wewnętrzna przesłona zamyka się, aby zapewnić jednolite odniesienie termiczne, względem którego oprogramowanie układowe ponownie kalibruje każdy piksel. Jakość tej procedury NUC odróżnia profesjonalny moduł od anonimowej płyty z odzysku. Słaba NUC powoduje szum stałoprzestrzenny i smużenie; dobrze dostrojona NUC daje czysty, stabilny obraz. Ponieważ samodzielnie kontrolujemy oprogramowanie układowe, nasze strojenie NUC jest zoptymalizowane specjalnie pod kątem naszych detektorów — coś, czego po prostu nie da się odtworzyć przy użyciu podzespołów samochodowych pozyskanych metodą inżynierii wstecznej.
Moduły termiczne chłodzone a niechłodzone: Którego potrzebujesz?
| Atrybut | Chłodzone | Niechłodzone |
|---|---|---|
| Koszt | Bardzo wysoka (10–50×) | Przystępna cenowo |
| Rozmiar | Duża (kriochłodziarka) | Kompaktowa |
| Zasilanie | Wysokie | Niska |
| Czułość (NETD) | Ekstremalnie wysoka | Dobra (20–60 mK) |
| Pasmo spektralne | MWIR (powszechna) | LWIR (8–14 µm) |
| Czas uruchomienia | Minuty (schładzanie) | Natychmiastowe włączenie |
| Żywotność | Ograniczona przez chłodziarkę | Długi |
| Typowe zastosowanie | Wojsko, astronomia, wykrywanie gazów | DIY, drony, robotyka, badania przesiewowe |
Dla odbiorców czytających ten poradnik — konstruktorów, budowniczych dronów, inżynierów robotyki i programistów systemów wbudowanych — niechłodzona jest prawie zawsze właściwą odpowiedzią. Systemy chłodzone istnieją dla wojskowego nadzoru dalekiego zasięgu i obrazowania naukowego i kosztują od dziesięciu do pięćdziesięciu razy więcej. Nie zamierzam sprzedawać ci kriochłodziarki, której nie potrzebujesz.
Kiedy chłodzona ma uzasadnienie
Pozwólcie, że będę tu szczery i wyczerpujący: detektory chłodzone naprawdę błyszczą w wykrywaniu gazów na duże odległości, niektórych zastosowaniach astronomicznych i ultra-dalekim celowaniu wojskowym, gdzie trzeba rozróżnić niewielkie różnice temperatur na przestrzeni kilometrów. Jeśli to opisuje twój projekt, masz już specjalistyczny budżet. Dla wszystkich pozostałych, czytajcie dalej.
Dlaczego niechłodzona dominuje w konstrukcjach DIY i dronach
Moduły niechłodzone nie wymagają kriochłodziarki, pobierają minimalną moc (kluczowe dla dronów zasilanych bateryjnie), włączają się natychmiast i mieszczą się w kompaktowych ładunkach. Są praktycznym, sprawdzonym wyborem dla praktycznie każdego projektu, którego dotyczy ten poradnik.
Rozszyfrowanie kluczowych specyfikacji: Jak czytać arkusz danych modułu termowizyjnego
To najbardziej wartościowa sekcja poradnika. Naucz się czytać te sześć specyfikacji, a już nigdy nie dasz się nabrać na mylącą ofertę.
Rozdzielczość (384×288, 256×192, 640×512)
Rozdzielczość to liczba pikseli detektora. Więcej pikseli oznacza więcej szczegółów i dłuższy efektywny zasięg wykrywania. Jednak wyższa rozdzielczość dramatycznie zwiększa koszt. 384×288 to optymalny punkt pod względem stosunku kosztów do wydajności — zapewnia wystarczającą ilość szczegółów dla celowników termowizyjnych, dronów i wizji maszynowej bez premii za sensor 640×512.
NETD (Czułość termiczna)
NETD (Równoważna Szumowi Różnica Temperatur) jest mierzona w milikelwinach (mK) i opisuje najmniejszą różnicę temperatur, jaką sensor może odróżnić od szumu. Im niższa, tym lepiej. Moduł o wartości poniżej 40 mK daje ostry obraz o niskim poziomie szumów; ten o wartości powyżej 60 mK wygląda na bardziej ziarnisty, szczególnie w scenach z subtelnymi różnicami temperatur. Wielu kupujących ma obsesję na punkcie rozdzielczości, ignorując NETD — to kosztowny błąd, który stale obserwuję.
Częstotliwość odświeżania (9 Hz vs 25/30/50 Hz)
Częstotliwość odświeżania decyduje o płynności. Słynny limit 9 Hz istnieje, ponieważ wyższe częstotliwości mogą uruchamiać ograniczenia eksportowe w niektórych regionach. Do płynnego wideo w czasie rzeczywistym — niezbędnego do śledzenia z drona i szybkiego panoramowania celownikiem — potrzebujesz 25 Hz lub więcej, gdzie jest to prawnie dostępne. Wybieraj świadomie, w zależności od jurysdykcji i przypadku użycia.
Pole widzenia (FOV) i ogniskowa obiektywu
FOV jest określane przez ogniskową obiektywu. Szerokie FOV jest idealne do nawigacji i świadomości sytuacyjnej, podczas gdy wąskie FOV (dłuższa ogniskowa) koncentruje piksele na odległych celach w celu detekcji na dystansie. Dopasuj obiektyw do misji: szeroki do nawigacji dronem, wąski do identyfikacji na dużą odległość.
Zakres pomiaru temperatury i dokładność
Moduły radiometryczne określają zakres pomiarowy i dokładność, zazwyczaj ±2°C lub ±2% odczytu. Moduł radiometryczny podaje skalibrowaną temperaturę dla każdego piksela; moduł nieradiometryczny tworzy tylko obraz. Jeśli potrzebujesz rzeczywistych wartości liczbowych — badania przesiewowe gorączki, konserwacja predykcyjna — radiometryczny jest obowiązkowy.
Pobór mocy i temperatura pracy
W przypadku dronów i systemów wbudowanych każdy miliwat i każdy stopień zakresu roboczego ma znaczenie. Sprawdź pobór mocy modułu w stosunku do budżetu baterii oraz jego zakres temperatury roboczej w stosunku do środowiska, w którym będzie używany.
⚡ Ściągawka ze specyfikacją
- ✅ Dron: 384×288, <40 mK NETD, CVBS/MIPI, niski pobór mocy, lekka waga.
- ✅ Celownik termiczny: 384×288+, 25–50 Hz, niskie opóźnienie (CVBS), wąskie pole widzenia.
- ✅ Robotyka/AI: MIPI CSI-2, SDK, wysoka liczba klatek na sekundę do inferencji Jetson.
- ✅ Badanie przesiewowe gorączki: Radiometryczny, ±0,3–0,5°C, kalibrowany ciałem doskonale czarnym.
Chcesz poznać konkretne liczby? Pobierz pełne karty katalogowe i tabele specyfikacji dla każdego modułu z naszego Centrum pobierania.
Typy interfejsów: USB, CVBS, MIPI i SPI – wyjaśnienie
Wybór interfejsu to główna przyczyna niepowodzeń integracji u hobbystów. Odpowiedni czujnik na niewłaściwym interfejsie to ślepa uliczka. Oto jak wybrać.
USB / UVC
Moduły USB zgodne ze standardem UVC (USB Video Class) są naprawdę plug-and-play w systemach Linux, Windows i Android. To najłatwiejsza ścieżka dla projektów Raspberry Pi i dodatków do telefonów. Zastrzeżenie: nie każdy moduł "USB" jest w pełni zgodny z UVC — sprawdź przed zakupem.
CVBS (wideo analogowe)
CVBS to kompozytowe wideo analogowe. Nasz moduł MINI oferuje opcję CVBS, która jest idealna do gogli FPV do dronów i analogowych celowników termowizyjnych, ponieważ zapewnia wyjątkowo niskie opóźnienia — kluczowe podczas pilotowania lub śledzenia w czasie rzeczywistym. Bez stosu sterowników, bez opóźnień w potoku programowym; po prostu czysty sygnał analogowy na wyświetlacz.
MIPI CSI-2
MIPI CSI-2 to interfejs o wysokiej przepustowości, natywny dla portów kamer na płytach NVIDIA Jetson i Raspberry Pi. To najlepszy wybór dla potoków AI o wysokiej rozdzielczości i w czasie rzeczywistym, gdzie trzeba podawać klatki bezpośrednio do silnika wnioskowania. Jeśli budujesz termowizyjne wykrywanie obiektów na NVIDIA Jetson, MIPI jest twoim interfejsem.
SPI / I²C
SPI i I²C zapewniają kontrolę na poziomie rejestrów i dostęp do surowych danych. Są przeznaczone dla zaawansowanych programistów systemów wbudowanych, którzy muszą bezpośrednio sterować modułem i pobierać nieprzetworzone klatki. Z odpowiednią dokumentacją jest to niezwykle potężne narzędzie; bez niej to koszmar — co prowadzi nas do sedna sprawy.
Prawdziwym wyróżnikiem jest dokumentacja. Udokumentowany interfejs plus prawdziwy SDK oznaczają integrację w ciągu dni. Nieudokumentowany interfejs — sytuacja, na którą narzeka tak wielu użytkowników Tiny1-C i RTR-225M — oznacza miesiące inżynierii wstecznej. Zawsze wybieraj opublikowaną dokumentację zamiast inżynierii wstecznej. Nie mogę tego powiedzieć wystarczająco głośno.
Integracja z Linuxem, Raspberry Pi i Jetsonem
Zajmijmy się bezpośrednio głównym zamierzeniem technicznym: uruchomienie modułu termowizyjnego na Linuksie, strumieniowanie z Raspberry Pi i uruchamianie AI na Jetson.
Wymagania dotyczące sterowników i SDK
Przed zakupem zażądaj od każdego dostawcy następujących rzeczy: kompatybilnych z jądrem sterowników Linux, przykładowego kodu, opublikowanej mapy rejestrów i jasnej dokumentacji odczytu temperatury. Jeśli dostawca nie może ich zapewnić, odejdź. Te cztery elementy stanowią różnicę między działającym projektem a przyciskiem do papieru.
Strumieniowanie obrazu termowizyjnego w czasie rzeczywistym na Raspberry Pi
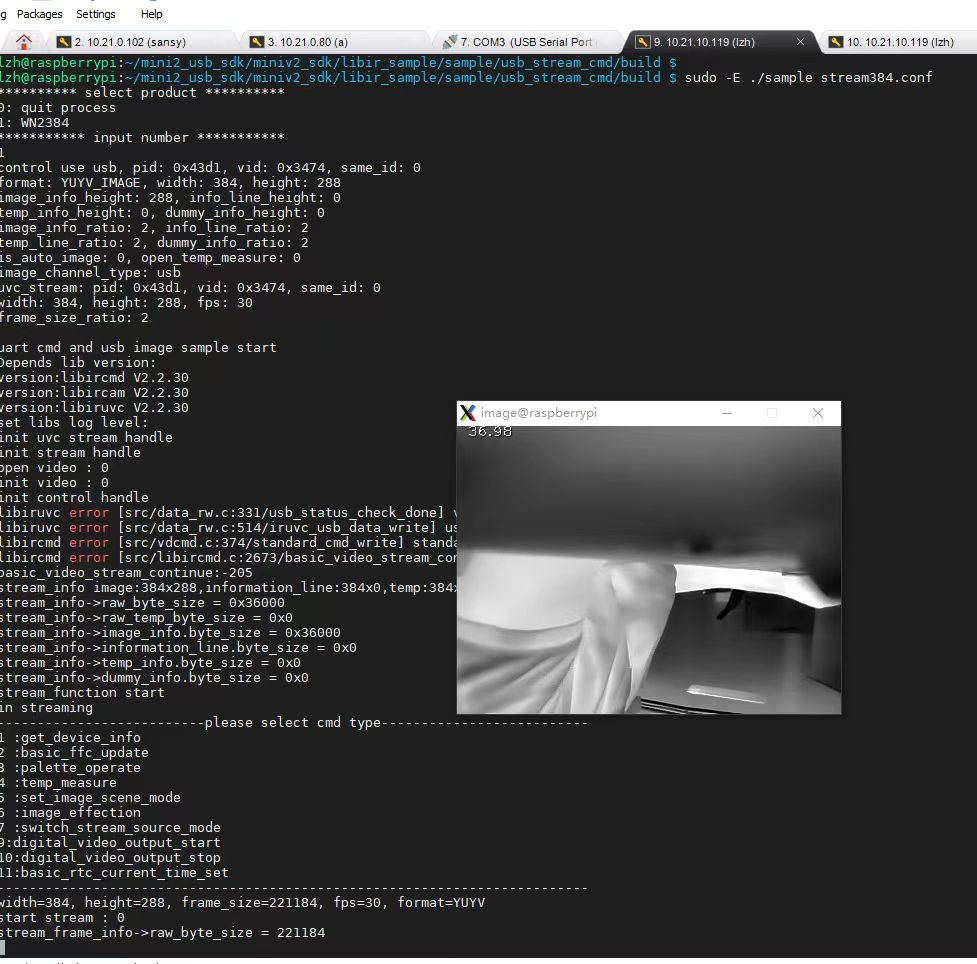
Praktyczny przepływ pracy jest prosty, gdy sprzęt współpracuje: podłącz moduł przez USB lub MIPI, przechwytuj każdą klatkę przez sterownik, zastosuj paletę kolorów (ironbow, white-hot, rainbow) i wyświetl lokalnie lub strumieniuj przez RTSP do zdalnego klienta. Z modułem UVC może to być tak proste, jak otwarcie urządzenia za pomocą standardowej biblioteki przechwytywania; z MIPI konfigurujesz interfejs kamery i pobierasz klatki z pełną szybkością.
Uruchamianie termowizyjnej AI na NVIDIA Jetson
Do wnioskowania AI niskie opóźnienia MIPI pozwalają podawać klatki termowizyjne bezpośrednio do modeli detekcji działających na GPU Jetson — wykrywanie ludzi, śledzenie obiektów i wykrywanie anomalii w domenie termowizyjnej. To architektura stojąca za nowoczesnymi systemami bezpieczeństwa termowizyjnego i autonomicznej nawigacji.
Unikanie pułapki "modułu z odzysku samochodowego"
Moduły noktowizyjne z odzysku samochodowego są kuszące, bo są tanie, ale prawie nigdy nie mają otwartego API, sterowników ani dokumentacji. Spędzisz miesiące na analizowaniu protokołów. Moduł OEM z otwartym API całkowicie oszczędza ten czas. Aby zobaczyć, jak konkretne to może być, przeczytaj nasz przewodnik krok po kroku dotyczący konfiguracji sterownika RS300 dla Raspberry Pi — działający przykład udokumentowanej integracji.
Przewodnik wyboru zastosowania: Dron, Luneta, Robotyka i Badanie gorączki
Skorzystaj z tego przewodnika w formie drzewa decyzyjnego, aby dopasować moduł do swojej aplikacji.
Ładunki lotnicze drona / UAV
Waga i moc są najważniejsze. Potrzebujesz kompaktowego modułu o niskim poborze mocy z interfejsem CVBS do FPV (niska latencja) lub MIPI do pokładowej AI. Polecamy MINI 384×288 ze względu na jego elastyczność wielointerfejsową i niewielkie rozmiary.
Konstrukcje lunet termowizyjnych DIY
Priorytetem jest liczba klatek na sekundę i niska latencja dla płynnego wykrywania celów, a także dobór odpowiedniego pola widzenia do zasięgu działania. Tutaj sprawdza się wyjście CVBS. Zobacz specyfikację modułu MINI ➔
Robotyka i wizja maszynowa
Wybierz MIPI oraz pełny pakiet SDK do integracji z frameworkami takimi jak ROS. Obraz w czasie rzeczywistym i kontrola na poziomie rejestrów sprawiają, że moduł MINI doskonale nadaje się na platformy autonomiczne. Porównaj moduły ➔
Obrazowanie termiczne w smartfonie
Do pomiarów temperatury w terenie i natychmiastowego obrazowania termicznego w ruchu, moduł XPro Android zamienia Twój telefon w kamerę termowizyjną przez USB Type-C — bez potrzeby dodatkowego wyświetlacza.
Pomiar temperatury ciała / Badanie gorączki
Dokładność radiometryczna i kalibracja są najważniejsze. Połącz skalibrowany moduł MINI z referencyjnym ciałem doskonale czarnym, aby uzyskać dokładność na poziomie badań przesiewowych. Zobacz moduły radiometryczne ➔
Gotowy, aby zobaczyć wszystko? Przeglądaj nasz pełny katalog modułów termowizyjnych.
Wyjaśnienie radiometrycznego pomiaru temperatury
Najważniejszym rozróżnieniem funkcjonalnym jest podział na moduły radiometryczne i nieradiometryczne. modułami radiometrycznymi Moduł radiometryczny dostarcza skalibrowaną wartość temperatury dla każdego piksela — możesz kliknąć dowolny punkt obrazu i odczytać jego temperaturę. nieradiometryczny moduł generuje jedynie obraz przypominający termowizję, bez wiarygodnych danych o temperaturze.
Emisyjność i dlaczego ma znaczenie
Emisyjność opisuje, jak skutecznie powierzchnia emituje promieniowanie podczerwone. Błyszczące metale mają niską emisyjność i mogą dawać niedokładne odczyty; ludzka skóra ma wysoką emisyjność (~0,98). Dobry moduł pozwala dostosować ustawienie emisyjności, aby obliczona temperatura odpowiadała rzeczywistości dla mierzonej powierzchni. Widziałem, jak ludzie kierują kamerę termowizyjną na wypolerowaną rurę i otrzymują bezsensowne odczyty — to emisyjność daje im się we znaki, a nie uszkodzony czujnik.
Kalibracja i odniesienie do ciała doskonale czarnego
Kalibracja fabryczna względem odniesienia ciała doskonale czarnego — źródła o precyzyjnie znanej, jednolitej temperaturze — umożliwia dokładność ±2°C lub lepszą. Jest to proces na etapie produkcji; nie można go dodać później. Kontrola kalibracji przez producenta OEM jest dokładnie tym, dlaczego nasze moduły dostarczają niezawodne wartości.
Zastosowanie w badaniach przesiewowych gorączki i konserwacji predykcyjnej
W konserwacji predykcyjnej skanuje się silniki, łożyska i panele elektryczne w poszukiwaniu gorących punktów sygnalizujących zbliżającą się awarię. W badaniach przesiewowych gorączki mierzy się temperaturę skóry, aby oznaczyć podwyższone odczyty. Oba zastosowania wymagają wyjścia radiometrycznego i oba korzystają z kontrolowanej odległości pomiaru oraz kompensacji temperatury otoczenia. Zarówno nasz moduł MINI, jak i XPro są dostarczane z skalibrowanym wyjściem radiometrycznym.
Typowe błędy przy zakupie modułów termowizyjnych, których należy unikać
- Kupowanie modułów samochodowych z odzysku bez dokumentacji protokołu. Niska cena ukrywa miesiące inżynierii wstecznej bez gwarancji sukcesu.
- Ignorowanie NETD i skupianie się wyłącznie na rozdzielczości. Czujnik o wysokiej rozdzielczości ze słabą czułością termiczną generuje zaszumione, rozczarowujące obrazy.
- Zakładanie, że moduł USB jest automatycznie kompatybilny z Linux/UVC. Wiele z nich nie jest — przed zakupem zweryfikuj rzeczywistą zgodność z UVC.
- Przeoczanie ograniczeń eksportowych dotyczących liczby klatek na sekundę. Limit 9 Hz może zaskoczyć kupujących, którzy oczekiwali płynnego wideo 30 Hz.
- Brak wsparcia inżynieryjnego dostawcy lub SDK. Bez przykładowego kodu i mapy rejestrów nawet świetny czujnik staje się bezużyteczny.
- Niedopasowane pole widzenia obiektywu do zamierzonego zasięgu. Szeroki obiektyw nie wykryje odległych celów; wąski obiektyw nie pozwala na nawigację. Dopasuj optykę do zadania.
Uniknij wszystkich sześciu, współpracując z producentem OEM, który publikuje specyfikacje, dostarcza SDK i zapewnia bezpośredni kontakt z inżynierami, którzy napisali oprogramowanie sprzętowe.
Nasze moduły kamer termowizyjnych: Specyfikacje i porównanie
Teraz, gdy rozumiesz interfejs, SDK, wyjście radiometryczne i format, oto jak nasze dwa flagowe produkty wpisują się w te kryteria. MINI 384×288 to nasz moduł integracyjny na poziomie płytki dla konstruktorów; XPro to nasze natychmiastowe rozszerzenie do telefonu dla użytkowników terenowych.
| Cecha | Niechłodzony moduł MINI 384×288 | Telefoniczna kamera termowizyjna XPro |
|---|---|---|
| Typ produktu | Moduł IR na poziomie płytki | Rozszerzenie do telefonu Android |
| Detektor | Niechłodzony mikrobolometr (LWIR) | Niechłodzone LWIR |
| Rozdzielczość | 384 × 288 | Matryca termiczna LWIR |
| Pomiar temperatury | Wysokoprecyzyjny radiometryczny | Radiometryczny, temperatura na ekranie |
| Interfejsy | USB / CVBS / MIPI (wiele interfejsów) | USB Typu-C |
| Najlepsze do | Drony, lunety, robotyka, wizja maszynowa, systemy wbudowane | Mobilne obrazowanie termiczne, terenowe kontrole temperatury |
| SDK / Dokumentacja | Otwarte API, sterowniki Linux, przykładowy kod | Aplikacja typu plug-and-play |
| Format | Kompaktowy do zabudowy | Kieszonkowy klips |
| Platforma | Raspberry Pi / Linux / Jetson / niestandardowa | Android (Typu-C) |
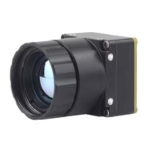
Niechłodzony moduł kamery termowizyjnej MINI 384×288 do dronów
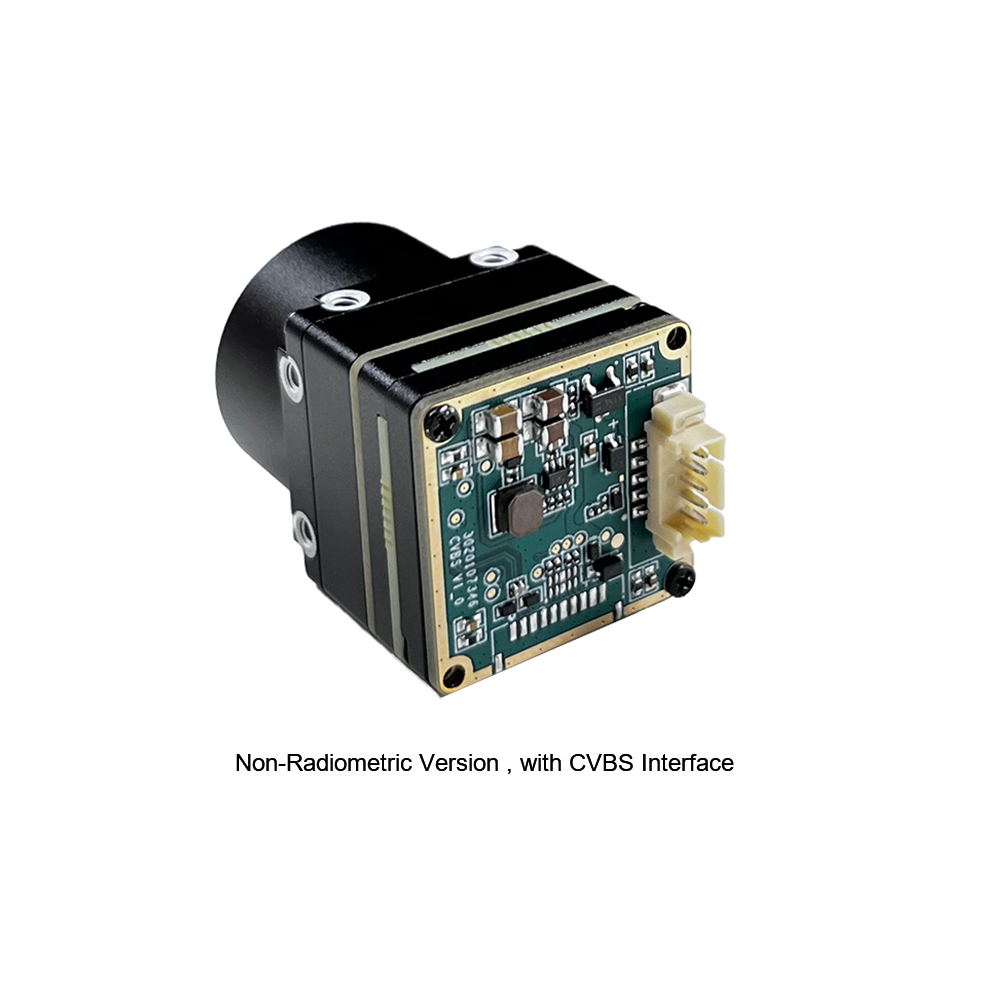
Moduł pomiaru temperatury z obrazowaniem termicznym w podczerwieni serii MINI to wysokoprecyzyjny, niewielkich rozmiarów i uniwersalny termowizor do pomiaru temperatury online. Wykorzystuje wysokiej jakości detektory o wysokiej rozdzielczości, stabilnej wydajności i zaawansowanych funkcjach. Wyposażony w wiele interfejsów (USB, CVBS, MIPI), jest preferowanym produktem w takich dziedzinach zastosowań, jak wizja maszynowa, inspekcje bezpieczeństwa, inteligentna produkcja, konserwacja sprzętu oraz ładunki użytkowe dla robotów/dronów. Ponieważ kontrolujemy projekt od sensora po oprogramowanie układowe, format ramki, mapa rejestrów i sterowniki Linux są w pełni udokumentowane — co czyni go idealnym wyborem dla konstruktorów, którzy nie chcą tracić miesięcy na inżynierię wsteczną anonimowych płytek.
Kamera termowizyjna do telefonu Xpro — pomiar temperatury dla Androida

XPro Mini to nakładkowa kamera termowizyjna do telefonu, która szybko przekształci Twój telefon komórkowy w termowizor, pozwalając Ci wizualnie odkrywać i mierzyć temperaturę. Widzi obiekty w ciemności i z łatwością wykrywa temperaturę wszystkich obiektów wokół Ciebie. Łącząc się przez USB Type-C, nie wymaga oddzielnego wyświetlacza ani zasilania — co czyni ją idealnym narzędziem kieszonkowym do kontroli temperatury w terenie, inspekcji domowych i szybkiej diagnostyki. Dzięki odczytom radiometrycznym na ekranie otrzymujesz rzeczywiste liczby, a nie tylko ładne obrazy.
Pobierz pełne karty katalogowe obu modułów z naszego Centrum pobierania.
Często zadawane pytania
Chcę zbudować celownik termowizyjny DIY lub przesyłać strumieniowo wideo termiczne w wysokiej rozdzielczości w czasie rzeczywistym do Raspberry Pi — który chiński moduł kamery termowizyjnej faktycznie działa?
Wielu użytkowników Reddita narzeka, że moduły takie jak Tiny1-C lub RTR-225M nie mają sterowników dla Linuxa i jasnej dokumentacji. Czy wasze moduły obsługują Linuxa i zapewniają zasoby programistyczne?
Potrzebuję modułu termicznego do dokładnego sprawdzania temperatury ciała ludzkiego — czy wasz moduł może mierzyć temperaturę niezawodnie i jest wystarczająco mały do wbudowania?
📚 Piśmiennictwo i dalsze lektury
- Standard branżowy: Wikipedia — Mikrobolometr
- Standard branżowy: Wbudowane systemy obliczeniowe NVIDIA Jetson
- Powiązany przewodnik: Sterownik kamery termowizyjnej RS300 dla Raspberry Pi
- Zasoby: Centrum pobierania — Arkusze danych i SDK
- Katalog: Przeglądaj wszystkie moduły kamer termicznych