وحدة كاميرا تصوير حراري عالية الدقة لـ Raspberry Pi: دليل تكامل Edge AI النهائي
٢٤ يونيو ٢٠٢٦
الدليل النهائي لتكامل وحدة الكاميرا الحرارية: حلول 384x288 للطائرات بدون طيار، Raspberry Pi ومشاريع OEM B2B
١ يوليو ٢٠٢٦
وحدة كاميرا تصوير حراري USB عالية الدقة لـ Raspberry Pi: دليل التكامل 640x512
إليك الخلاصة: إذا كنت تحاول نشر تصوير حراري عالي الدقة على حواسيب أحادية اللوحة (SBCs) مثل Raspberry Pi، فمن المحتمل أنك واجهت بعض العقبات. كانت التجارب المبكرة مع مصفوفات الثرموبيل I2C منخفضة الدقة مناسبة لمشاريع الهواة، لكن التطبيقات الصناعية الحديثة تتطلب عتادًا جادًا. نحن نتحدث عن حساسية حرارية عالية (NETD ≤ 50 mK)، ومعدلات إطارات سريعة، ودقة مكانية كثيفة. هذا الدليل هو مرجع تكامل أنظمة عملي كامل لمهندسي العتاد، وأخصائيي البحث والتطوير، ومهندسي البرمجيات الذين يجمعون وحدة كاميرا تصوير حراري USB لـ Raspberry Pi. في الورشة، نعلم أن النجاح يكمن في فهم الفيزياء، واختيار الواجهة الصحيحة، ومواءمة البصريات، وكتابة خطوط أنابيب برمجية فعالة. سنشرح فيزياء مستشعرات الأشعة تحت الحمراء طويلة الموجة (LWIR) غير المبردة، ونقارن التفاصيل الدقيقة لواجهات USB/UVC مقابل MIPI CSI-2، ونحلل خيارات العدسات، ونستعرض خط أنابيب Python جاهز للإنتاج باستخدام مشغلات Linux V4L2 و OpenCV.
جدول المحتويات
- 👉 فيزياء مستشعرات الميكروبولومتر LWIR
- 👉 تكامل USB مقابل MIPI لـ Raspberry Pi
- 👉 البصريات ومعايير اختيار العدسات
- 👉 المواصفات التقنية واختيار المنتج
- 👉 تكامل البرمجيات: V4L2 و OpenCV و Python SDK
- 👉 معالجة الصور المتقدمة: التخطيط الإشعاعي و NUC
- 👉 النشرات الميدانية الصناعية
- 👉 الأسئلة الشائعة التقنية المتعمقة
فيزياء مستشعرات الميكروبولومتر LWIR
لبناء نظام حراري يعمل فعليًا في الميدان، عليك النظر عن كثب في الفيزياء الأساسية. تلتقط مستشعرات CMOS و CCD القياسية الضوء المرئي المنعكس في نطاق 400 نانومتر إلى 700 نانومتر. التصوير الحراري مختلف. نحن ننظر إلى نطاق الأشعة تحت الحمراء طويلة الموجة (LWIR)، الذي يمتد من 8 ميكرومتر إلى 14 ميكرومتر.
كل شيء حولنا — المحركات، الآلات، لوحات الدوائر، أجسام البشر — يصدر طاقة حرارية كإشعاع الجسم الأسود. يصف قانون بلانك وقانون فين للإزاحة هذا السلوك. عندما نحسب الطول الموجي الأقصى للانبعاث، يبسطه قانون فين:
λmax = 2897.8 ميكرومتر·كلفن / T
إذا كان هدفك عند درجة حرارة غرفة عادية تبلغ 300 كلفن (حوالي 27 درجة مئوية أو 80 درجة فهرنهايت)، فإن ذروة انبعاثه تقع تمامًا عند 9.66 ميكرومتر. هذا يقع تمامًا في مركز نافذة النقل الجوي LWIR. هذا النطاق حاسم لأن الغازات الجوية مثل ثاني أكسيد الكربون وبخار الماء لا تمتص الكثير من الطاقة هنا، مما يسمح لإشارتك بالانتقال إلى المستشعر بأقل توهين.
مؤشرات الأداء النظرية:
أكسيد الفاناديوم (VOx) مقابل السيليكون غير المتبلور (a-Si): في الميدان، تُفضل مصفوفات VOx الأساسية للتطبيقات عالية المستوى. تُظهر مادة VOx معامل درجة حرارة مقاومة (TCR) متفوق مقارنة بالسيليكون. هذا يقلل الضوضاء الحرارية وينتج صورة خام أنظف. اختيار وحدة كاميرا تصوير حراري عالية الدقة 640x512 نوى LWIR غير مبردة باستخدام ركائز VOx يضمن بقاء تفاصيل الهدف الخام واضحة عبر ظروف تشغيل واسعة.
تستخدم معظم وحدات الكاميرات التجارية المتينة ميكروبولومترات غير مبردة. تخيل مصفوفة من جسور السيليكون الصغيرة المعلقة، كل منها مطلي بمادة حساسة للحرارة مثل أكسيد الفاناديوم. عندما تصطدم فوتونات الأشعة تحت الحمراء طويلة الموجة ببكسل، يسخن الجسر، مما يغير مقاومته الكهربائية.
تقوم دائرة القراءة المتكاملة (ROIC) بتمرير تيار منحاز عبر المصفوفة، وتقيس تغيرات المقاومة تلك، وتبني الصورة الحرارية الرقمية. هناك متغيران رئيسيان يحددان مدى جودة أداء المستشعر:
- ⚙️ حجم البكسل: المسافة من المركز إلى المركز بين البكسلات المتجاورة. تقليص هذه المسافة من 17 ميكرومتر إلى 12 ميكرومتر يسمح لنا بتعبئة مصفوفة 640×512 في نواة مدمجة وخفيفة الوزن تناسب الطائرات بدون طيار الصغيرة أو الحاويات الضيقة.
- ⚙️ NETD (فرق درجة الحرارة المكافئ للضوضاء): هذا هو معيار نسبة الإشارة إلى الضوضاء. يحدد أصغر فرق في درجة الحرارة يمكن للكاميرا تمييزه. إذا كنت تجري تشخيصات حساسة للتفاصيل، فأنت بحاجة إلى NETD بقيمة ≤40 ملي كلفن أو ≤50 ملي كلفن. القيم الأعلى تجعل الصورة تبدو مثل تشويش التلفزيون القديم.
تكامل USB مقابل MIPI لـ Raspberry Pi
عند دمج نواة حرارية متطورة مع Raspberry Pi، تواجه مفترق طرق حاسم: هل تستخدم USB (بروتوكول UVC) أم MIPI CSI-2 الأصلي؟
واجهة USB (بروتوكول UVC)
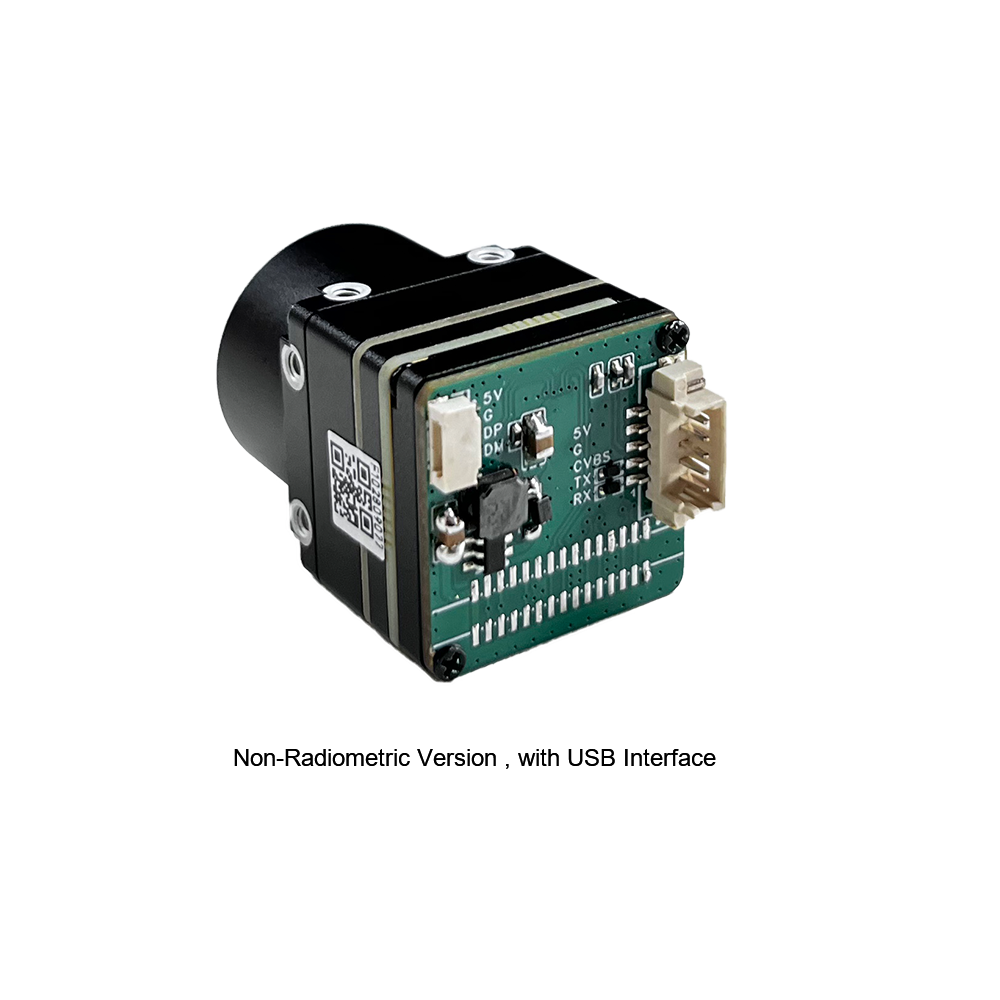
تعتمد وحدات USB على شيفرة USB Video Class (UVC) القياسية التي تعمل على متحكم دقيق أو FPGA على اللوحة. تقوم الشريحة بتعبئة إطار ROIC الخام في تنسيق رقمي (YUYV أو تدرج رمادي خام 16 بت) وتنقله عبر ناقل USB.
الفائدة الكبيرة هنا هي سهولة الاستخدام. لينكس لديه تعريفات uvcvideo أصلية مدمجة في النواة منذ سنوات. قم بتوصيل الوحدة، وستظهر فورًا كـ /dev/video0. لا حاجة لتراكبات شجرة الأجهزة المخصصة، ولا أخطاء ترجمة، ولا مشاكل في مطابقة النواة. يمكنك نقل كاميرا USB نفسها من Raspberry Pi 4 إلى Pi 5 أو كمبيوتر صناعي قياسي Linux x86 دون تغيير سطر واحد من الكود. المقايضة؟ USB يقدم زمن انتقال أعلى قليلاً (عادة 10 مللي ثانية إلى 30 مللي ثانية إضافية) ويستهلك جزءًا أكبر قليلاً من دورات وحدة المعالجة المركزية بسبب متطلبات تحليل مشغل متحكم المضيف.
واجهة MIPI CSI-2
MIPI CSI-2 هو خيار الأداء العالي. تتجاوز هذه الواجهة المتحكمات الدقيقة الوسيطة، وتدفق مخازن الإطارات التسلسلية الخام مباشرة إلى معالج إشارات الصور Video Core في نظام Raspberry Pi على الشريحة أو ذاكرة النظام عبر DMA.
إذا كنت تصمم أنظمة تتبع آلية أو أجهزة خفيفة الوزن تعمل بالبطارية (مثل مثبتات الطائرات بدون طيار) حيث كل مللي ثانية ومللي واط مهمان، فإن MIPI هو الخيار القياسي. يوفر زمن انتقال منخفض وأدنى حمل على وحدة المعالجة المركزية.
الجانب السلبي هو صلابة الأجهزة. يجب عليك ترجمة تراكبات شجرة الأجهزة (.dtbo) الخاصة بإصدار النواة الخاص بك بالضبط. إذا قمت بتحديث نظام التشغيل، فقد يتعطل مسار الكاميرا حتى يتم تصحيح التعريف. التوصيلات الفيزيائية حساسة أيضًا؛ أنت تتعامل مع كابلات شريطية هشة أو حزم أسلاك محورية دقيقة مخصصة. إذا كنت تمرر عبر وصلة دوارة ضيقة، فإن مجموعات أسلاك عالية السرعة متخصصة من خبراء مثل رجل الكابل المحوري الصغير مطلوبة للحفاظ على الإشارات محمية ونظيفة.
البصريات ومعايير اختيار العدسات
على عكس الكاميرات القياسية التي تستخدم عدسات زجاجية أو بلاستيكية منخفضة التكلفة، تتطلب تصاميم LWIR مواد متخصصة ناقلة للأشعة تحت الحمراء. زجاج البوروسيليكات القياسي معتم تمامًا لإشعاع LWIR. بدلاً من ذلك، نستخدم عناصر من الجرمانيوم (Ge)، أو السيليكون (Si)، أو زجاج الكالكوجينيد المقولب.
| المادة | معامل الانكسار (n @10µm) | الخصائص الهندسية الرئيسية |
|---|---|---|
| الجرمانيوم (Ge) | ~4.0 | خصائص نقل ممتازة في النطاق 8-14 ميكرومتر؛ مكلف؛ يعاني من انحراف التركيز الحراري عند حدود التشغيل. |
| زجاج الكالكوجينيد (سبائك As-Se-Ge) | ~2.5 إلى 2.8 | Highly moldable optics allowing complex geometries; minimal thermal focal drift; highly cost-effective index of refraction. |
When pairing a lens with your sensor, you need to calculate the spatial resolution. This is represented by the Instantaneous Field of View (iFOV) which tells you the physical field area a single pixel resolves at a given working distance:
iFOV = Pixel Pitch (µm) / Focal Length (mm)
Let's calculate this using a 640x512 resolution module with a 12 µm pixel pitch and a standard 9mm focus lens:
iFOV = 12 μm / 9 mm ≈ 1.33 mrad
This means at a range of 1 meter, each individual pixel resolves a physical square of 1.33 mm. At a distance of 100 meters, that footprint expands to 133 mm (about 5.2 inches). If you are looking for localized anomalies on utility poles or wind turbines, a target must cover at least 3x3 pixels to ensure reliable measurement. This makes focal length selection critical before deploying your hardware.
For demanding applications, precision-molded chalcogenide lenses from technology leaders like لايت باث تكنولوجيز provide high light transmission while maintaining focus across wide temperature swings. This minimizes the need for continuous software focus corrections during outdoor operation.
المواصفات التقنية واختيار المنتج
For hardware builds on the Raspberry Pi architecture, we offer two industrial-grade uncooled microbolometer sensor modules. One is designed for plug-and-play USB deployment, and the other is a native MIPI module built for direct, low-latency interfacing.
Product 1: Uncooled LWIR USB Mini 640*512 Thermal Imaging Camera Core Module For Drones Similar To DJI

This mini uncooled infrared thermal imaging module delivers sharp, detailed performance in an ultra-compact form factor. It is ideal for drone payloads and remote industrial monitoring systems.
Key Technical Specifications:
| Form Factor / Size | Ultra-miniature 21mm * 21mm footprint |
| Lens Options (Focal Length) | 5mm / 9mm / 13mm / 18mm / 35mm / 50mm / 75mm / 100mm / 150mm selections |
| خيارات الدقة | High-density 640x512 matrix (with 640x480 crop compatibility) |
| Integration Compatibility | Robust structural sealing, thermal stability, standard UVC compliant over USB |
Product 2: Uncooled Infrared Mipi 640 384 256 9mm Thermal Imaging Camera Module For Drones

The Mini2 series MIPI thermal imaging module streams raw thermal data with minimal latency. It is optimized for direct processing loops and lightweight aerial systems.
Key Technical Specifications:
| Primary Resolution | 640x512 active pixel matrix (with 384 and 256 structural options) |
| Default Optics | 9mm high-quality Germanium focal lens configuration |
| Hardware Interface | Direct MIPI CSI-2 signaling (optimized for minimal latency and direct hardware processing) |
| Imaging Profile | Sharp and crisp thermal image presentation, lightweight design for drones and aerial platforms |
تكامل البرمجيات: V4L2 و OpenCV و Python SDK
Let's get our hands dirty with some code. To pull raw, uncompressed frames from a UVC thermal camera on a Raspberry Pi, we use the standard Linux Video4Linux2 (V4L2) driver.
Step 1: Check the System Properties
Before writing code, verify that the OS sees your camera. Plug the camera in and run:
# Install v4l2 utility toolkit
sudo apt-get update && sudo apt-get install -y v4l-utils

# List all connected video units
v4l2-ctl --list-devices

# Query supported resolution, formats, and frame-rate configurations
v4l2-ctl -d /dev/video0 --list-formats-ext
Look for frame formats like YDUV, YUYV, or direct 16-bit greyscale (labeled as Y16 أو GREY). If your pipeline needs direct radiometric measurements, the raw 16-bit format is what you want.
Step 2: Real-World Multithreaded Python Capture
If you call VideoCapture.read() in a single-threaded Python loop, your frame rate will lag. In the shop, we run the sensor capture in a dedicated background thread to prevent blocking. This keeps the camera pipeline steady while you run heavy computer vision tasks on the main thread.
"""
RPi LWIR Thermal Acquisition and Multi-Threaded Frame Buffer Pipe
Optimized for 640x512 Uncooled USB Camera Cores.
"""

import cv2
import numpy as np
import time
import threading

class USBThermalCamera:
    def __init__(self, device_index=0, width=640, height=512):
        self.device_index = device_index
        self.width = width
        self.height = height
        self.cap = None
        self.frame = None
        self.running = False
        self.lock = threading.Lock()

    def initialize_capture(self):
        # Open video device via standard V4L2 utility backend
        self.cap = cv2.VideoCapture(self.device_index, cv2.CAP_V4L2)
        if not self.cap.isOpened():
            raise RuntimeError(f"Failed to access V4L2 sensor node: /dev/video{self.device_index}")

        # Bind payload stream resolutions to the requested parameters
        self.cap.set(cv2.CAP_PROP_FRAME_WIDTH, self.width)
        self.cap.set(cv2.CAP_PROP_FRAME_HEIGHT, self.height)

        # Verify active driver configuration values
        active_w = int(self.cap.get(cv2.CAP_PROP_FRAME_WIDTH))
        active_h = int(self.cap.get(cv2.CAP_PROP_FRAME_HEIGHT))
        print(f"[INFO] Camera pipeline running at target configuration: {active_w}x{active_h} px")

    def start_grab_thread(self):
        self.running = True
        self.thread = threading.Thread(target=self._update_loop, daemon=True)
        self.thread.start()

    def _update_loop(self):
        while self.running:
            ret, raw_frame = self.cap.read()
            if not ret or raw_frame is None:
                time.sleep(0.005)
                continue

            with self.lock:
                self.frame = raw_frame.copy()

    def grab_latest_frame(self):
        with self.lock:
            if self.frame is None:
                return None
            return self.frame.copy()

    def terminate_pipeline(self):
        self.running = False
        if hasattr(self, 'thread'):
            self.thread.join(timeout=1.0)
        if self.cap:
            self.cap.release()
        print("[INFO] Thermal core pipeline shutdown gracefully.")

if __name__ == "__main__":
    cam = USBThermalCamera(device_index=0, width=640, height=512)
    try:
        cam.initialize_capture()
        cam.start_grab_thread()
        print("[PROCESS] Streaming initialized. Press 'Q' to safely exit.")

        while True:
            frame = cam.grab_latest_frame()
            if frame is None:
                time.sleep(0.01)
                continue

            # Convert incoming YUYV channel arrays to basic greyscale structures
            gray_frame = cv2.cvtColor(frame, cv2.COLOR_BGR2GRAY)

            # Apply dynamic colormaps to visually enhance thermal variance
            # COLORMAP_INFERNO outputs excellent human eye thermography separation
            thermal_color = cv2.applyColorMap(gray_frame, cv2.COLORMAP_INFERNO)

            # Identify absolute thermal peaks within the target frame space
            min_val, max_val, min_loc, max_loc = cv2.minMaxLoc(gray_frame)

            # Draw tracking overlay representing the peak thermal zone
            cv2.circle(thermal_color, max_loc, 8, (0, 0, 255), 2)
            cv2.putText(thermal_color, f"PEAK: {max_val}", (15, 30),
                        cv2.FONT_HERSHEY_SIMPLEX, 0.6, (0, 255, 0), 2)

            cv2.imshow("LWIR 640x512 Realtime Core Pipeline", thermal_color)
            if cv2.waitKey(1) & 0xFF == ord('q'):
                break

    except Exception as err:
        print(f"[FATAL EXCEPTION]: {err}")
    finally:
        cam.terminate_pipeline()
        cv2.destroyAllWindows()
معالجة الصور المتقدمة: التخطيط الإشعاعي و NUC
Raw video data is just the beginning. Setting up a professional thermal monitoring solution requires two advanced processing steps: تصحيح عدم الانتظام (NUC) و Radiometric Mapping.
تصحيح عدم الانتظام (NUC)
Because microbolometer pixels are tiny and suspended, their raw electrical properties shift over time as the camera body warms up. This drift results in a noisy, grainy image—an effect called "spatial pattern noise."
To fix this, high-performance camera cores drop a small internal mechanical shutter in front of the optical sensor for a fraction of a second. This presents a perfectly uniform thermal target to the array. The internal processor measures the raw pixel values against the average, generating an offset correction map. While our modules can run this calibration automatically, developers working with precise radiometric systems often trigger this correction manually via serial commands to avoid interruptions during critical recordings.
Radiometric Temperature Calibration
For industrial temperature measurement, you need a radiometric setup. Instead of rendering standard 8-bit visual values, the module exports a raw 16-bit integer representing the actual ADC intensity of each pixel. High-performance modules typically use a standard linear scale:
Tالهدف = (Pixel Value × Scale Factor) - Offset
If your module uses a standard 0.01K scaling factor, transforming raw pixel readings into Celsius or Kelvin is straightforward:
T (Kelvin) = ADC_Pixel_Value × 0.01
T (Celsius) = (ADC_Pixel_Value × 0.01) - 273.15
In real-world applications, you must also adjust for **Target Emissivity (ε)**. This value describes how efficiently an object radiates heat compared to a theoretical blackbody (where ε = 1.0). If you are measuring polished metals like electrical copper or aluminum bushings, their emissivity can drop to 0.15 or less. This means the raw sensor will pick up ambient heat reflections rather than the actual temperature of the metal. To get accurate readings, you must adjust your post-processing math to correct for these reflections:
def calculate_absolute_temp(pixel_value, emissivity=0.95, t_ambient_k=298.15):
    # Convert standard sensor output straight to Kelvin
    t_apparent_k = pixel_value * 0.01

    # Correct for surface reflection properties
    # Object energy = (Total Energy - Reflected Ambient) / Emissivity
    t_corrected_k = ((t_apparent_k ** 4 - (1.0 - emissivity) * (t_ambient_k ** 4)) / emissivity) ** 0.25
    return t_corrected_k - 273.15
النشرات الميدانية الصناعية
Here's how engineers are using these integrated 640x512 microbolometer boards in field deployments:
A. UAV Aerial Inspection and Drone Mapping
By mounting these lightweight thermal cores onto small drones, utility operators can conduct automated inspections of solar farms, wind turbine blades, and high-voltage transmission lines.
Using compact setups like the Raspberry Pi Compute Module 4 (CM4), flight teams can run real-time image stabilization and target georeferencing without adding excessive weight to the airframe, preserving flight times.
B. Industrial Automation & Continuous Thermal Monitoring
Inside manufacturing plants, machinery failures can cause costly downtime. Engineers deploy Raspberry Pi boards inside sealed, industrial enclosures to continuously monitor conveyor bearings, transformers, and physical assets like boilers.
These setups watch for temperature spikes based on standard ما هو استخدام الكاميرا الحرارية profiling guidelines. If a component exceeds safe limits, the Raspberry Pi can trigger alerts directly over industrial field networks using protocols like Modbus TCP or MQTT.
C. Perimeter Security and Edge Intelligence
While standard cameras struggle in complete darkness, fog, or heavy vegetation, LWIR sensors excel. Combining a high-resolution 640x512 thermal core with lightweight Edge AI models (like TFLite YOLOv8) on a Raspberry Pi 5 allows for highly reliable intruder detection. This setup can spot human silhouettes hundreds of meters away while ignoring background noise like blowing branches and wind.
If you're looking for basic hardware setups and diagnostic tools, check out our general thermal integration guide. It covers structural enclosures and protective crystal windows for harsh, dusty environments.
الأسئلة الشائعة التقنية المتعمقة
Why should I upgrade from an I2C sensor like MLX90640 to a USB thermal camera module for Raspberry Pi?
Then there's the speed. I2C is a slow, serial interface. Even when overclocked, you're looking at a sluggish 4 to 8 Hz. The USB camera streams at a smooth 25 Hz over a native high-speed bus using standard UVC protocols.
Finally, there's resolution quality. Low-cost thermopile arrays suffer from high sensor noise, meaning their NETD is often around 100 mK to 150 mK. A professional VOx microbolometer core delivers an NETD ≤ 50 mK. This means you can resolve fine temperature differences down to 0.05°C, which is essential for details like tracing heat flow on circuitry or locating fluid leaks behind drywall.
How do I stream real-time thermal video on Raspberry Pi OS using your module?
uvcvideo kernel driver included in Raspberry Pi OS releases like Debian Bookworm or Bullseye. No custom drivers or kernel patches are required.
Once connected, you can capture frames directly in Python using standard OpenCV calls. To avoid lag, we recommend grabbing frames on a background thread and feeding them to your main application, where you can apply false-color maps like INFERNO or JET for clear visualization.
What is the active power consumption and thermal dissipation requirement for continuous operation?
If you're housing the camera inside a sealed enclosure or drone pod, recommend mounting it directly to an aluminum bulkhead or chassis using thermal tape or brass standoffs. Keeping the body of the module cool minimizes how often the internal NUC shutter needs to cycle, ensuring a more stable, uninterrupted video feed.
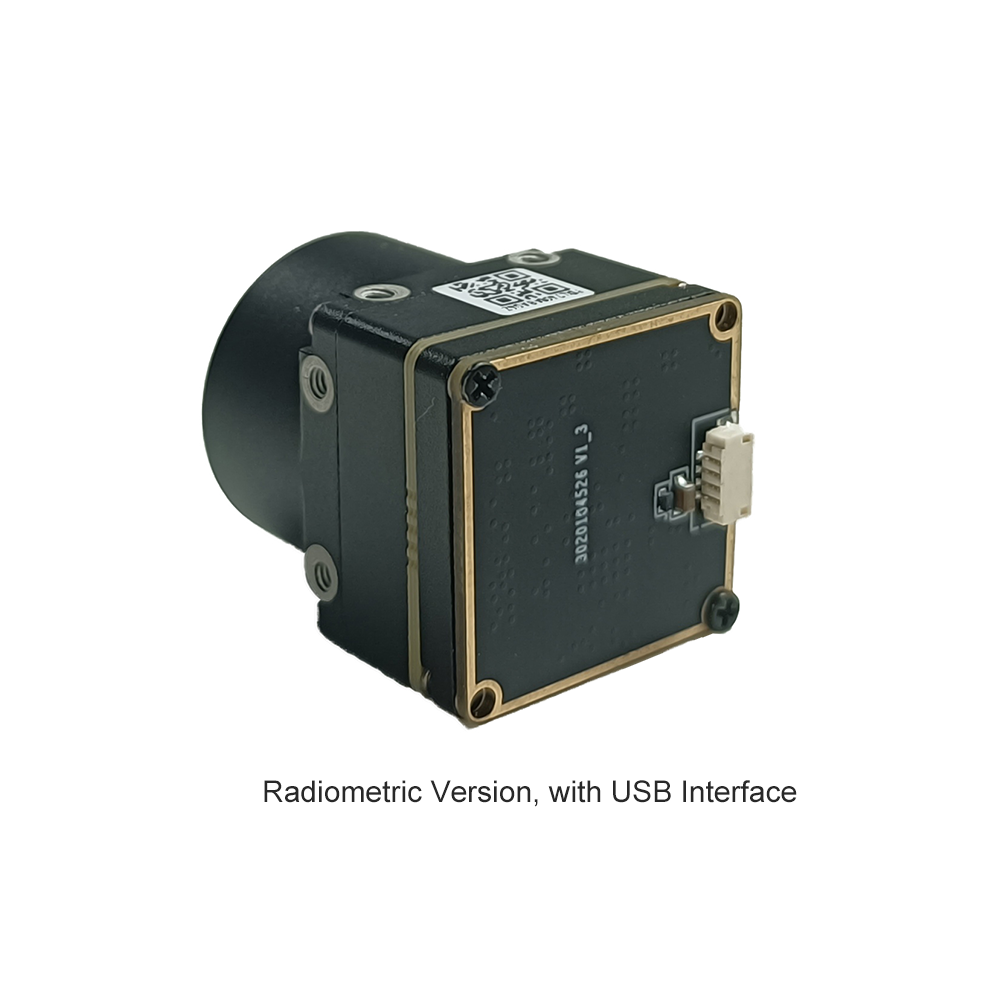
Can I perform absolute temperature measurement (radiometry) using these uncooled LWIR camera modules?
By applying our core's calibration offsets in your code, your program can convert those raw ADC values into actual Kelvin or Celsius readings in real time. Once you compensate for surface emissivity, the system delivers an absolute accuracy of within ±2°C.
📚 المراجع والقراءات الإضافية
- ✅ المعيار الصناعي: لايت باث تكنولوجيز
- ✅ System Physical Buses: رجل الكابل المحوري الصغير
- ✅ دليل ذو صلة: High-Resolution 640x512 Thermal core integration