دليل وحدة كاميرا التصوير الحراري: اختيار نواة LWIR المناسبة للطائرات بدون طيار والبناء الذاتي والبث المباشر
٢. ٤ يونيو ٢٠٢٦
أفضل وحدات الكاميرا الحرارية لراسبيري باي: دليل البث عالي الدقة LWIR (2024)
5 يونيو 2026
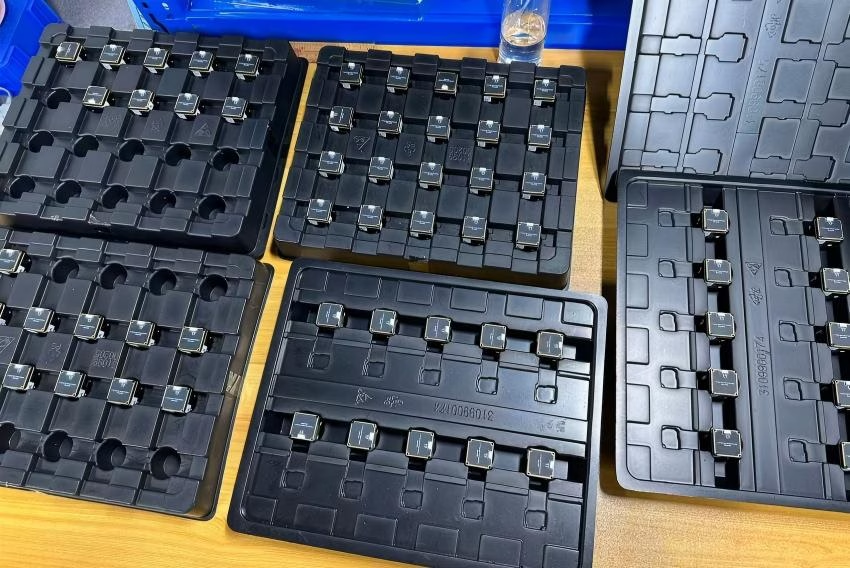
وحدة كاميرا التصوير الحراري بالأشعة تحت الحمراء: الدليل الهندسي الكامل لنوى LWIR غير المبردة
لسنوات، عاش التصوير الحراري خلف حبل مخملي. أسعار بخمسة أرقام، وقيود تصدير ITAR، وأنظمة بيئية احتكارية أبقت قدرة الأشعة تحت الحمراء الحقيقية بعيدة عن أيدي الأشخاص الذين يمكنهم فعل شيء مثير للاهتمام بها — بناة الطائرات بدون طيار، ومختبري Raspberry Pi، ومهندسي الرؤية المضمنة، وهواة مناظير التصوير الحراري DIY. اليوم، ارتخى الحبل، ولكن ها هي المسألة: جدار جديد ارتفع مكانه. تجول في أي منتدى للصانعين وستسمع نفس الشكوى مرارًا وتكرارًا: مستشعرات رخيصة بدقة 256×192 تبث إطارات ضبابية ومكسلة البكسلات عديمة الفائدة تمامًا للفحص الجاد، أو البحث والإنقاذ، أو أعمال المناظير الدقيقة. التوتر الحقيقي لم يعد السعر فقط — إنه عملية الموازنة المؤلمة بين الدقة، وزمن الانتقال، ومرونة العدسة، وصداع التكامل الذي يأتي مع تزاوج نواة حرارية مع منصة مضيفة.
هذا الدليل موجود لهدم ذلك الجدار. سنشرح تقنية نواة LWIR غير المبردة (الأشعة تحت الحمراء طويلة الموجة) من الميكروبولومتر فصاعدًا، ونتناول حسابات الدقة المهمة فعليًا، ونفك شيفرة اختيار العدسة عبر النطاق الكامل 5 مم–150 مم، ونرسم مسارات تكامل ملموسة للمنصات المضمنة مثل Raspberry Pi، وArduino، ومحاور الطائرات بدون طيار الحساسة للوزن. بحلول وقت انتهائك من القراءة، سيكون لديك إطار قرار واضح — إطار يخبرك بالضبط أي مواصفات وحدة تناسب حمولة طائرتك بدون طيار، أو نظام البث Pi الخاص بك، أو منظارك المحمول، دون دفع مبالغ زائدة مقابل علامة DJI التجارية. هذا هو العمق الذي يفصل بين الشراء العارض والشراء الهندسي.
جدول المحتويات
- 👉 ما هي وحدة كاميرا التصوير الحراري بالأشعة تحت الحمراء؟ — النوى مقابل الكاميرات الكاملة.
- 👉 كيف تعمل نوى LWIR غير المبردة فعليًا — سلسلة الإشارة الكاملة مشروحة.
- 👉 فك شيفرة الدقة: 640×512 مقابل 256×192 — لماذا البكسلات على الهدف مهمة.
- 👉 دليل اختيار العدسة ومجال الرؤية — مطابقة البعد البؤري مع المدى.
- 👉 التكامل: Raspberry Pi و Arduino والطائرات بدون طيار — سير عمل التوصيل والتشغيل.
- 👉 منتج مميز ومواصفات حقيقية — نواة Mini بدقة 640×512.
- 👉 قائمة معايير الشراء الرئيسية — ما يجب الإصرار عليه.
- 👉 تطبيقات العالم الحقيقي — من البحث والإنقاذ إلى المناظير.
- 👉 أسئلة متكررة — إجابات مباشرة على الاستفسارات الشائعة.
ما هي وحدة كاميرا التصوير الحراري بالأشعة تحت الحمراء؟
وحدة كاميرا التصوير الحراري بالأشعة تحت الحمراء — ما نسميه "النواة" في الورشة — هي محرك التصوير المجرد الذي يجلس في قلب كل جهاز حراري. تتلخص عادةً في ثلاث قطع مقترنة بإحكام: مستشعر الأشعة تحت الحمراء (مصفوفة مستوى بؤري ميكروبولومترية)، والعدسة التي تركز الإشعاع طويل الموجة على ذلك المستشعر، ولوحة معالجة تحول إشارات الكاشف الخام إلى دفق فيديو قابل للاستخدام أو بيانات إشعاعية. ها هو الشيء الأساسي الذي يجب فهمه: الوحدة هي ليست منتجًا نهائيًا. ليس لديها غلاف متين، ولا بطارية، ولا شاشة، ولا تغليف استهلاكي. إنها لبنة بناء OEM، مصممة لتعيش داخل شيء أكبر تبنيه أنت حولها.
الوحدة الأساسية مقابل كاميرا التصوير الحراري الكاملة
هذا التمييز مهم أكثر مما يدركه معظم المشترين. كاميرا التصوير الحراري الكاملة هي منتج نهائي استهلاكي أو صناعي محكم الإغلاق — جهاز فحص محمول، أو حمولة طائرة بدون طيار جاهزة، أو كاميرا أمنية. تشتريها، تستخدمها، وتتعايش مع أي بصريات، وواجهة، وبرامج ثابتة اختارها المصنع لك. الوحدة الأساسية, ، من ناحية أخرى، يمنحك الحرية الهندسية لتعريف النظام بنفسك. أنت تختار العدسة لمجال الرؤية الدقيق الخاص بك، وتقرر كيفية التقاط الفيديو ومعالجته، وتصمم هيكل التركيب والطاقة حول تطبيقك. هذا هو بالضبط السبب الذي يجعل مدمجي الطائرات بدون طيار، وبناة المناظير، ومطوري الأنظمة المضمنة ينجذبون نحو الوحدات: إنهم يريدون التحكم، وتوفير الوزن، وكفاءة التكلفة التي لا يمكن لكاميرا التجزئة المغلقة أن تمنحهم إياها أبدًا.

لماذا تهيمن الأشعة تحت الحمراء طويلة الموجة (LWIR) على تطبيقات الطائرات بدون طيار والأعمال اليدوية (DIY)
يعمل التصوير الحراري في الجزء تحت الأحمر من الطيف الكهرومغناطيسي، بعيدًا جدًا عن أي شيء يمكن للعين البشرية التقاطه. نطاق الأشعة تحت الحمراء طويلة الموجة، الذي يمتد تقريبًا من 8 إلى 14 ميكرون، هو النقطة المثالية لتصوير الأجسام في درجات الحرارة المحيطة اليومية — الأشخاص، والحيوانات، والآلات، والأعطال الكهربائية، والتضاريس. الأجسام حوالي درجة حرارة الغرفة تبعث ذروة إشعاعها الحراري في ذلك النطاق مباشرة، مما يجعل LWIR الخيار الطبيعي للتصوير السلبي، في جميع الأحوال الجوية، ليلاً ونهارًا الذي يحتاج إلى صفر إضاءة. في قلب نواة LWIR تقع مصفوفة المستوى البؤري (FPA)، وهي شبكة من عناصر الميكروبولومتر المجهرية التي يتفاعل كل منها مع الحرارة الواردة. للحصول على نظرة أعمق حول كيفية التقاط الإشعاع الحراري وتحويله إلى صورة، ألق نظرة على تفصيلنا لـ مبادئ التصوير الحراري, ، الذي يشرح الفيزياء الأساسية بالتفصيل.
كيف تعمل نوى LWIR غير المبردة فعليًا
انظر، فهم كيف تحول النواة غير المبردة الحرارة غير المرئية إلى صورة واضحة هو الشيء الوحيد الأكثر قيمة الذي يمكن للمشتري معرفته. إنه يزيل الغموض عن التسعير، ويشرح أوراق المواصفات، ويظهر لك لماذا تتفوق وحدات معينة تمامًا على غيرها. الرحلة من الفوتون إلى البكسل هي سلسلة أنيقة من الفيزياء والإلكترونيات، وبمجرد أن تفهمها، لن تقرأ ورقة مواصفات بنفس الطريقة مرة أخرى.
شرح مستشعر الميكروبولومتر
الميكروبولومتر هو القلب النابض لكل وحدة حرارية غير مبردة. تخيل شبكة كثيفة من عناصر الكشف المجهرية، كل واحد منها معلق على أرجل صغيرة معزولة حراريًا. عندما يضرب إشعاع الأشعة تحت الحمراء طويلة الموجة بكسلًا، يمتص ذلك البكسل الطاقة ويسخن بشكل طفيف جدًا. ذلك التغير الدقيق في درجة الحرارة يغير المقاومة الكهربائية لمادة الكاشف، وتقيس دائرة القراءة ذلك التحول في المقاومة، بكسلًا ببكسل، لبناء خريطة حرارية كاملة للمشهد عدة مرات في الثانية. بسيط في المفهوم، دقيق بشكل قاسٍ في التنفيذ.
مادتان للكاشف تسيطران على الصناعة. أكسيد الفاناديوم (VOx) يوفر حساسية ممتازة وهو العمود الفقري للنوى عالية الأداء، بينما السيليكون غير المتبلور (a-Si) يكسب مكانته من قابلية التوسع في التصنيع. بنفس القدر من الأهمية هو تباعد البكسل — التباعد الفيزيائي بين عناصر الكشف، عادة 12µm أو 17µm. تباعد 12µm الأصغر يحشر دقة أكبر في مستشعر أكثر اكتنازًا وأخف وزنًا، وهو فوز حاسم لحمولات الطائرات بدون طيار حيث كل مليمتر وجرام له أهميته. بصريات الجرمانيوم التي تركز الأشعة تحت الحمراء على هذه المصفوفة هي تخصص متخصص بحد ذاته؛ موردو البصريات تحت الحمراء الدقيقة مثل جيندي يظهرون مدى الدقة التي أصبح عليها هذا الفرع من تصنيع العدسات.
غير المبردة مقابل المبردة: المفاضلة الحاسمة
تأتي النوى الحرارية في عائلتين أساسيتين، والاختيار يشكل كل شيء حول تكلفة نظامك، ووزنه، وسلوكه. يوضح الجدول أدناه التناقضات الحاسمة جنبًا إلى جنب.
| السمة | LWIR غير المبردة | الحرارية المبردة |
|---|---|---|
| التكلفة | منخفضة إلى متوسطة | عالية جدًا (غالبًا 5–10 أضعاف) |
| SWaP (الحجم/الوزن/الطاقة) | مدمجة، خفيفة، طاقة منخفضة | كبيرة، ثقيلة، مبرد دائري مستهلك للطاقة |
| وقت بدء التشغيل | تشغيل فوري (ثوانٍ) | عدة دقائق (التبريد مطلوب) |
| حساسية NETD | Excellent (sub-50mK achievable) | Superior (single-digit mK) |
| Lifecycle | Long, no moving parts | Limited by cryocooler wear |
| Best For | Drones, DIY, inspection, scopes | Long-range military, scientific research |
For the overwhelming majority of drone, maker, and inspection jobs, uncooled wins hands down. No cryocooler means no bulky refrigeration assembly, dramatically lower weight, instant readiness, and a price point that finally makes serious thermal imaging genuinely accessible. And don't sleep on the ruggedized board-to-board connectors that link these cores to host electronics — vibration-resistant interconnects from manufacturers like Amphenol are what keep your module alive through the harsh shake of drone flight.
NETD, Thermal Sensitivity & Image Clarity
NETD — Noise Equivalent Temperature Difference — is the spec that separates a crisp, readable image from a noisy, grainy mess. Measured in millikelvin (mK), NETD describes the smallest temperature difference the sensor can reliably tell apart from electronic noise. Lower is better, plain and simple. A core rated below 50mK can resolve subtle thermal contrasts — the faint warmth of a footprint, the early signature of an overheating connection — that a noisier sensor would just smear into the background. When you're scanning a field for survivors or hunting an electrical hotspot, that sensitivity is the difference between a confident finding and a missed one.
Resolution Decoded: Why 640×512 Beats 256×192
Resolution is the most misunderstood — and most marketing-abused — spec in the entire thermal industry. Let's settle it with simple math. A 640×512 sensor delivers 327,680 individual thermal pixels. A 256×192 sensor delivers a measly 49,152. That's not a modest bump; it's 6.6 times more thermal data describing the exact same scene. Every one of those extra pixels means more detail, sharper edges, and earlier detection of small heat signatures.
The DRI Range Formula for Drone Payloads
Engineers think in terms of "thermal pixels on target." The DRI model — Detection, Recognition, Identification — quantifies how many pixels need to land on an object before you can simply spot it (detection), tell what kind of object it is (recognition), or positively identify it (identification). Because higher resolution puts more pixels on every target at a given distance, a 640 core dramatically stretches your effective DRI range compared to a 256 core running the identical lens. For a drone sweeping a wide area at altitude, that translates directly into covering more ground per pass while still resolving a person or animal far below. The environmental stability of a high-resolution core under field stress matters just as much; our high and low temperature humidity testing shows how rigorous validation keeps imagery stable across punishing conditions.
When Lower Resolution Is Acceptable (and When It Isn't)
Beware the digital zoom trap. Plenty of budget modules advertise impressive-sounding figures pulled off through interpolation or upscaling — software that invents pixels rather than capturing them. Interpolation can never add genuine thermal information; it just smooths and stretches whatever little data is actually there. Only native sensor resolution improves real clarity. That said, a 256×192 core isn't worthless. For close-range hobby glances, simple presence detection, or budget learning projects, it'll do the job. But the moment your application demands positive identification, long detection range, or reliable inspection, the 640 class becomes the practical floor — no two ways about it.
دليل اختيار العدسة ومجال الرؤية
Once you've locked in your resolution, the lens decides how that resolution gets spread across the scene. Focal length governs the fundamental trade-off between field of view (how wide an area you see) and range (how far you can resolve detail). A short focal length gives you a wide, sweeping view that's perfect for scanning — but every object looks small. A long focal length zooms in, putting more pixels on distant targets at the cost of a narrow field. The featured Mini core supports a genuinely impressive spread of focal lengths: 5, 9, 13, 18, 35, 50, 75, 100, and 150mm, letting you tune the system precisely to your mission.
Focal Length vs. Field of View
| البعد البؤري | مجال الرؤية | Best Use Case | Effective Range |
|---|---|---|---|
| 5–9mm | Very wide | Indoor scanning, short-range drone surveys | Short |
| 13–18mm | Balanced / general | All-purpose inspection and observation | Medium-short |
| 35–50mm | Narrow | Medium-range inspection, spotting scopes | Medium-long |
| 75–150mm | Very narrow / telephoto | Long-range surveillance, perimeter security | طويل |
Interchangeable Lenses for DIY Thermal Scopes
For scope builders and OEM integrators, lens interchangeability is a game-changer. The same compact core can serve as a wide-angle drone scanner one day and a high-magnification spotting scope the next, just by swapping optics. The lens material matters more than people think: infrared optics are crafted from germanium, which is transparent to long-wave radiation but exotic and fiddly to manufacture. Quality cores also build in athermalization — optical design that keeps the image in focus across wide temperature swings, so your scope stays sharp whether it's a freezing dawn or a baking afternoon. For deeper authority on this specialized optical discipline, infrared lens specialists such as جيندي offer a window into the engineering rigor behind germanium optics.
Integration: Raspberry Pi, Arduino & Drone Payloads
A brilliant sensor is dead weight if you can't get clean data out of it. This is where the featured Mini core really earns its keep, and where a lot of cheaper alternatives fall flat on their face with proprietary interfaces and missing documentation.
USB UVC Plug-and-Play with Raspberry Pi
The single most important integration feature is the module's USB output conforming to the UVC (فئة الفيديو عبر USB) standard. UVC is the same protocol your everyday webcam uses, and it means the thermal core shows up to a Linux host as a standard video device — no proprietary drivers to compile, no kernel patching, no vendor lock-in nonsense. On a Raspberry Pi, you literally just plug it in and the system recognizes it. From there you can grab frames using v4l2 at the system level, pull them into OpenCV for processing, or knock out a handful of lines of Python to throw a live thermal feed on screen within minutes. The uncooled core's low-latency architecture keeps that stream smooth — which is essential for robotics, real-time monitoring, and embedded vision pipelines where lag simply won't fly.
Arduino & SDK-Based Control
Arduino plays a different but complementary role. It's not built to crunch high-resolution video, so in a well-architected system the Arduino handles the control logic — triggering captures, relaying GPIO events, driving servos, or managing alert relays — while a Raspberry Pi or host PC handles the heavy video processing. Through the supported SDK, developers can go well beyond simple imagery to access genuine radiometric data: per-pixel temperature values that enable automated thresholds, hotspot alerts, and smart custom applications. That division of labor gives makers a robust, scalable foundation to build on.
Drone Payload Integration (DJI-Comparable)
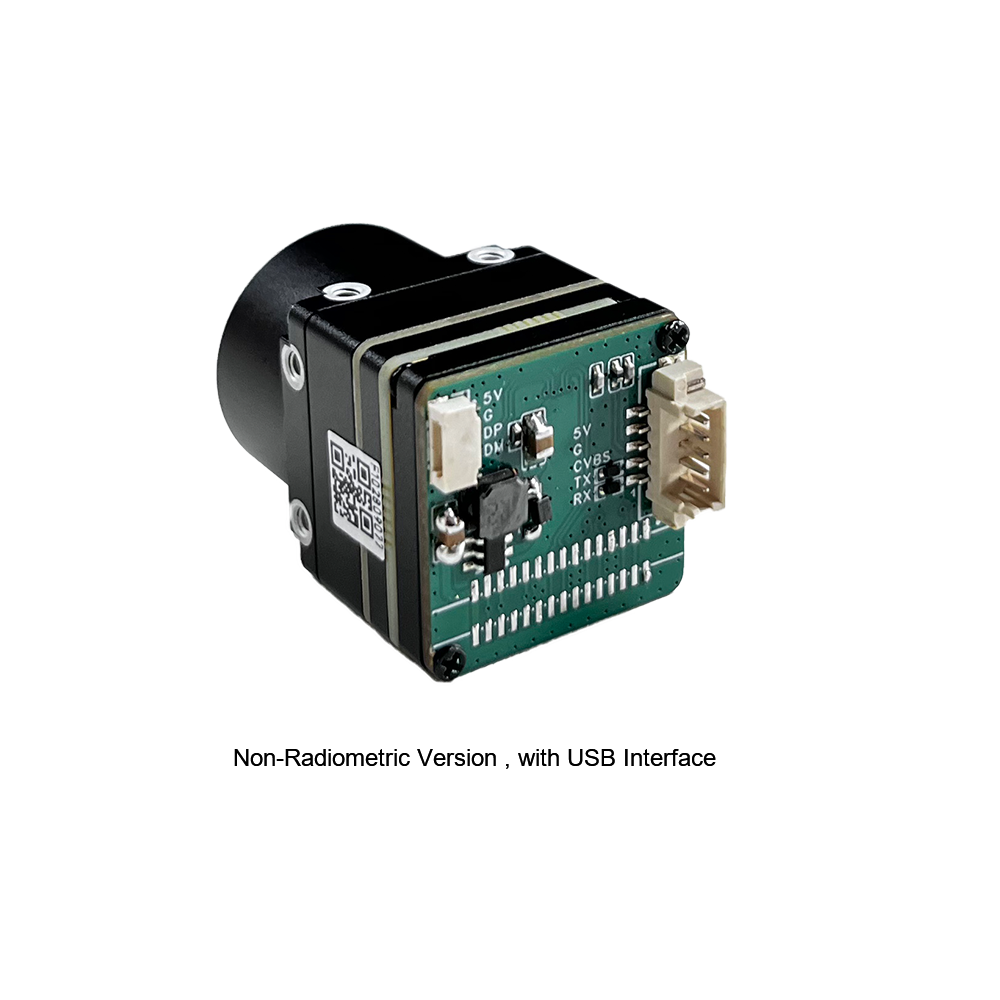
For aerial work, SWaP is everything. The Mini core's tiny 21mm × 21mm footprint is a decisive advantage — it slips into compact gimbals and tight payload bays where bulkier cameras just won't fit, and its low weight protects your precious flight time. A clean integration also demands attention to power draw, vibration isolation (a soft-mount or damped gimbal protects image stability), and secure, rattle-proof cabling. Robust connectors from suppliers like Amphenol earn their place here, surviving the constant vibration of flight. Ready to explore complete thermal solutions? Browse our full thermal imaging product range to see how cores fit into finished systems.
Featured Product: Mini 640×512 Uncooled LWIR Module
The standout pick for makers and OEM integrators chasing DJI-comparable performance without the premium branding is the Mini uncooled infrared thermal imaging module. It's engineered around three core strengths: sharp and crisp image presentation, an exceptionally compact form factor, and a genuinely low cost that opens serious thermal imaging up to a far wider audience. With its Mini-size of 21mm × 21mm, a deep bench of interchangeable lenses, optional 640-class resolution, and stable performance with strong environmental adaptability, it serves as a flexible, professional-grade foundation for everything from handheld scopes to lightweight aerial payloads.
| المواصفات | Detail |
|---|---|
| Product Name | Uncooled LWIR USB Mini 640×512 Thermal Imaging Camera Core Module |
| نوع الكاشف | Uncooled LWIR Microbolometer |
| الدقة | 640×512 / 640×480 (optional) |
| Module Size | 21mm × 21mm (Mini-Size) |
| خيارات العدسات | 5 / 9 / 13 / 18 / 35 / 50 / 75 / 100 / 150 مم |
| واجهة الإخراج | USB (UVC Plug-and-Play) |
| Best For | Drones, Raspberry Pi, Arduino, DIY Thermal Scopes |
| Image Quality | Sharp, crisp presentation |
| القدرة على التكيف البيئي | Strong, stable performance |
| Comparable To | DJI thermal payloads (at lower cost) |
قائمة معايير الشراء الرئيسية
Cutting through the marketing noise takes a disciplined checklist. Before you commit to any infrared thermal camera module, run it against the criteria below — every one of them rooted in real-world performance rather than spec-sheet theater.
- ✅ الدقة: Insist on 640×512 for any serious detection, recognition, or inspection work. Treat 256×192 as hobby-grade only.
- ✅ NETD Sensitivity: Look for sub-50mK to guarantee crisp, low-noise imagery that reveals subtle thermal contrasts.
- ✅ Output Interface: UVC over USB means driverless, plug-and-play integration on Raspberry Pi and standard hosts.
- ✅ Lens Flexibility: Interchangeable focal lengths (5mm–150mm) let one core serve many missions.
- ✅ Form Factor & Weight: A compact 21×21mm footprint is critical for drone SWaP and tight scope housings.
- ⚙️ SDK & Platform Support: Confirm radiometric access and documented software support for your platform.
- ⚙️ Environmental Ratings: Demand strong adaptability and validated stability across temperature and humidity extremes.
- ✅ Cost-vs-Performance Ratio: Seek DJI-comparable imagery without paying for a premium brand badge.
Red Flags to Avoid When Buying Cheap Modules
Be especially wary of three traps. First, interpolated resolution claims — numbers puffed up by software upscaling rather than native sensor pixels. Second, undocumented proprietary interfaces that lock you into a single vendor's tooling and leave you stranded without an SDK. Third, missing or vague NETD figures, which almost always signal a noisy sensor the manufacturer would rather not put a number on. A reputable core publishes honest native resolution, a clear NETD value, and a documented, standards-based output path. If they're hiding any of those, walk away.
تطبيقات العالم الحقيقي
The versatility of a compact 640-class LWIR core shows up across an astonishing range of fields. In drone-based search and rescue, a wide-FOV lens lets a UAV sweep huge swaths of terrain, the warm signature of a missing person standing out sharply against cool ground even in pitch darkness — and that same airframe is equally at home running agricultural surveys mapping crop stress and irrigation patterns.
For DIY thermal rifle and spotting scopes, the tiny module paired with a long 75–150mm lens delivers high-magnification target identification that hobbyists used to only dream about. In building and electrical inspection, the core's sub-50mK sensitivity surfaces overheating breakers, loose connections, and hidden moisture intrusion long before they turn into failures, turning routine maintenance into genuine prevention.
The maker community has embraced these modules for Raspberry Pi projects and embedded vision — autonomous robots that navigate by heat, smart monitoring rigs, and experimental computer-vision pipelines all benefit from clean UVC streaming. And in perimeter security, a fixed telephoto core gives you reliable, all-weather intrusion detection across fences and boundaries where visible cameras go blind in the dark. In every one of these scenarios, the same underlying specs — resolution, lens choice, sensitivity, and form factor — quietly decide the outcome.
أسئلة متكررة
Can I integrate a thermal camera module with a Raspberry Pi or Arduino for real-time high-res streaming?
v4l2, OpenCV, or a few lines of Python and have a live thermal feed running within minutes. The uncooled core's low-latency architecture keeps the stream smooth, which matters for real-time monitoring, robotics, and embedded vision pipelines. For Arduino-based systems, the workflow is slightly different — Arduino typically handles control logic, triggering, or relaying GPIO events, while a Pi or host PC manages the heavy video processing. Through our supported SDKs you can also access radiometric temperature data, enabling automated alerts and custom maker projects with genuine high-resolution thermal output.Cheap 256×192 modules offer poor image quality. What resolution should I choose for clear thermal images?
I want to build a custom DIY thermal scope or drone payload similar to DJI but at lower cost. Is a compact module available?
عند إحكام إغلاق نواة حرارية غير مبردة داخل علبة مقاومة للطقس IP67/IP68، يكون التصميم الحراري السلبي حاسمًا لإيقاف الانحراف الحراري الأساسي وتدهور الصورة. لا تحتاج الميكروبولومترات إلى مبردات نشطة، لكن ASIC الصورة المدمجة ومشفرات الفيديو الشبكية تستهلك بين 1.0 واط و 2.5 واط أثناء التشغيل. في صندوق محكم ضيق بدون تدفق هواء، تخلق الحرارة الداخلية المحتبسة نقاطًا ساخنة عبر هيكل النواة ومصفوفة المستوى البؤري. تؤدي هذه التدرجات الحرارية الموضعية إلى خلل في قراءات درجة الحرارة الإشعاعية وتزيد من ضوضاء المستشعر، مما يقلل من حساسية NETD الفعالة لديك. لحل هذا، صمم مسارات مباشرة لتبديد الحرارة المعدنية—مثل كتلة باردة من الألومنيوم أو النحاس مقترنة بوسادات فجوة عالية التوصيل—تربط اللوحة الحرارية للوحدة مباشرة بالغلاف المعدني الخارجي. هذا يحول كامل الهيكل الخارجي إلى مشتت حراري كبير. أيضًا، تجنب تركيب أجزاء عالية الطاقة (مثل أجهزة الراديو RF أو محولات الطاقة الساخنة) بجوار النواة البصرية مباشرة للحفاظ على استقرار الظروف الحرارية عبر المستشعر.
- Industry Standard (Connectors): Amphenol — Ruggedized Interconnect Solutions
- Industry Standard (IR Optics): Jinde — Infrared & Germanium Optics
- دليل ذو صلة: Thermal Imaging Principles Explained
- دليل ذو صلة: High & Low Temperature Humidity Testing
- كتالوج المنتجات: Full Thermal Imaging Product Range