Best 256x192 Thermal Camera Module: Integration Guide & OEM Solutions
2026年7月10日
640*512/9.1 Thermal Imaging Camera Module: High-Res Drone Integration Guide
2026年7月13日
Best LWIR Thermal Imaging Camera Module: Mini Cores for Edge AI & UAV Integration
In the rapidly evolving landscape of autonomous systems, industrial automation, and aerial surveillance, sensory perception is undergoing a massive structural shift. Let's be honest: standard electro-optical (EO) visible-light cameras are essentially useless when things get messy. They fail horribly in pitch-black conditions, or when blinded by fog, smoke, and dust. That is where Long-Wave Infrared (LWIR) thermal imaging steps in as the ultimate equalizer. Operating in the 8μm to 14μm spectral band, LWIR sensors bypass ambient light entirely, capturing the microthermal radiation emitted by everything above absolute zero. This is a game-changer for high-stakes operations—whether you are designing tactical search-and-rescue systems, managing high-precision agricultural monitoring, or building unmanned aerial vehicles (UAVs) that need to perform complex infrastructure inspections in zero-visibility conditions.
But here is the catch: squeezing traditional thermal cores into modern edge hardware is a massive headache for engineers. Legacy LWIR cameras are notorious power hogs. They are bulky, drift thermally when the ambient temperature shifts, and are locked down by annoying, proprietary software ecosystems that make integration a nightmare. This guide lays out a practical, hard-nosed engineering blueprint for system architects, hardware developers, and product managers who need to integrate lightweight, high-performance, and cost-effective uncooled LWIR camera cores. We will break down the crucial optical specs, sensor physics, and raw embedded software configurations needed to deploy robust thermal vision in tight, SWaP-constrained (Size, Weight, and Power) setups—taking you all the way from raw microbolometer data to fast Edge AI insights.
In the shop, we have learned that you cannot just slap a sensor on a board and hope for the best. To build something that actually works in the field, you need to understand the underlying hardware trade-offs.

The following sections will dive deep into the specific engineering choices that separate a reliable, field-tested thermal system from a prototype that constantly glitches during flight.
Table of Contents
- 👉 1. The Optomechanics of LWIR: Microbolometer Physics and Sensor Topologies
- 👉 2. SWaP-C Optical Design and Focal Length Selection Criteria
- 👉 3. Edge AI & Interface Integration: Bridging Raw Pixels to Silicon
- 👉 4. Uncooled LWIR Mini Series: Detailed Product Showcase
- 👉 5. Uncooled LWIR Mini Series Hardware Comparison Matrix
- 👉 6. Advanced Hardware Integration & Calibration Schematics
- 👉 7. Industrial, Defense, and UAV Case Studies
- 👉 8. Deep-Dive Technical FAQ and Troubleshooting Suite
1. The Optomechanics of LWIR: Microbolometer Physics and Sensor Topologies
At the center of any solid uncooled LWIR camera module is the microbolometer array. Now, unlike cooled thermal detectors that require bulky, power-hungry cryogenic Stirling coolers to chill the sensor to a freezing 77 Kelvin, uncooled microbolometers run perfectly at ambient temperatures. The core array is fabricated directly on a silicon Readout Integrated Circuit (ROIC) wafer using MEMS (Micro-Electro-Mechanical Systems) surface micromachining.
Let's look at how these things are actually constructed. Every individual pixel on the sensor array consists of:
⚙️ An IR-absorbing bridge, usually made of Vanadium Oxide (VOx) or Amorphous Silicon (a-Si), suspended over the silicon substrate by incredibly thin, metal legs with massive thermal resistance.
⚙️ A tiny vacuum gap directly below the suspended bridge to stop thermal conduction to the substrate, keeping the thermal sensitivity as high as possible.
⚙️ A reflecting substrate layer that forms an optical resonant cavity, trapping incoming 8–14μm infrared photons to squeeze out maximum absorption efficiency.
When LWIR radiation hits that active layer, the material drinks in the energy, which causes its physical temperature to tick upward. This tiny change in temperature alters the material's electrical resistance. In the engineering world, we measure this using the Temperature Coefficient of Resistance (TCR). Look, VOx is hands-down the industry favorite for industrial and tactical gear because it gives you a TCR of around -2% to -3% per Kelvin. That translates to a way better Signal-to-Noise Ratio (SNR) than you will ever get with cheaper amorphous silicon.
Then there is pixel pitch—the center-to-center distance between neighboring pixels. This number dictates your overall manufacturing costs and the physical footprint of your optical setup. For years, 17μm was the standard. While those older sensors have plenty of surface area to grab light, they force you to use much larger, heavier, and costlier optics to focus the image.
Moving to a modern 12μm pitch changes the math completely. Shrinking the focal plane array (FPA) means you can use smaller, featherweight lenses while keeping your Field of View (FOV) exactly the same. For UAV payloads and SWaP-constrained designs, switching to a 12μm core is a complete no-brainer to save power, cut down on aerodynamic drag, and keep battery draw to a minimum. If you want to dive deeper into the core physics, check out our comprehensive technical knowledge repository on thermal physics.
The main metric you need to watch when evaluating any thermal core is the Noise Equivalent Temperature Difference (NETD), measured in milliKelvins (mK). Think of it as the smallest temperature variance the sensor can detect before the signal gets drowned out by background noise. Cheaper consumer-grade cores usually sit above 50mK and perform terribly on humid, overcast, or low-contrast days. For serious engineering work, a sub-40mK NETD is the gold standard. It allows your system to resolve minute thermal differences, map out clean structural outlines of targets, and pull human heat signatures right out of messy, cluttered backgrounds.
2. SWaP-C Optical Design and Focal Length Selection Criteria
When you are building an LWIR optical pipeline, forget about using standard camera glass. Standard silica silica glass acts like a solid brick wall to wavelengths longer than 2.5μm. Instead, we have to use specialized infrared-transmitting materials, with Germanium (Ge) and Chalcogenide glasses being the top choices.
Germanium is an incredible material with a massive refractive index of roughly 4.0 at 10μm and very low optical dispersion. This lets us design highly compact lens assemblies with ultra-fast F-numbers. But here is the catch: Germanium is expensive, and it suffers from thermal runaway. If your camera housing gets hot (above 60°C), Germanium’s absorption rate shoots up, messing with performance. On the other hand, Chalcogenide is a synthetic glass that can be molded into precise aspheric shapes on high-volume production lines. It is way cheaper to manufacture and is incredibly stable across massive temperature swings, making it a great budget-friendly alternative even if its light transmission is a hair lower than pure Germanium.
Choosing your focal length is all about balancing the Field of View (FOV) against your required detection distance. But keep this rule in mind: with uncooled systems, you absolutely must maintain a fast aperture (typically F/1.0 to F/1.3). Because these microbolometers depend on radiative heating, narrowing your aperture (going to a higher F-number) starve the sensor of thermal energy and instantly ruins your real-world NETD.
When calculating target ranges in the field, we rely on the classic Johnson Criteria. This framework tells you how many pixels must cover a target for a human or an algorithm to see it:
✅ Detection (1.5 pixels): You can tell something is out there (e.g., a hot spot on a hillside).
✅ Recognition (6.0 pixels): You can classify the object (e.g., distinguishing a person from a deer, or a truck from a car).
✅ Identification (12.0 pixels): You can see details (e.g., telling if a person is holding a tool or a rifle).
This physical limit is governed by the Instantaneous Field of View (IFOV), which is simply the mathematical ratio of your pixel pitch to your lens's focal length.
3. Edge AI & Interface Integration: Bridging Raw Pixels to Silicon
In the past, getting a thermal camera to talk to your computer required proprietary frame grabbers and a mountain of custom code. Today, we expect clean, standardized, low-latency, plug-and-play interfaces that connect straight to edge-compute hardware.
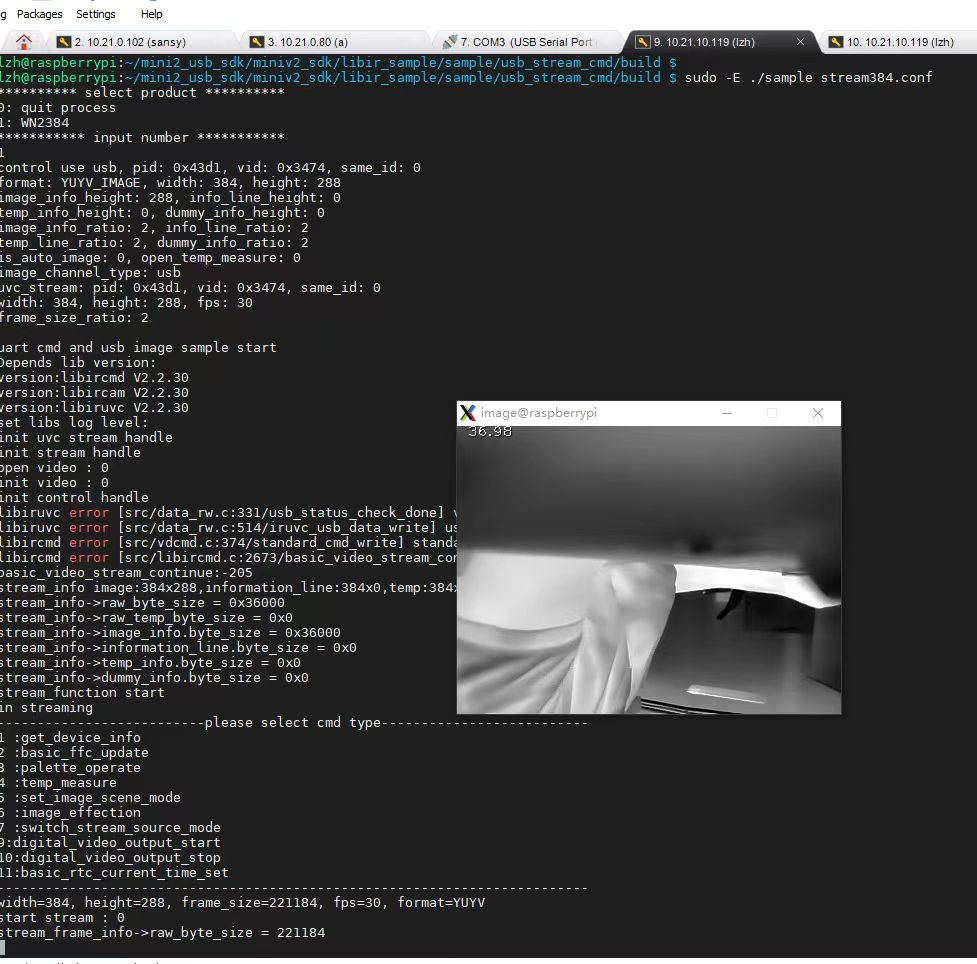
Using the USB Video Class (UVC) standard means your mini uncooled LWIR core registers on your host board (whether it is running Linux, Windows, or macOS) just like a standard USB webcam. You do not need to mess with custom drivers; you can pull the video feed directly into OpenCV with a single line of code. But if you are doing radiometry—actual temperature measurement—you cannot rely on standard 8-bit compressed video. You need access to the raw, uncompressed 14-bit data stream (often sent over a Y14 format). High-quality cores will expose this raw 14-bit stream, letting your edge algorithm read direct ADC counts and convert them into precise physical temperatures on the fly.
When you are running real-time video analytics on small, battery-powered systems, choosing your hardware platform is critical:
⚙️ For basic, ultra-low-power, lightweight monitoring rigs, interfacing with a Raspberry Pi via SPI or USB is perfect for quick scripts and telemetry logging.
⚙️ For high-frame-rate deep learning, object tracking, and automatic target classification, the NVIDIA Jetson platform is the undisputed king of edge compute.
To keep latency to a minimum, forget about writing heavy, CPU-bound image processing loops. Standardizing on a hardware-accelerated GStreamer pipeline is the way to go. This shifts demanding tasks like image resizing, thermal color-mapping, and bounding-box rendering directly onto the carrier board's GPU, leaving your CPU free to run deep learning inference cycles without breaking a sweat.
4. Uncooled LWIR Mini Series: Detailed Product Showcase
Uncooled LWIR USB Mini 640*512 Thermal Imaging Camera Core Module For Drones Similar To DJI

Compact hand-held form factor of the Mini 640 LWIR thermal camera module.
Here is the deal: if you are building drone gimbals or compact optical payloads, you are fighting for every gram. This Mini 640 module is designed specifically to solve that problem. With a tiny 21mm x 21mm footprint, it packs a full 640*512 resolution core that runs circles around older, bulkier thermal cameras. It gives you stable operational performance, a wide selection of lenses from 5mm up to 150mm, and incredible resistance to environmental shifts.
Technical Specifications
| Specification Parameter | Value / Details |
|---|---|
| Focal Plane Array Resolution | 640*512 (640*480 optional) |
| Core Dimensions | Mini-Size of 21mm*21mm |
| Focal Length Lens Configurations | 5 / 9 / 13 / 18 / 35 / 50 / 75 / 100 / 150mm |
| System Integration Feature | Uncooled LWIR USB Interface connectivity |
| Environmental Performance | Stable performance and strong environmental adaptability |
This is a solid, high-reliability core for guys who want to bypass the restrictive licenses and closed ecosystems of Western brands while still maintaining top-tier image quality and rugged build standards.
Uncooled LWIR Mini 256*192 Thermal Imaging Camera Module Similar To DJI For Detecting Mines
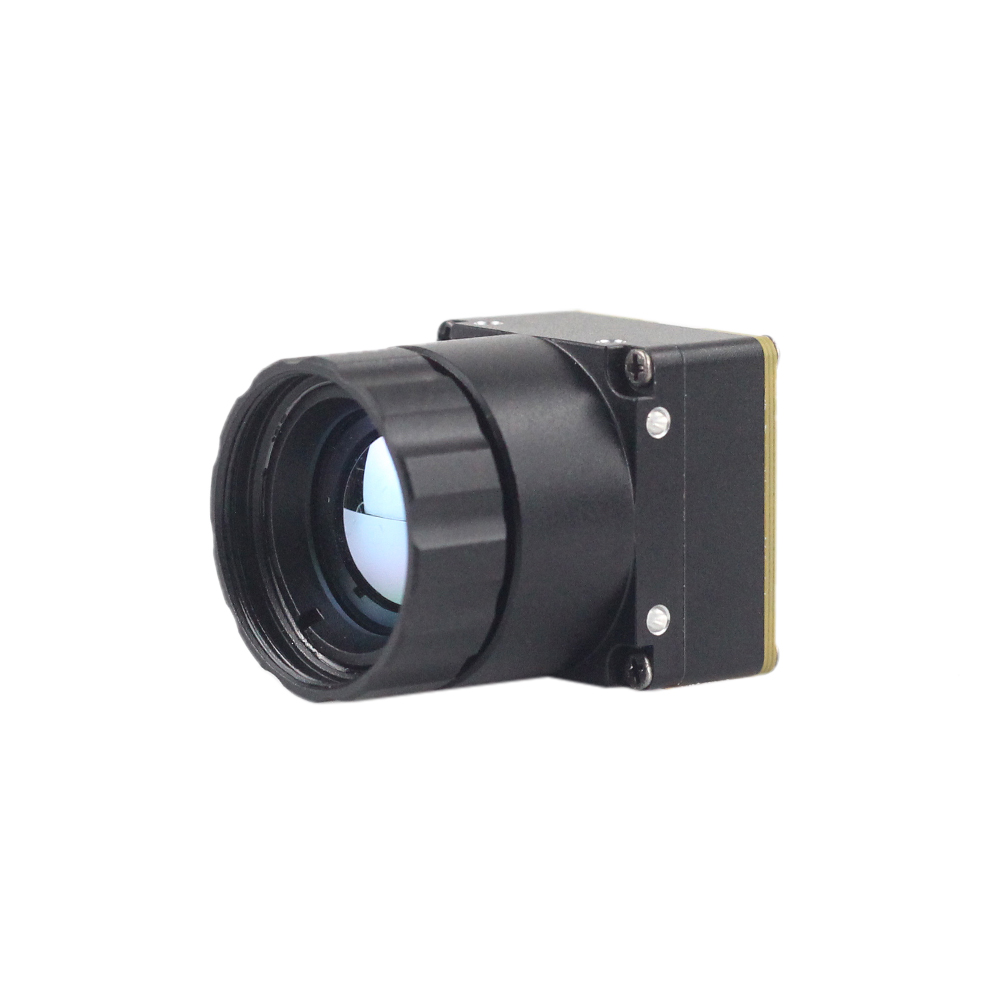
Highly integrated profile of the Mini 256 uncooled LWIR thermal module.
If you are building hand-held scanning equipment, light robotic scouts, or specialized detectors (like search equipment to spot buried landmines), check this out. The Mini 256 module focuses entirely on cost-efficiency and power optimization. It outputs a remarkably clean, uniform radiometry image while sipping minimum current, making it ideal for large-scale deployments or swarm configurations where budgets are tight but failures are not an option.
Technical Specifications
| Specification Parameter | Value / Details |
|---|---|
| Focal Plane Array Resolution | 256*192 |
| Detector Type | High-performance uncooled uncooled infrared detectors |
| Measurement Mode | Accurate temperature measurement with radiometry |
| Output Characteristic | Uniform thermal image and ultra-clear thermal imaging |
This is a solid, reliable sensor that lets you get the job done without carrying extra weight or wasting precious battery capacity in remote environments.
5. Uncooled LWIR Mini Series Hardware Comparison Matrix
Let's map out these specs side-by-side to make your choice easier. Every design is a balance of image detail, weight, power, and cost:
| Technical Parameter | Uncooled LWIR USB Mini 640 Thermal Core | Uncooled LWIR Mini 256 Thermal Core |
|---|---|---|
| FPA Resolution | 640*512 (Dense Thermal Profiling) | 256*192 (Swarm/SWaP-Optimized) |
| Pixel Pitch | 12μm (Optimized Optical Circle) | 12μm (Minimum footprint) |
| Spectral Band | 8μm to 14μm (LWIR) | 8μm to 14μm (LWIR) |
| Core Dimensions | Mini-Size of 21mm*21mm | Mini-Size of 21mm*21mm |
| Available Optics Options | 5/9/13/18/35/50/75/100/150mm Lenses | Fixed wide-angle focusing core system |
| Interface Formats | USB/UVC, Universal Custom SDK support | USB/UVC digital, accurate temp calibration |
| Application Scenarios | Tactical Drones (DJI style), High-Alt SAR | Buried Mine Detection, Handheld inspection |
6. Advanced Hardware Integration & Calibration Schematics
Integrating a highly sensitive thermal core into a complex electromechanical platform is a tough engineering challenge. If you do not pay close attention to your thermal management, power delivery, and calibration routines, you will end up with noisy, drifted images.
Even though uncooled microbolometers do not require cryogenic cooling, they are incredibly sensitive to local temperature shifts. If you mount them right next to hot components—like a switching power regulator, an edge computer's SoC, or a drone's brushless motors—you will create non-uniform thermal patterns across the sensor housing. This localized heating causes image shadowing and ruins your calibration.
To avoid these issues in the shop, we follow a simple set of thermal rules:
⚙️ Always mount the camera core using low-thermal-conductivity standoffs (like nylon or FR4) to physically isolate it from hot components.
⚙️ Connect the metallic chassis of the core to a dedicated aluminum heat sink or structural frame member to spread ambient heat evenly around the sensor housing.
⚙️ Route your digital cables away from high-power motor lines and telemetry transmitters to block electromagnetic interference (EMI).
Your power supply design is just as critical. Since microbolometer sensors read tiny, sub-microvolt signal changes, any voltage ripple on your power lines will immediately show up as annoying horizontal lines or high-frequency "salt-and-pepper" noise in your video. Do not power your thermal core directly from a standard switching Buck regulator. Instead, use a two-stage approach: step the power down to about 3.8V with a high-efficiency switching regulator, and then run that through a low-noise, high-PSRR (Power Supply Rejection Ratio) Linear Dropout Regulator (LDO) to supply the sensor with clean, quiet power.
Finally, let's talk about drift. All microbolometers drift slightly over time, bringing out pixel noise on the screen. To fix this, thermal cameras use Flat Field Correction (FFC), which drops a physical mechanical shutter in front of the sensor for a split second to reset the baseline. But if you are in the middle of landing a drone or holding a high-stakes search, a sudden shutter pause is the last thing you want. You can use your software SDK to disable automatic shutter cycles and trigger FFC manually via UART or USB when the vehicle is safe, or deploy shutterless digital correction models that monitor temperature sensors on the FPA to fix drift on the fly without moving parts.
7. Industrial, Defense, and UAV Case Studies
Let's look at how these compact, rugged thermal cubes hold up in actual field deployments.
When deploying thermal payloads on search-and-rescue UAVs, saving weight is your primary concern. For lightweight, sub-100g gimbals, the Mini 640 core is a perfect fit. When flying at an altitude of 150 meters, pairing the 640*512 core with a 35mm lens gives you enough pixels on target to detect a human heat signature. This allows search teams to scan large agricultural or wilderness areas quickly while keeping the aircraft at a safe altitude. For teams planning these types of operations, check out our practical guide on thermal search and rescue technology.
Another critical application is mine detection. Unexploded ordnance and buried mines alter the structure of the soil above them, meaning they heat up and cool down at different rates than the surrounding earth. By mounting the lightweight Uncooled LWIR Mini 256 module on autonomous ground crawlers or low-flying micro-drones, detection crews can sweep dangerous areas with minimal risk. The raw thermal readings are sent via USB straight to a local edge computer, which runs custom algorithms to flag soil temperature discrepancies down to 0.05°C, pointing out hidden hazards below the surface.
For high-end security and perimeter tracking, combining one of these thermal modules with a standard visible-light camera gives you complete, multi-spectrum situational awareness in any lighting or weather. By overlaying the thermal signature on top of a sharp, high-resolution visible-light stream, you can target objects through heavy brush, mist, or total darkness while keeping the fine details of the visible channel. If you are interested in how these setups work on the ground, check out our deep-dive guide to modern tracking and hunting tools.
8. Deep-Dive Technical FAQ and Troubleshooting Suite
How do Purpleriver’s Chinese thermal cores compare to expensive brands like FLIR Lepton?
Can these uncooled LWIR camera modules handle long-range detection through smoke, haze, or fog?
My LWIR camera feed shows horizontal line noise when integrated into a UAV. How do I solve this?
What is the optimal frame rate selection (25Hz vs. 60Hz) for autonomous navigation?
📚 References & Further Reading
- Industry Standard: Learn more about high-compute hardware platforms at the NVIDIA Jetson Developer Portal and the official Raspberry Pi Foundation Website.
- Related Guide: Explore our internal resources on Thermal Technical Knowledge, examine advanced setups in Thermal Technology for Search and Rescue Operations, or review consumer use cases in Thermal Tools for Modern Hunting and Tracking.