
Mini 640 Uncooled LWIR Thermal Camera Module | Ultra-Compact 640×512 High-Sensitivity Thermal Imaging for Drones, Industrial Inspection & Security
2026年5月22日
Thermal Imaging Camera Module Guide: Choosing the Right LWIR Core for Drones, DIY & Real-Time Streaming
2026年6月4日
Thermal Camera Module Guide: Choosing the Right Uncooled IR Sensor for DIY, Drone & Linux Projects
Look, if you've spent the last few weeks bouncing between Reddit threads, AliExpress listings, and salvaged automotive parts forums trying to find a thermal camera module that actually ships with documentation, you already know the pain. You find a board with a promising sensor — maybe a Tiny1-C, an RTR-225M, or a pulled automotive night-vision unit — and then you discover there's no Linux driver, no register map, no published frame format, and no temperature-output specification. Suddenly your "weekend project" turns into a multi-month protocol-sniffing expedition, where you're probing data lines with a logic analyzer instead of building the drone, scope, or robot you actually wanted. The stakes are real: a single wrong purchase can cost you months of wasted effort and a drawer full of useless hardware.
Here's the deal. This guide is written from the perspective of an OEM manufacturer that controls the entire design pipeline — from the microbolometer detector all the way through to the firmware. That means when we talk about NETD, pixel pitch, interface protocols, or radiometric calibration, we're describing the exact decisions we make on the production floor. Over the next 3,000+ words you'll get a complete, vendor-neutral decision framework: how uncooled microbolometers actually work, how to read a real datasheet (resolution, NETD, pixel pitch, frame rate, FOV), how to integrate a module into Raspberry Pi, NVIDIA Jetson, or Android, and finally which module fits drone, scope, fever-screening, and embedded use cases. We'll close with concrete product recommendations and downloadable resources so you can move from research to integration in days, not years.
I've been around enough failed builds to tell you the truth up front: the sensor is rarely the problem. The documentation around the sensor is. Keep that in the back of your mind as you read, because it shapes every recommendation here.
Let's get into it.

Table of Contents
Estimated read time: 14 minutes · Jump to Product Specs ➔
- 👉 What Is a Thermal Camera Module?
- 👉 How Uncooled IR Sensors Work: The Microbolometer
- 👉 Cooled vs. Uncooled: Which Do You Need?
- 👉 Key Specifications Decoded
- 👉 Interface Types: USB, CVBS, MIPI & SPI
- 👉 Linux, Raspberry Pi & Jetson Integration
- 👉 Use-Case Selection Guide
- 👉 Our Thermal Camera Modules (Specs Table)
- 👉 Radiometric Temperature Measurement Explained
- 👉 Common Buying Mistakes to Avoid
- 👉 Frequently Asked Questions
What Is a Thermal Camera Module?
A thermal camera module is a self-contained subassembly designed for integration rather than for retail-shelf use. At its core it combines four key elements: an infrared detector (the focal plane array), specialized optics (typically a germanium or chalcogenide lens that's transparent to long-wave infrared), a readout integrated circuit (ROIC) that converts the detector's signals into usable data, an image-processing board that handles correction and enhancement, and an output interface that delivers video or raw frames to your host system.
Here's the distinction that trips people up. A module is not a finished thermal camera. A finished camera is a housed, consumer-ready device with a screen, battery, and enclosure. A module, by contrast, is a board-level product engineered to be embedded inside your product — a drone gimbal, a robot, a fever-screening kiosk, or a custom Raspberry Pi rig. Most uncooled modules operate in the long-wave infrared (LWIR) band of roughly 8–14 µm, which is the dominant spectral region for detecting heat emitted by people, machinery, and the natural environment.
Core Components Breakdown
- ⚙️ Detector array: The uncooled microbolometer focal plane array that absorbs IR radiation.
- ⚙️ Optics: Germanium or chalcogenide lens engineered for LWIR transmission.
- ⚙️ ROIC: Reads each pixel's signal and digitizes it.
- ⚙️ Image pipeline: Non-uniformity correction (NUC) and automatic gain control (AGC) for a clean, stable image.
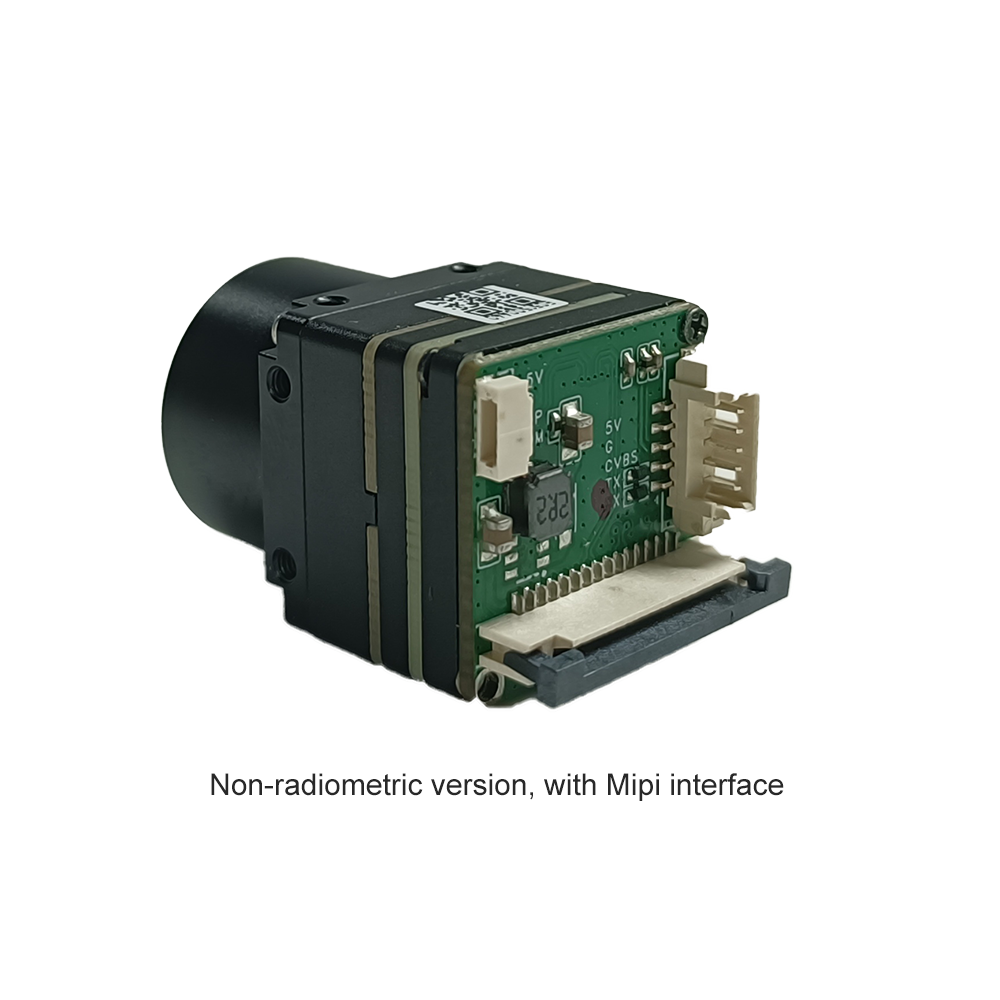
- ⚙️ Interface board: Outputs USB/UVC, CVBS analog video, MIPI CSI-2, or SPI/I²C control.
Why Modular Matters for OEMs & Makers
The modular approach buys you three things that matter: embeddability, the ability to run custom firmware, and freedom over form factor. You're not locked into someone else's enclosure or feature set. For OEMs scaling production and makers prototyping a single unit alike, a module with a documented interface is the foundation that determines whether your project succeeds in weeks or stalls indefinitely.
How Uncooled IR Sensors Work: The Microbolometer
The physics is elegantly simple once you state it plainly. Every object above absolute zero emits infrared radiation proportional to its temperature. An uncooled microbolometer array is a grid of tiny, thermally isolated pixels. When IR radiation strikes a pixel, that pixel heats up slightly, and its electrical resistance changes. The ROIC measures these resistance changes across the entire array many times per second and assembles them into a thermal intensity map — the image you see, where hotter regions appear distinct from cooler ones.
Microbolometer Materials — VOx vs. a-Si
Two materials dominate the microbolometer world. Vanadium Oxide (VOx) offers excellent sensitivity and a mature manufacturing base, generally delivering lower NETD (better thermal resolution) but at higher process complexity. Amorphous Silicon (a-Si) is cheaper and easier to fabricate using standard semiconductor lines, with slightly higher noise in some implementations. For most DIY, drone, and embedded applications the practical performance gap is small, and good firmware-level calibration matters far more than the raw material choice. I've seen a well-tuned a-Si board outshine a sloppy VOx board plenty of times in the shop.
Pixel Pitch & Why Smaller Isn't Always Better
Pixel pitch — the center-to-center distance between pixels, commonly 17 µm or 12 µm — is frequently misunderstood. A smaller pitch (12 µm) lets you pack more pixels into a smaller, lighter sensor and use a smaller, cheaper lens. However, smaller pixels collect less radiation, which can reduce sensitivity unless compensated by detector design. A 17 µm pitch often delivers slightly better signal per pixel. The "right" pitch depends on your priorities: compactness and weight (critical for drones) versus maximum per-pixel sensitivity.
Non-Uniformity Correction (NUC) & Shutter Calibration
No two pixels in a microbolometer respond identically, so every module periodically performs Non-Uniformity Correction. You'll hear a faint "click" — that's the internal shutter closing to present a uniform thermal reference, against which the firmware recalibrates every pixel. The quality of this NUC routine is what separates a professional module from a no-name salvaged board. Poor NUC produces fixed-pattern noise and ghosting; well-tuned NUC produces a clean, stable image. Because we control firmware in-house, our NUC tuning is optimized specifically for our detectors — something you simply cannot replicate with reverse-engineered automotive pulls.
Cooled vs. Uncooled Thermal Modules: Which Do You Need?
| Attribute | Cooled | Uncooled |
|---|---|---|
| Cost | Very high (10–50×) | Affordable |
| Size | Large (cryocooler) | Compact |
| Power | High | Low |
| Sensitivity (NETD) | Extremely high | Good (20–60 mK) |
| Spectral Band | MWIR (common) | LWIR (8–14 µm) |
| Startup Time | Minutes (cooldown) | Instant-on |
| Lifespan | Limited by cooler | Long |
| Typical Use | Military, astronomy, gas detection | DIY, drone, robotics, screening |
For the audience reading this guide — makers, drone builders, robotics engineers, and embedded developers — uncooled is almost always the correct answer. Cooled systems exist for long-range military surveillance and scientific imaging, and they cost ten to fifty times more. I'm not going to sell you a cryocooler you don't need.
When Cooled Is Justified
Let me be honest and complete here: cooled detectors genuinely shine in long-range gas detection, certain astronomy applications, and ultra-long-range military targeting where you need to resolve tiny temperature differences across kilometers. If that describes your project, you already have a specialist budget. For everyone else, read on.
Why Uncooled Dominates DIY & Drone Builds
Uncooled modules require no cryocooler, draw minimal power (essential for battery-powered drones), turn on instantly, and fit into compact payloads. They're the practical, proven choice for virtually every project this guide addresses.
Key Specifications Decoded: How to Read a Thermal Module Datasheet
This is the highest-value section in the guide. Learn to read these six specs and you'll never get fooled by a misleading listing again.
Resolution (384×288, 256×192, 640×512)
Resolution is the pixel count of the detector. More pixels mean more detail and longer effective detection range. However, higher resolution increases cost dramatically. 384×288 is the sweet spot for cost versus performance — it provides ample detail for thermal scopes, drones, and machine vision without the premium of a 640×512 sensor.
NETD (Thermal Sensitivity)
NETD (Noise Equivalent Temperature Difference) is measured in millikelvin (mK) and describes the smallest temperature difference the sensor can distinguish from noise. Lower is better. A module rated under 40 mK produces crisp, low-noise imagery; one rated above 60 mK looks grainier, especially in scenes with subtle temperature variation. Many buyers obsess over resolution while ignoring NETD — that's a costly mistake, and I see it constantly.
Frame Rate (9 Hz vs 25/30/50 Hz)
Frame rate determines smoothness. The famous 9 Hz limit exists because higher frame rates can trigger export restrictions in some regions. For smooth real-time video — essential for drone tracking and fast scope panning — you want 25 Hz or higher where legally available. Choose deliberately based on your jurisdiction and use case.
Field of View (FOV) & Lens Focal Length
FOV is set by the lens focal length. A wide FOV is ideal for navigation and situational awareness, while a narrow FOV (longer focal length) concentrates pixels on distant targets for detection at range. Match the lens to your mission: wide for drone navigation, narrow for long-range identification.
Temperature Measurement Range & Accuracy
Radiometric modules specify a measurement range and accuracy, typically ±2°C or ±2% of reading. A radiometric module reports a calibrated temperature for every pixel; a non-radiometric module only produces a picture. If you need actual numbers — fever screening, predictive maintenance — radiometric is mandatory.
Power Consumption & Operating Temperature
For drones and embedded systems, every milliwatt and every degree of operating range matters. Check the module's power draw against your battery budget and its operating temperature range against your deployment environment.
⚡ Quick Spec Cheat Sheet
- ✅ Drone: 384×288, <40 mK NETD, CVBS/MIPI, low power, light weight.
- ✅ Thermal scope: 384×288+, 25–50 Hz, low latency (CVBS), narrow FOV.
- ✅ Robotics/AI: MIPI CSI-2, SDK, high frame rate for Jetson inference.
- ✅ Fever screening: Radiometric, ±0.3–0.5°C, blackbody-calibrated.
Want the real numbers? Download full datasheets and spec tables for every module from our Download Center.
Interface Types: USB, CVBS, MIPI & SPI Explained
Interface choice is the number-one cause of integration failure for hobbyists. The right sensor on the wrong interface is a dead end. Here's how to choose.
USB / UVC
USB modules that follow the UVC (USB Video Class) standard are genuinely plug-and-play across Linux, Windows, and Android. They're the easiest path for Raspberry Pi projects and phone add-ons. The caveat: not every "USB" module is truly UVC-compliant — verify before you buy.
CVBS (Analog Video)
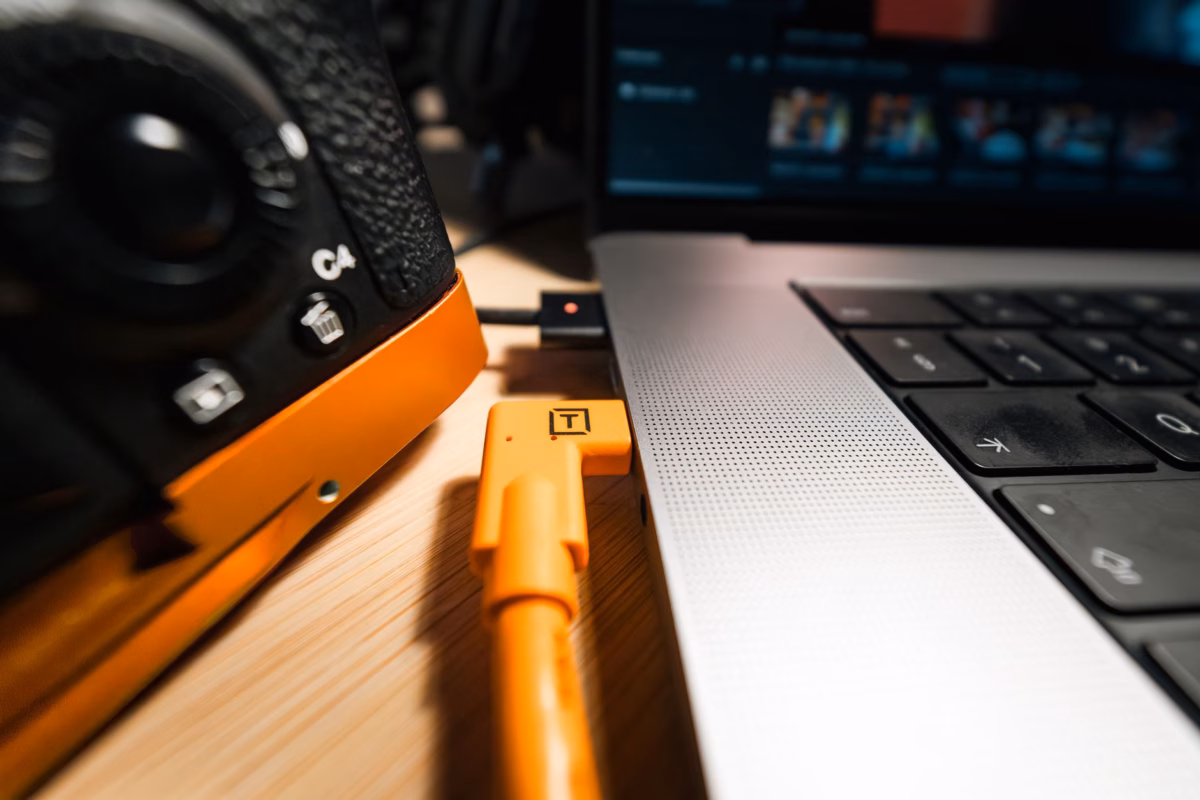
CVBS is composite analog video. Our MINI module offers a CVBS option, which is ideal for FPV drone goggles and analog thermal scopes because it delivers extremely low latency — critical when you're piloting or tracking in real time. No driver stack, no software pipeline delay; just clean analog video into your display.
MIPI CSI-2
MIPI CSI-2 is a high-bandwidth interface native to the camera ports on NVIDIA Jetson and Raspberry Pi boards. It's the best choice for high-resolution, real-time AI pipelines where you need to feed frames directly into an inference engine. If you're building thermal object detection on NVIDIA Jetson, MIPI is your interface.
SPI / I²C
SPI and I²C give register-level control and access to raw data. These are for deep embedded developers who need to command the module directly and pull unprocessed frames. With proper documentation, this is enormously powerful; without it, it's a nightmare — which brings us to the central point.
The real differentiator is documentation. A documented interface plus a real SDK means integration in days. An undocumented interface — the situation with so many Tiny1-C and RTR-225M complaints — means months of reverse-engineering. Always choose published over reverse-engineered. I can't say that loudly enough.
Linux, Raspberry Pi & Jetson Integration
Let's address the core technical intent directly: getting a thermal module working on Linux, streaming from a Raspberry Pi, and running AI on Jetson.
Driver & SDK Requirements
Before you buy, demand the following from any vendor: kernel-compatible Linux drivers, sample code, a published register map, and clear temperature-output documentation. If a vendor can't provide these, walk away. These four items are the difference between a working project and a paperweight.
Streaming Real-Time Thermal Video to a Raspberry Pi
The practical workflow is straightforward when the hardware cooperates: connect the module via USB or MIPI, capture each frame through the driver, apply a color palette (ironbow, white-hot, rainbow), and display locally or stream over RTSP to a remote client. With a UVC module this can be as simple as opening the device with a standard capture library; with MIPI you configure the camera interface and pull frames at full frame rate.
Running Thermal AI on NVIDIA Jetson
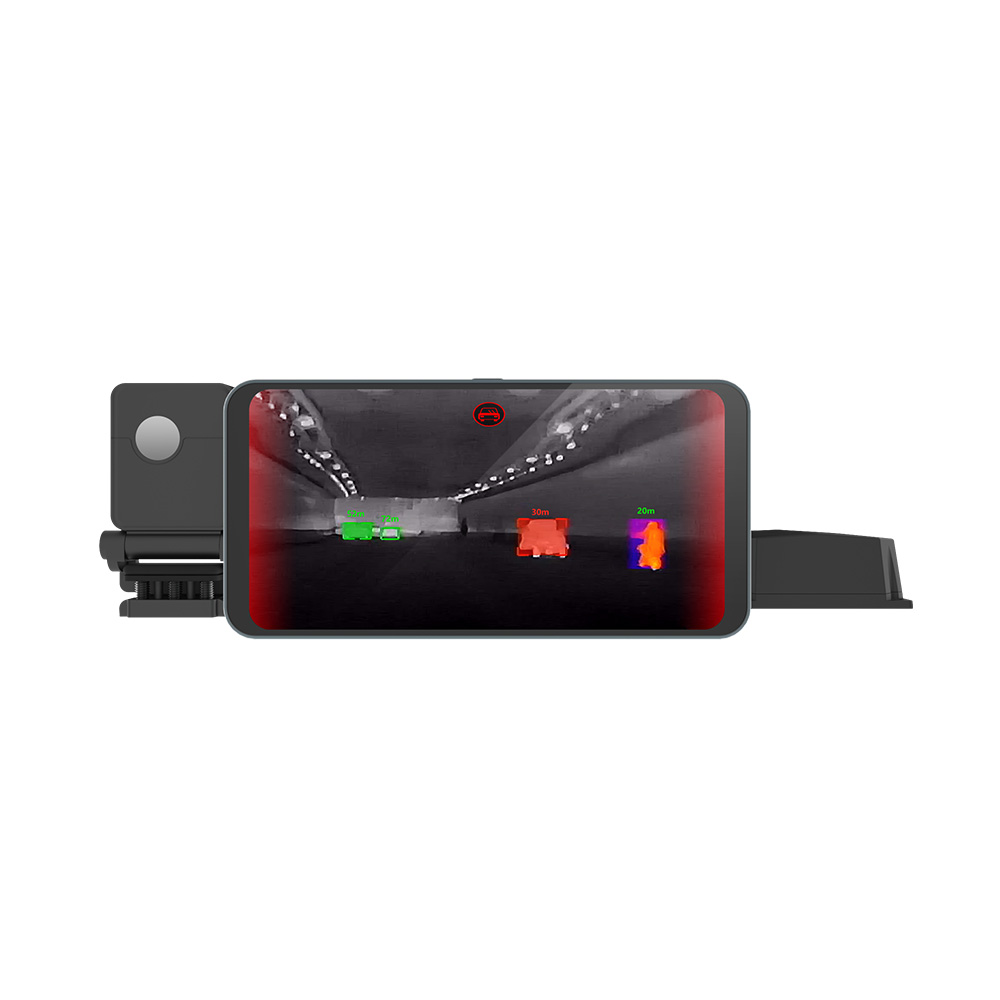
For AI inference, MIPI's low latency lets you feed thermal frames straight into detection models running on the Jetson GPU — human detection, object tracking, and anomaly spotting in the thermal domain. This is the architecture behind modern thermal security and autonomous-navigation systems.
Avoiding the "Salvaged Car Module" Trap
Salvaged automotive night-vision modules are tempting because they're cheap, but they almost never come with an open API, drivers, or documentation. You'll spend months sniffing protocols. An OEM module with an open API saves you that time entirely. To see how concrete this can be, read our step-by-step RS300 Raspberry Pi driver setup guide — a working example of documented integration.
Use-Case Selection Guide: Drone, Scope, Robotics & Fever Screening
Use this decision-tree-style guide to match a module to your application.
Drone / UAV Airborne Payloads
Weight and power are everything. You want a compact, low-power module with CVBS for FPV (low latency) or MIPI for onboard AI. We recommend the MINI 384×288 for its multi-interface flexibility and small footprint.
DIY Thermal Scope Builds
Prioritize frame rate and low latency for smooth target acquisition, and select an appropriate FOV for your engagement range. CVBS output shines here. See the MINI module specs ➔
Robotics & Machine Vision
Choose MIPI plus a full SDK for integration with frameworks like ROS. Real-time frames and register-level control make the MINI module a strong fit for autonomous platforms. Compare modules ➔
Smartphone Thermal Imaging
For field temperature checks and instant thermal vision on the go, the XPro Android module turns your phone into a thermal imager via USB Type-C — no separate display needed.
Human Body Temperature / Fever Screening
Radiometric accuracy and calibration are paramount. Pair a calibrated MINI module with a blackbody reference for screening-grade accuracy. View radiometric modules ➔
Ready to see everything? Browse our full thermal module catalog.
Radiometric Temperature Measurement Explained
The single most important capability distinction is radiometric versus non-radiometric. A radiometric module outputs a calibrated temperature value for every single pixel — you can click any point in the image and read its temperature. A non-radiometric module produces only a thermal-looking picture with no reliable temperature data behind it.
Emissivity & Why It Matters
Emissivity describes how efficiently a surface emits infrared radiation. Shiny metals have low emissivity and can read inaccurately; human skin has high emissivity (~0.98). A quality module lets you adjust the emissivity setting so the calculated temperature matches reality for the surface you're measuring. I've watched folks point a thermal camera at a polished pipe and get nonsense readings — that's emissivity biting them, not a broken sensor.
Calibration & Blackbody Referencing
Factory calibration against a blackbody reference — a source of precisely known, uniform temperature — is what enables ±2°C accuracy or better. This is a manufacturing-stage process; you cannot bolt it on later. OEM control over calibration is exactly why our modules deliver dependable numbers.
Use in Fever Screening & Predictive Maintenance
In predictive maintenance you scan motors, bearings, and electrical panels for hot spots that signal impending failure. In fever screening you measure skin temperature to flag elevated readings. Both demand radiometric output, and both benefit from controlled measurement distance and ambient compensation. Both our MINI and XPro modules ship with calibrated radiometric output.
Common Thermal Module Buying Mistakes to Avoid
- Buying salvaged automotive modules with no protocol docs. The cheap price hides months of reverse-engineering with no guarantee of success.
- Ignoring NETD and chasing resolution only. A high-resolution sensor with poor thermal sensitivity produces noisy, disappointing images.
- Assuming a USB module is automatically Linux/UVC compatible. Many are not — verify true UVC compliance before purchasing.
- Overlooking frame-rate export restrictions. The 9 Hz limit can blindside buyers who expected smooth 30 Hz video.
- No vendor engineering support or SDK. Without sample code and a register map, even a great sensor becomes unusable.
- Mismatched lens FOV for the intended range. A wide lens cannot detect distant targets; a narrow lens cannot navigate. Match optics to mission.
Avoid all six by working with an OEM that publishes specs, ships an SDK, and puts you in direct contact with the engineers who wrote the firmware.
Our Thermal Camera Modules: Specs & Comparison
Now that you understand interface, SDK, radiometric output, and form factor, here's how our two flagship products map onto those criteria. The MINI 384×288 is our board-level integration module for builders; the XPro is our instant phone add-on for field users.
| Feature | Uncooled MINI 384×288 Module | XPro Phone Thermal Camera |
|---|---|---|
| Product Type | Board-level IR module | Android phone add-on |
| Detector | Uncooled microbolometer (LWIR) | Uncooled LWIR |
| Resolution | 384 × 288 | LWIR thermal array |
| Temperature Measurement | High-precision radiometric | Radiometric, on-screen temp |
| Interfaces | USB / CVBS / MIPI (multi-interface) | USB Type-C |
| Best For | Drones, scopes, robotics, machine vision, embedded | Mobile thermal imaging, field temp checks |
| SDK / Docs | Open API, Linux drivers, sample code | Plug-and-play app |
| Form Factor | Compact embeddable | Pocket clip-on |
| Platform | Raspberry Pi / Linux / Jetson / custom | Android (Type-C) |
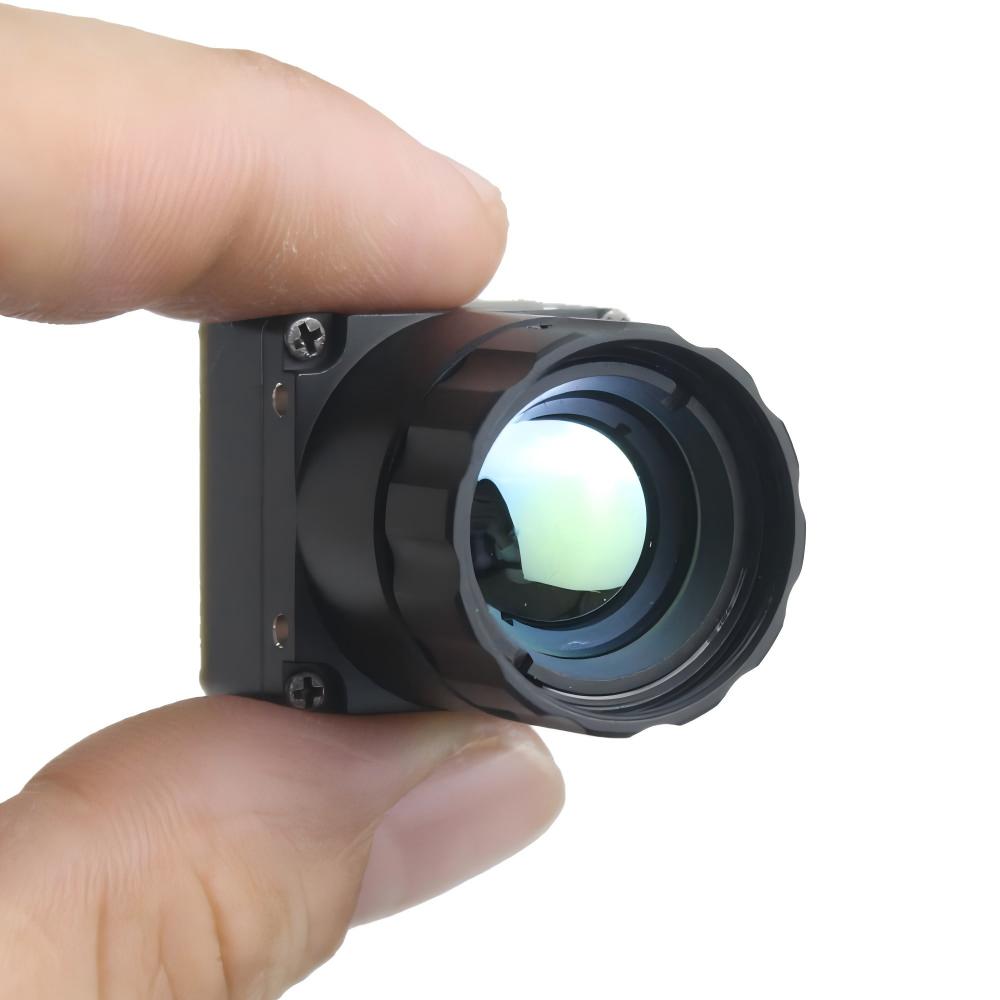
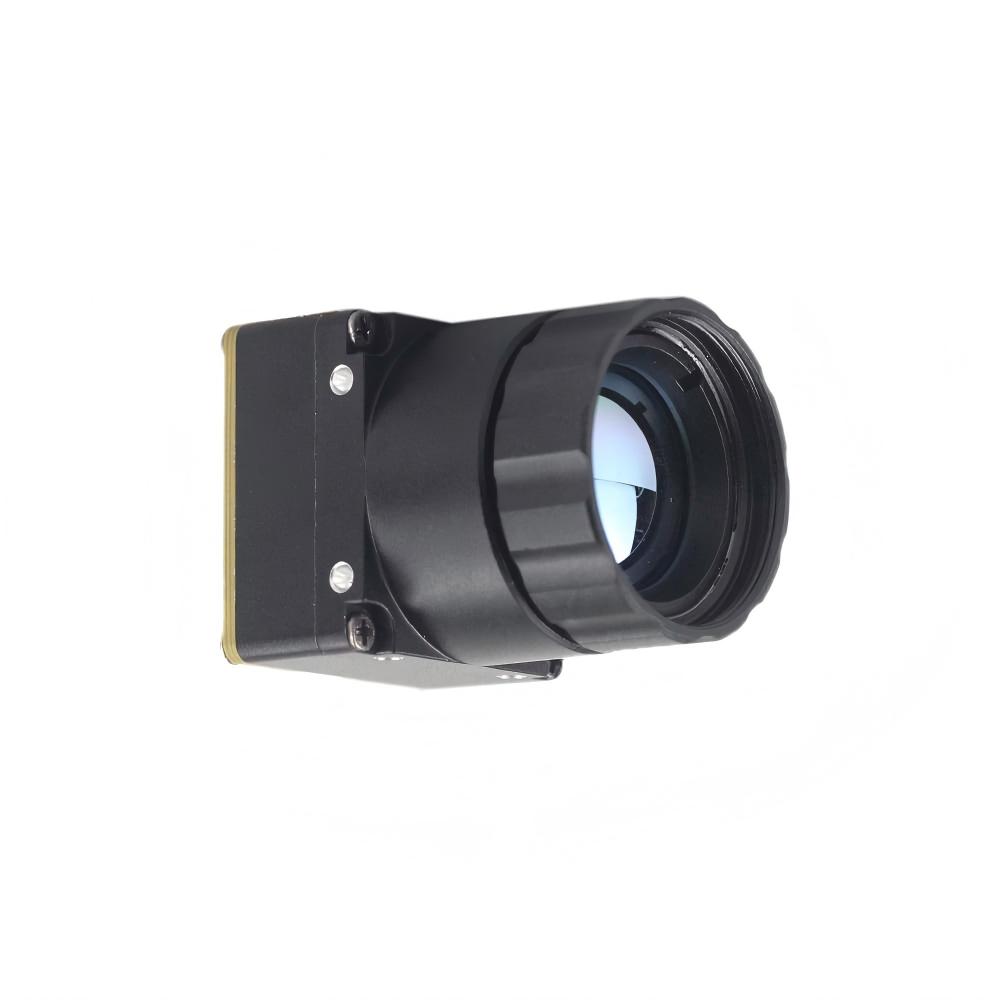
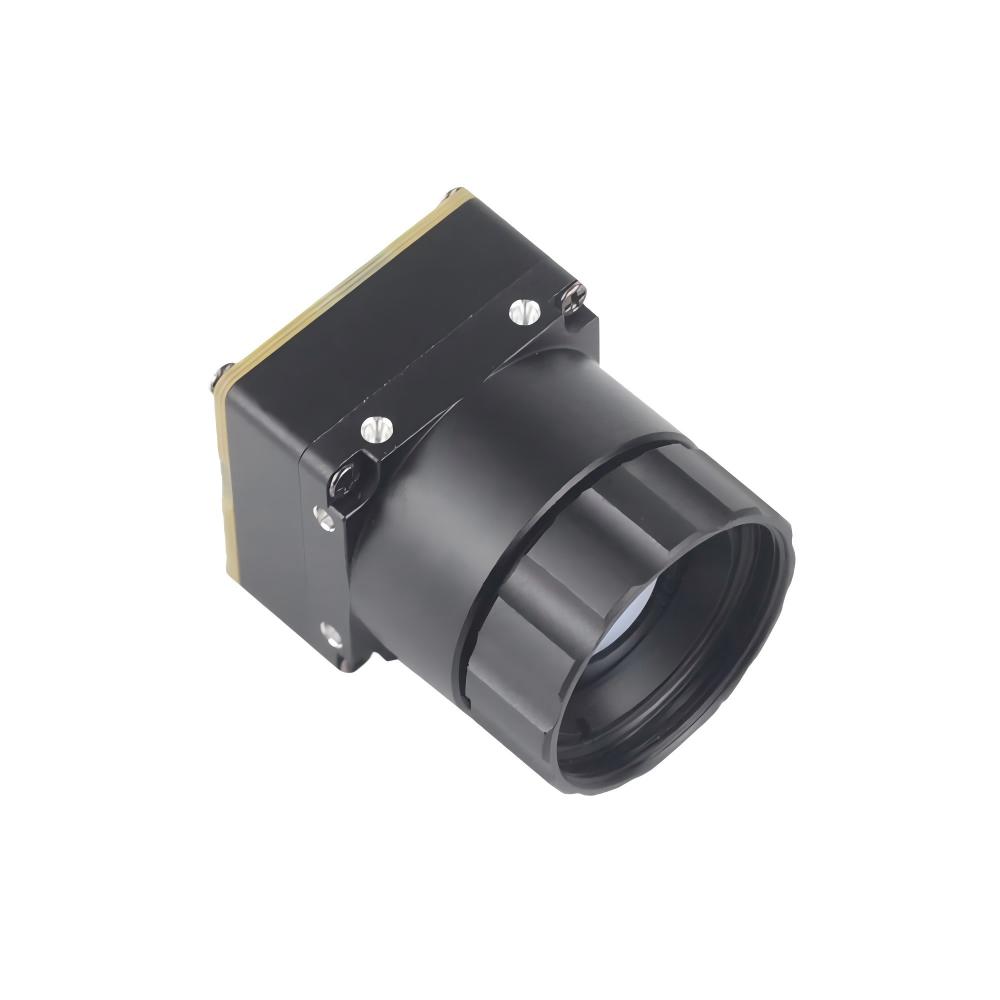
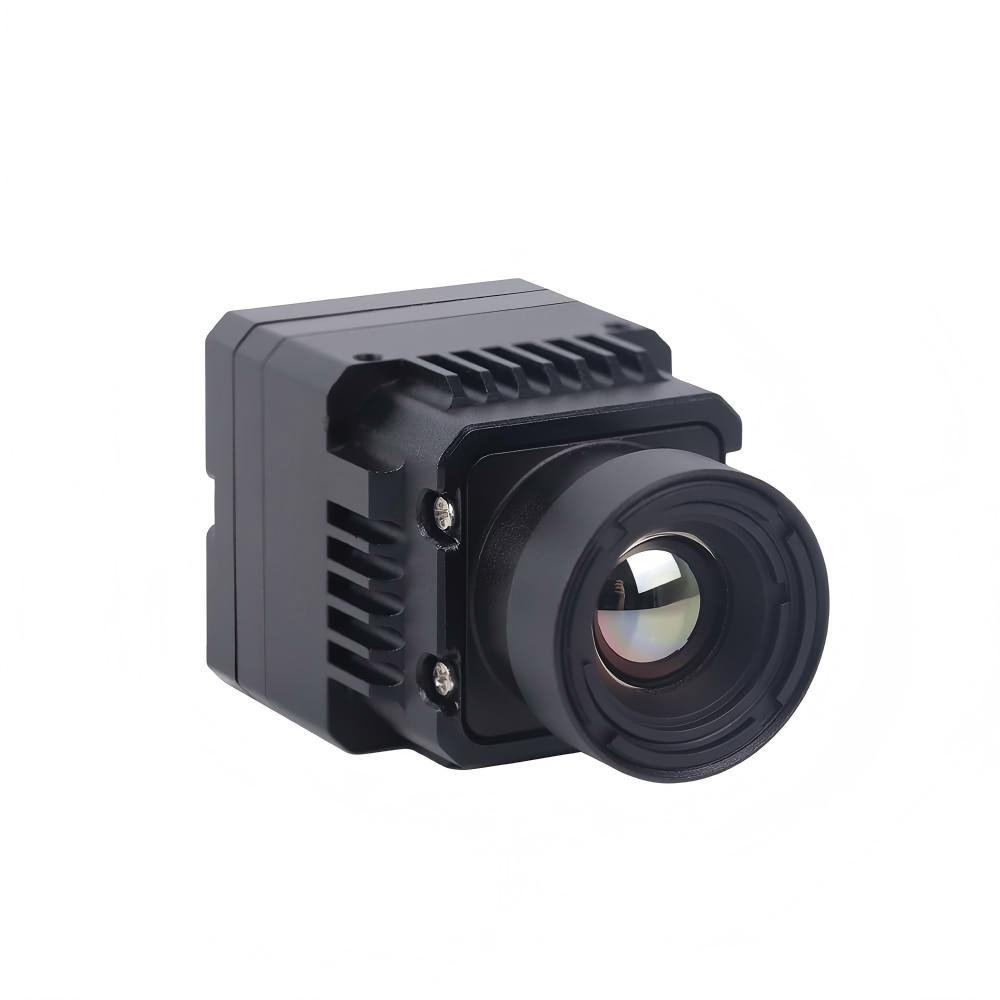
Uncooled Mini 384×288 Thermal Camera Module For Drones
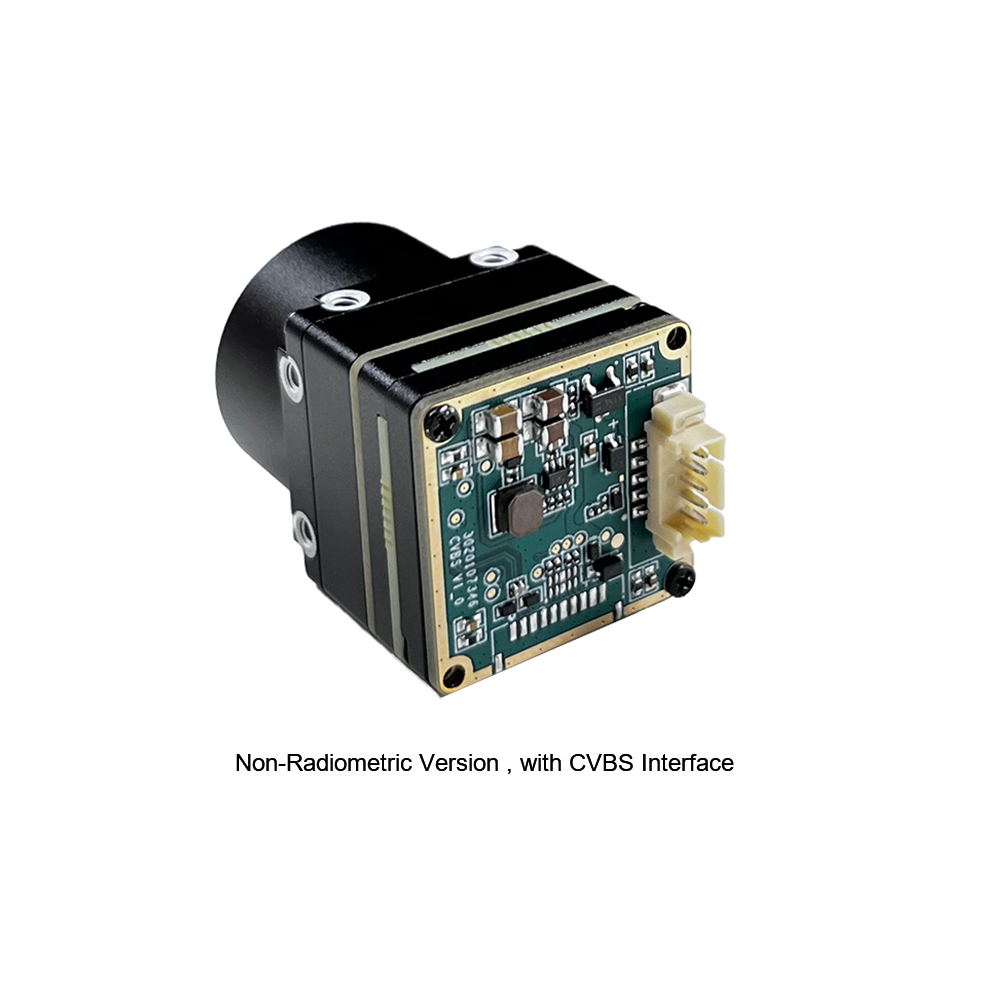
The MINI series infrared thermal imaging temperature measurement module is a high-precision, small-sized, and universal online temperature measurement infrared thermal imager. It uses high-quality detectors with high resolution, stable performance, and powerful functions. Equipped with multiple interfaces (USB, CVBS, MIPI), it is a preferred product across application fields such as machine vision, safety inspection, intelligent manufacturing, equipment maintenance, and robot/drone airborne payloads. Because we control the design from sensor to firmware, the frame format, register map, and Linux drivers are fully documented — making it the ideal choice for builders who refuse to waste months reverse-engineering anonymous boards.
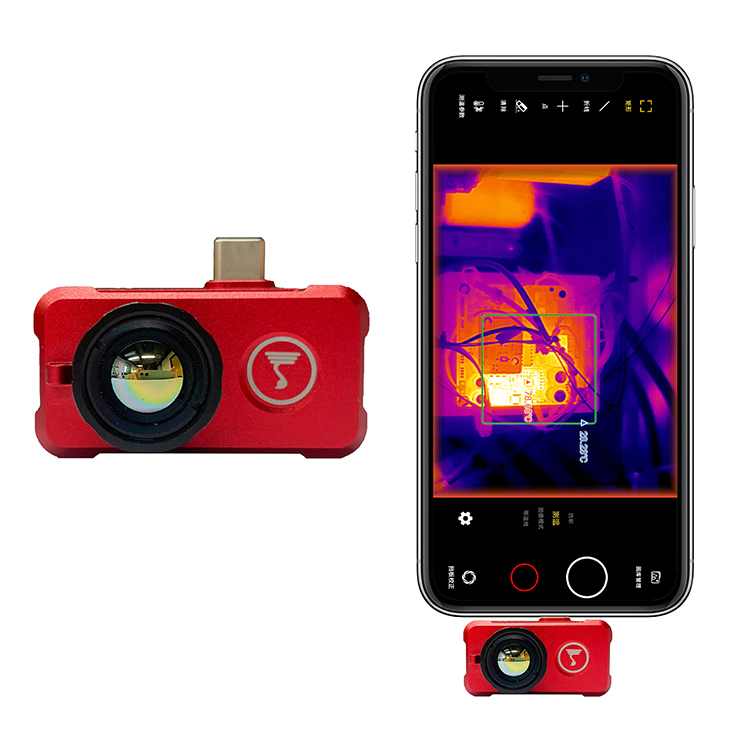
Xpro Phone Thermal Camera — Temperature Measurement For Android
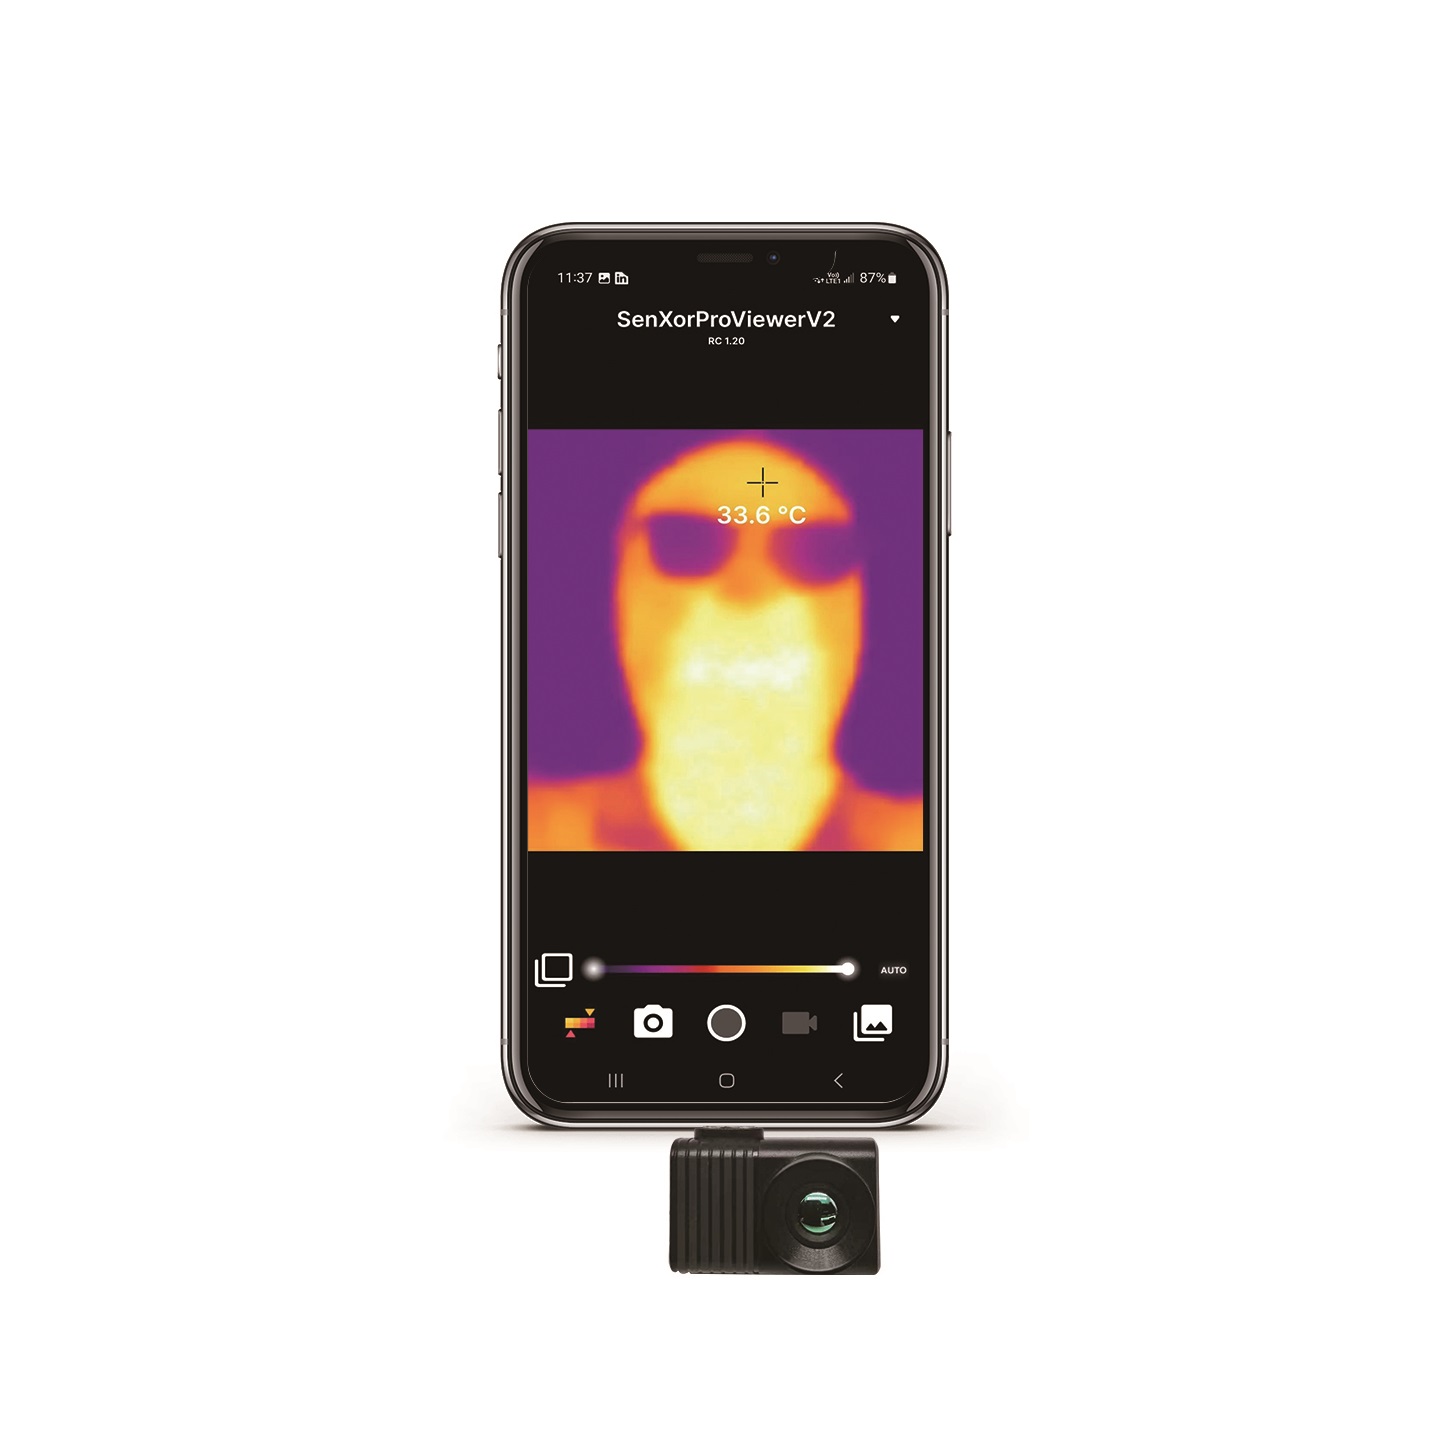
XPro Mini is a phone add-on thermal-imaging camera that can quickly turn your mobile phone into a thermal imager, letting you discover and measure temperature visually. It can see objects in the dark and easily detect the temperature of all objects around you. Connecting via USB Type-C, it requires no separate display or power supply — making it the perfect pocket tool for field temperature checks, home inspection, and rapid diagnostics. With on-screen radiometric readings, you get real numbers, not just pretty pictures.
Download full datasheets for both modules from our Download Center.
Frequently Asked Questions
I want to build a DIY thermal scope or stream real-time high-res thermal video to a Raspberry Pi—which Chinese thermal camera module actually works?
Many Reddit users complain that modules like the Tiny1-C or RTR-225M lack Linux drivers and clear documentation. Do your modules support Linux and provide development resources?
I need a thermal module for accurate human body temperature checking—can your module measure temperature reliably and small enough to embed?
📚 References & Further Reading
- Industry Standard: Wikipedia — Microbolometer
- Industry Standard: NVIDIA Jetson Embedded Computing
- Related Guide: RS300 Thermal Camera Driver for Raspberry Pi
- Resources: Download Center — Datasheets & SDKs
- Catalog: Browse All Thermal Camera Modules