Infrared Thermal Camera Module Guide: Choosing the Right Uncooled LWIR Core for Drones, Raspberry Pi & DIY Projects
2026年6月5日
High Resolution Thermal Camera Module: 640x512 Uncooled LWIR Cores for Drones & DIY Builds
2026年6月9日
Best Thermal Camera Modules for Raspberry Pi: The Definitive 2024 Resolution & Integration Guide
Here's the deal. Picture this all-too-familiar scene in the maker community: you've burned a whole weekend wiring up an MLX90640 sensor to your Raspberry Pi, soldering header pins, fighting with I2C addresses, and finally — heart racing — you boot up your script. What lands on screen is a disappointing, blocky 32×24 "heat blob" that vaguely resembles a hand, a soldering iron, or a warm cup of coffee. It's flat-out unusable for real PCB inspection, perimeter security, or any serious AI work. That's the painful gap between thermal imaging expectations and DIY reality, and it kills countless promising projects before they ever get off the bench. The truth is simple but uncomfortable: when it comes to thermal camera modules for raspberry pi, the Pi itself is a remarkably powerful edge-computing platform — but it's only ever as good as the thermal sensor feeding it data. Garbage in, garbage out.
This guide exists to bridge that resolution chasm — the enormous divide between cheap hobbyist sensors and professional-grade Long-Wave Infrared (LWIR) cores. Consider this the definitive 2024 resource: we'll cover the physics of LWIR imaging, the honest trade-offs between USB and GPIO/I2C integration, frame rate and resolution decisions, lens selection for your specific field of view, and full edge-AI deployment workflows. We'll also recommend a real, tested 640×512 USB module and walk through a complete integration roadmap so you can go from unboxing to a live thermal stream in minutes. Throughout, we lean on the broader maker ecosystem — including Raspberry Pi and Arduino — to keep every recommendation grounded in proven, real-world shop practice.
Table of Contents
- 👉 Why Resolution Matters for Pi Thermal Imaging
- 👉 How LWIR Thermal Camera Modules Work
- 👉 MLX90640 vs. 640×512 LWIR Cores: The Honest Comparison
- 👉 Connection Methods: USB, GPIO, I2C & CSI Explained
- 👉 Lens Selection & Field of View Guide
- 👉 Frame Rate, Streaming & Latency on Raspberry Pi
- 👉 Recommended Module & Real Specs
- 👉 Edge AI & Real-World Applications
- 👉 Step-by-Step Integration Roadmap
- 👉 Frequently Asked Questions
Why Resolution Matters for Raspberry Pi Thermal Imaging
Look, resolution is the single most important variable that separates a usable thermal camera from a novelty toy. Every decision downstream — frame rate, lens choice, AI accuracy — sits on the foundation of how many real thermal data points your sensor actually captures.
The Pixel Ceiling Problem
There's a profound and often misunderstood difference between native resolution and interpolated (upscaled) resolution. A 32×24 sensor captures exactly 768 individual thermal data points. A true 640×512 LWIR core captures 327,680 data points. That's a staggering 426× difference in raw thermal information. No clever software trick can manufacture the missing 326,912 measurements — they were simply never recorded. When you build a thermal camera for the Raspberry Pi, you're choosing your pixel ceiling at the hardware level, and you live with that ceiling forever.

Why Interpolation Isn't a Fix
Plenty of beginners assume they can grab a low-resolution image and "enhance" it with software. Interpolation algorithms — bilinear, bicubic, and similar methods — do produce a visually smoother image, but they pull it off by inventing transitional pixels between the few real data points. Those are, bluntly, smooth lies. The algorithm guesses what the temperature might be between two known points; it can't reveal the hairline crack in a PCB trace or the subtle hotspot on a connector that the sensor never resolved in the first place.
Resolution vs. Use Case
| Resolution Tier | Data Points | Viable Applications |
|---|---|---|
| 32×24 | 768 | Basic DIY temperature monitoring, learning projects |
| 640×512 | 327,680 | PCB inspection, perimeter security, drone survey, edge AI |
If you're still wrapping your head around how thermal imaging differs from regular photography, our deep-dive on converting a regular camera into a thermal imaging camera is the perfect place to start before you continue here.
How LWIR Thermal Camera Modules Work
To make an informed purchase, you need to understand the physics happening inside the module. LWIR thermal imaging isn't magic — it's a precise application of infrared physics and microelectromechanical engineering.
The Long-Wave Infrared Spectrum (8–14μm)
Long-Wave Infrared occupies the 8–14 micrometer band of the electromagnetic spectrum. This region is ideal for thermal imaging because objects at typical terrestrial temperatures dump most of their heat energy right here. Crucially, LWIR detects emitted heat rather than reflected light, which means it works flawlessly in total darkness. It'll also see through smoke, light fog, and other obscurants that blind conventional cameras — a decisive advantage for security and search applications running on a Raspberry Pi.
Uncooled Microbolometer Technology
The heart of an uncooled LWIR camera is the microbolometer array. Each pixel in this grid is a tiny thermally-sensitive element whose electrical resistance changes when it absorbs incident infrared radiation. The camera's processor reads these resistance changes across every pixel, converting them into a temperature map. The word "uncooled" matters: unlike cryogenically-cooled scientific sensors, uncooled microbolometers run at ambient temperature. That means lower cost, dramatically smaller size, lower power draw, and no fragile cooling apparatus — exactly the traits that make them perfect for compact Raspberry Pi builds and drone payloads.
NETD & Thermal Sensitivity
NETD, or Noise Equivalent Temperature Difference, is the gold-standard metric for thermal sensitivity. Measured in millikelvin (mK), it describes the smallest temperature difference the sensor can pick out from background noise. A lower NETD value means the camera can resolve finer thermal contrasts, producing crisper, more diagnostic imagery. When you're sizing up modules, treat low NETD as seriously as you treat high resolution — the two together define real image quality.
Why USB Output Simplifies Everything
Higher-end cores output fully processed thermal video over USB. That's transformative for Pi users: instead of forcing the Pi's CPU to grind through raw sensor decoding and correction, the module does the heavy lifting internally and hands the Pi a clean video stream. According to the Raspberry Pi documentation on USB device handling, standard UVC video devices are recognized automatically, which is precisely why USB cores are the path of least resistance.
MLX90640 vs. 640×512 LWIR Cores: The Honest Comparison
Let's be scrupulously fair to both options, because each has a legitimate place depending on your goals and budget.
Where MLX90640 Excels
The MLX90640 is genuinely excellent for what it is. It's inexpensive, talks over simple I2C, sips power, and is backed by a thriving community of tutorials. For students learning the basics of thermal data, for low-stakes temperature mapping, or for a fun weekend maker project, it's a fantastic entry point. Makers coming from an Arduino background will find its I2C interface immediately familiar and approachable.
Where It Hits the Wall
The limitations show up fast once ambition grows. The 32×24 resolution produces blocky output unsuitable for inspection or AI object recognition. On the Pi's I2C bus, effective frame rates typically land around 4–8 FPS, way too slow for real-time monitoring. There's simply no fine detail to feed a neural network, so any serious computer-vision task stalls out.
The 640×512 LWIR Advantage
A professional 640×512 LWIR core changes the entire equation. You get genuine professional resolution, far higher frame rates, plug-and-play USB connectivity, and a sensor capable of real production deployment in industrial, security, and aerial roles. Here's what that upgrade actually buys you:
✅ True professional resolution — 327,680 real data points instead of 768.
✅ Real-time frame rates that keep up with moving subjects and live AI.
✅ Plug-and-play USB — no soldering, no address conflicts.
✅ Production-ready for industrial inspection, perimeter security, and drone payloads.
| Attribute | MLX90640 | 640×512 LWIR Core |
|---|---|---|
| Resolution | 32×24 (768 px) | 640×512 (327,680 px) |
| Effective FPS on Pi | ~4–8 | High frame rate, real-time |
| Interface | I2C (GPIO) | USB plug-and-play |
| Power | Very low | USB-powered, modest |
| Cost Tier | Budget | Professional |
| Best Application | Learning, basic monitoring | Inspection, security, drones, AI |
| Lens Options | Fixed | 5–150mm selectable |
Connection Methods: USB, GPIO, I2C & CSI Explained
How you physically connect a thermal sensor to the Raspberry Pi determines your bandwidth ceiling, your wiring headache, and ultimately whether the project succeeds. Here are the four approaches makers actually use in the shop.
I2C (GPIO Pins)
I2C is the simplest interface conceptually — just a few wires to the GPIO header. Its weakness is bandwidth. The I2C bus was designed for low-speed sensor chatter, not for streaming high-resolution video. Push a high-resolution thermal feed through it and the pipeline chokes, capping your frame rate well below usable real-time thresholds.
CSI Ribbon Interface
The Pi's dedicated CSI camera port offers high bandwidth and is the standard route for visible-light Pi cameras. For thermal sensors, though, CSI compatibility is limited, and the fragile ribbon cable plus driver complexity make it a less practical choice for most thermal builds.
USB UVC & Custom USB Cores
This is the recommended path, hands down. A USB UVC-compatible thermal core is recognized by the Pi as a standard video device — no soldering, no address conflicts, no ribbon fragility. You get high bandwidth, cross-platform compatibility, and minimal wiring. To see exactly how a USB core performs in real deployments, read our detailed breakdown of the Mini 640 Uncooled LWIR Thermal Camera Module in action.
Power & Thermal Budget Considerations
USB cores draw their power directly from the bus, which simplifies your build. On a Raspberry Pi 4 or Pi 5, the USB 3.0 ports provide ample bandwidth and stable power delivery, keeping your high-resolution stream smooth even under sustained load.
Lens Selection & Field of View Guide
The lens is just as critical as the sensor. The right focal length makes sure your subject fills the frame, squeezing maximum effective resolution out of the pixels you paid for.
Focal Length Basics
Focal length, measured in millimeters, governs the field of view (FOV) and detection range. A short focal length yields a wide FOV ideal for nearby, broad scenes, while a long focal length narrows the FOV to magnify distant targets, stretching effective detection range.
Matching Lens to Application
For monitoring an entire room or a workbench, a wide 5mm lens grabs the whole scene. For long-range perimeter security or drone survey work where targets sit far away, a telephoto 100–150mm lens concentrates the sensor's pixels onto the distant subject for crisp identification.
| Lens Focal Length | Field of View | Ideal Use Case |
|---|---|---|
| 5 / 9mm | Very wide | Room monitoring, close-range scenes |
| 13 / 18 / 35mm | Medium | General inspection, industrial use |
| 50 / 75mm | Narrow | Mid-range security, detailed survey |
| 100 / 150mm | Telephoto | Long-range security, drone survey |
Custom Lens Configuration
Because the recommended module below offers a full range of selectable focal lengths — 5, 9, 13, 18, 35, 50, 75, 100, and 150mm — you can tailor your build precisely to your application, with customization available on request.
Frame Rate, Streaming & Latency on Raspberry Pi
A high-resolution sensor is only half the story. Getting that data onto your screen or into your AI pipeline smoothly and with minimal delay is what makes a system feel professional instead of janky.
Understanding Frame Rate
Frame rate, measured in frames per second (FPS), determines how fluid your thermal video looks. A smooth 25–60 FPS feed is essential for real-time, lag-free monitoring — tracking a moving person, inspecting a rotating component, or stabilizing a drone view. The stuttering 4–8 FPS of an I2C sensor simply can't keep up.
Streaming Pipelines
On the Raspberry Pi, the standard toolchain for capturing and processing video leans on three workhorses:
⚙️ GStreamer — flexible media pipelines for capture, transform, and output.
⚙️ V4L2 (Video4Linux2) — low-level device access to confirm and control the camera.
⚙️ OpenCV — frame-by-frame capture and full computer-vision workflows.
A USB UVC core slots neatly into all three with zero drama.
Reducing Latency
To knock down latency, lean on the Pi's hardware decoding, connect through USB 3.0 on a Pi 4 or 5, and tune your resolution and bandwidth to match what you actually need instead of maxing everything out blindly.
Network Streaming
For remote dashboards and monitoring stations, you can push the thermal feed over the network using RTSP or MJPEG, turning your Pi into a compact, deployable thermal sensor node you can reach from anywhere on your network.
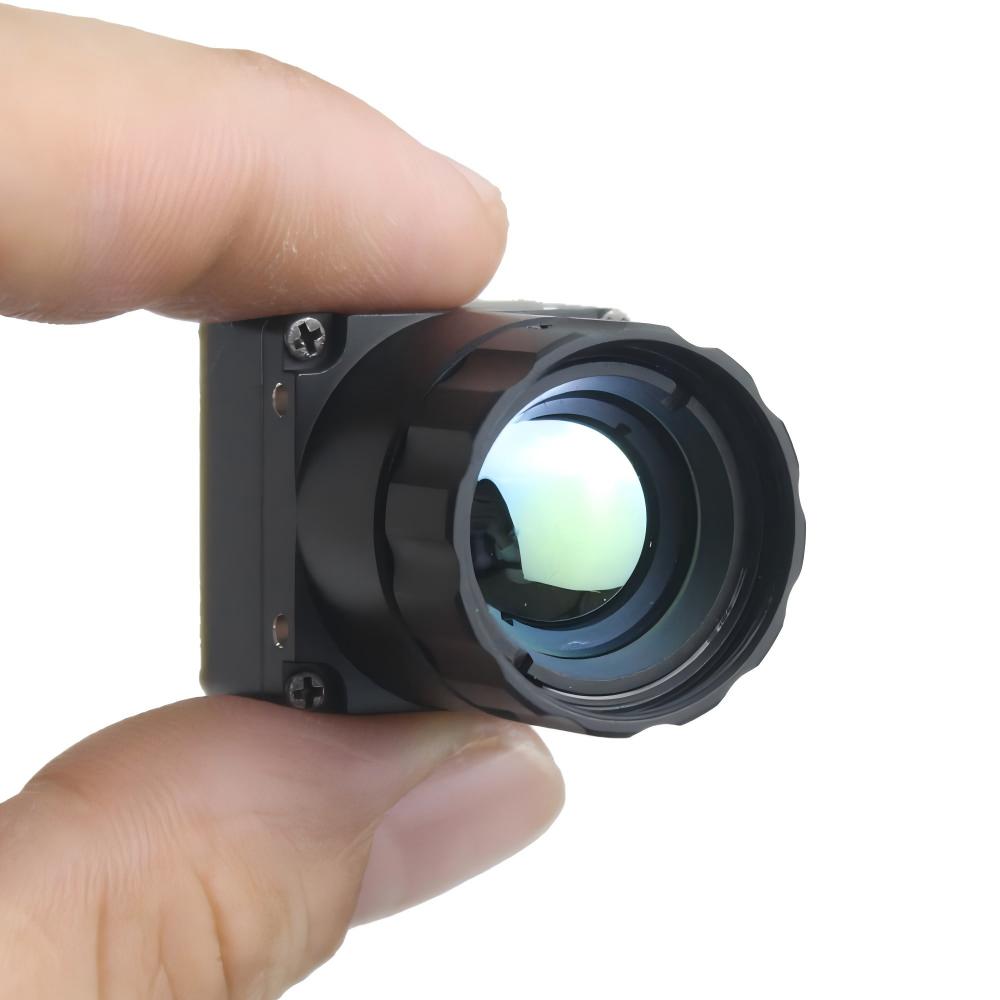
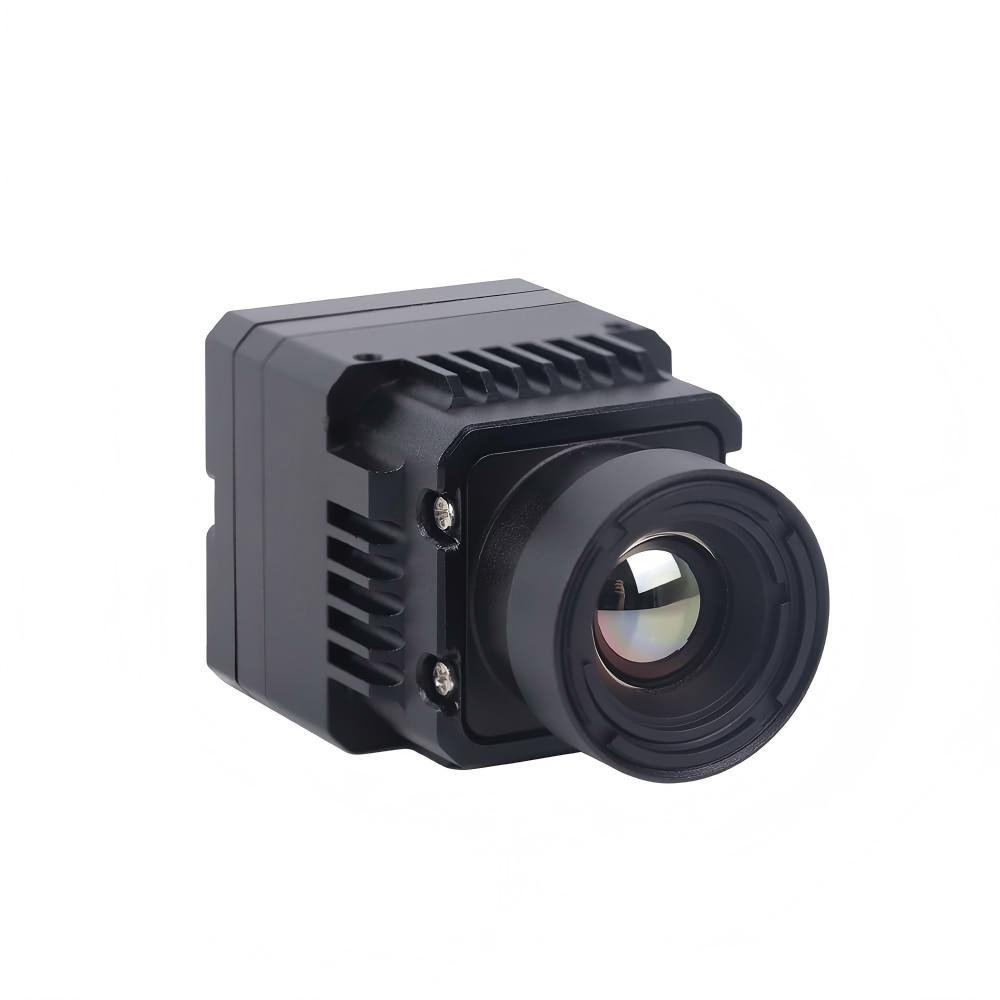
Recommended Module: Uncooled LWIR USB Mini 640×512 Core
After weighing every factor we've covered above — true resolution, compact form, USB plug-and-play simplicity, and lens flexibility — one module stands out as our tested, editor's-choice solution for serious thermal camera modules for raspberry pi projects. It directly solves the blurry-blob problem, the bandwidth bottleneck, and the wiring complexity that frustrate so many builders.
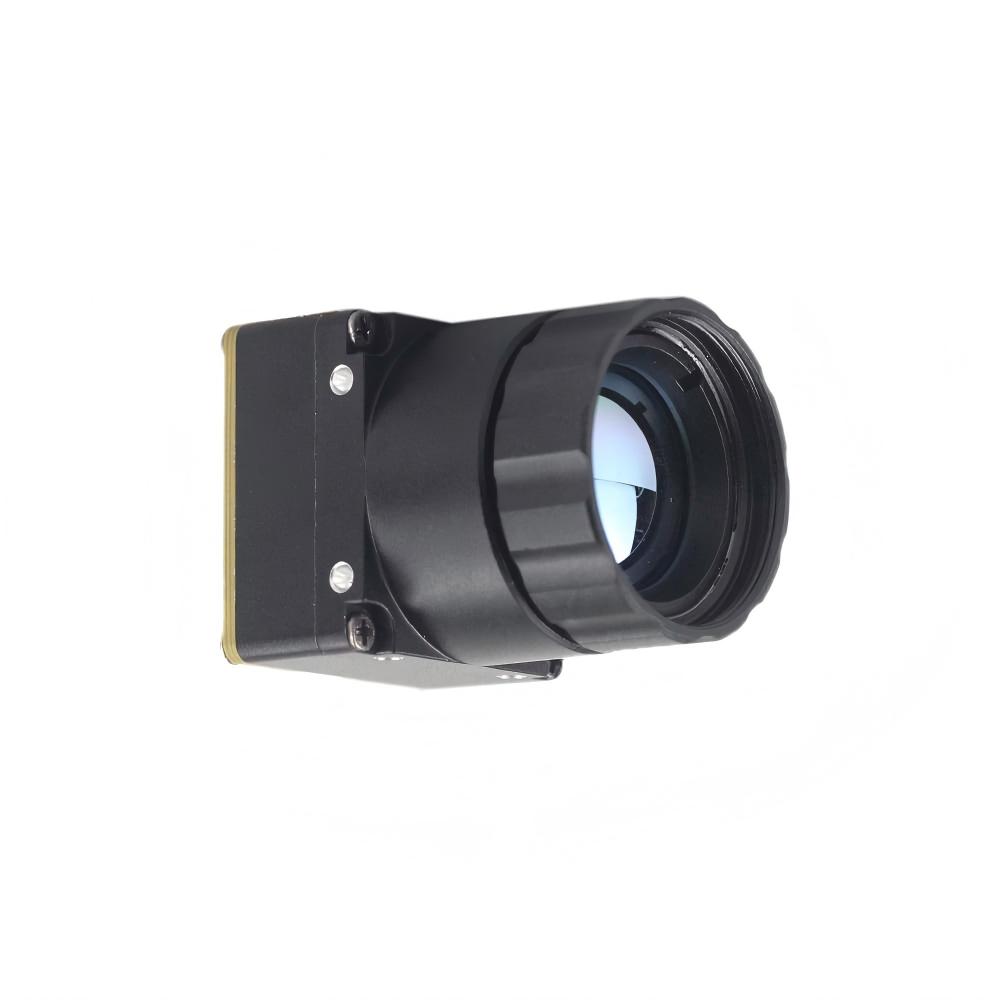
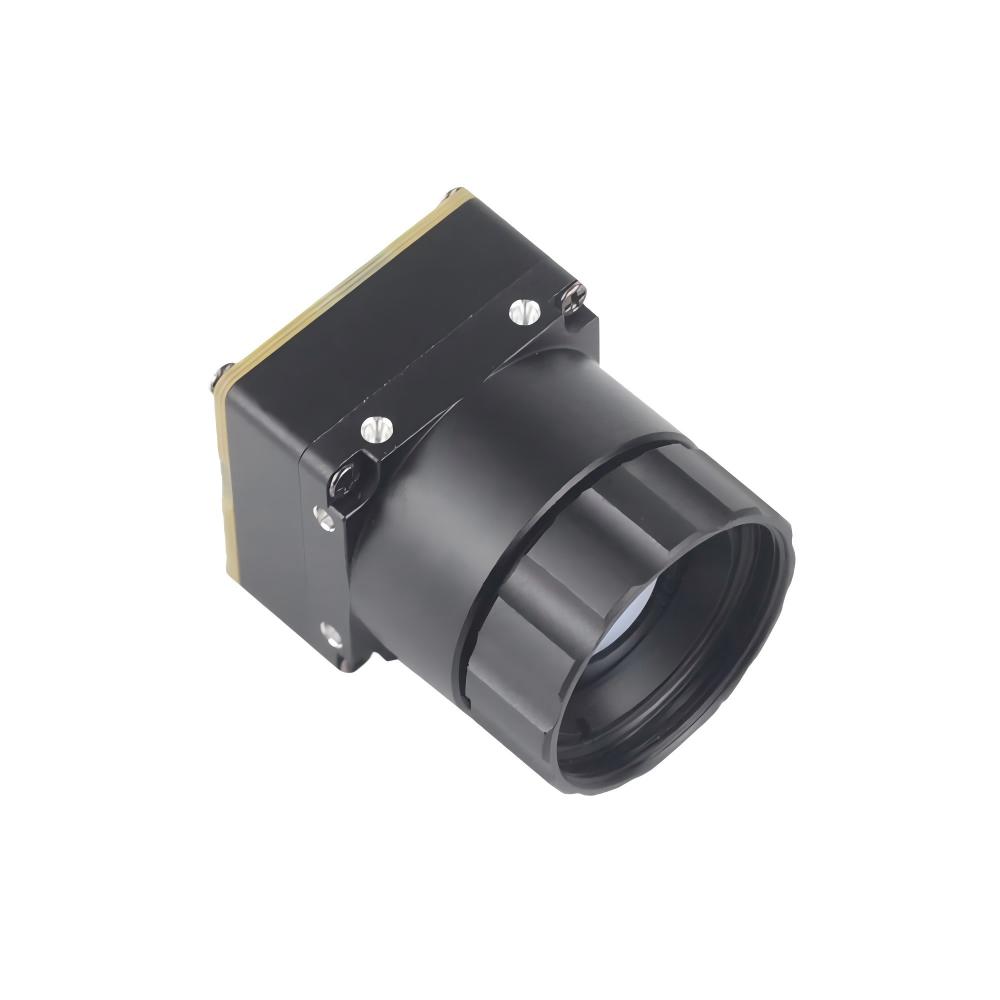
This mini uncooled infrared thermal imaging module delivers sharp, crisp image presentation, a remarkably compact body, and low cost. With a tiny 21mm×21mm footprint, optional 640×480 resolution alongside the standard 640×512 output, and a complete range of selectable lenses (5/9/13/18/35/50/75/100/150mm), it provides stable performance and strong environmental adaptability — making it equally at home on drones, industrial inspection rigs, and Raspberry Pi security builds.
| Specification | Detail |
|---|---|
| Product | Uncooled LWIR USB Mini 640×512 Thermal Imaging Camera Core Module |
| Resolution | 640×512 (640×480 optional) |
| Module Size | 21mm × 21mm (ultra-compact) |
| Sensor Type | Uncooled LWIR Microbolometer |
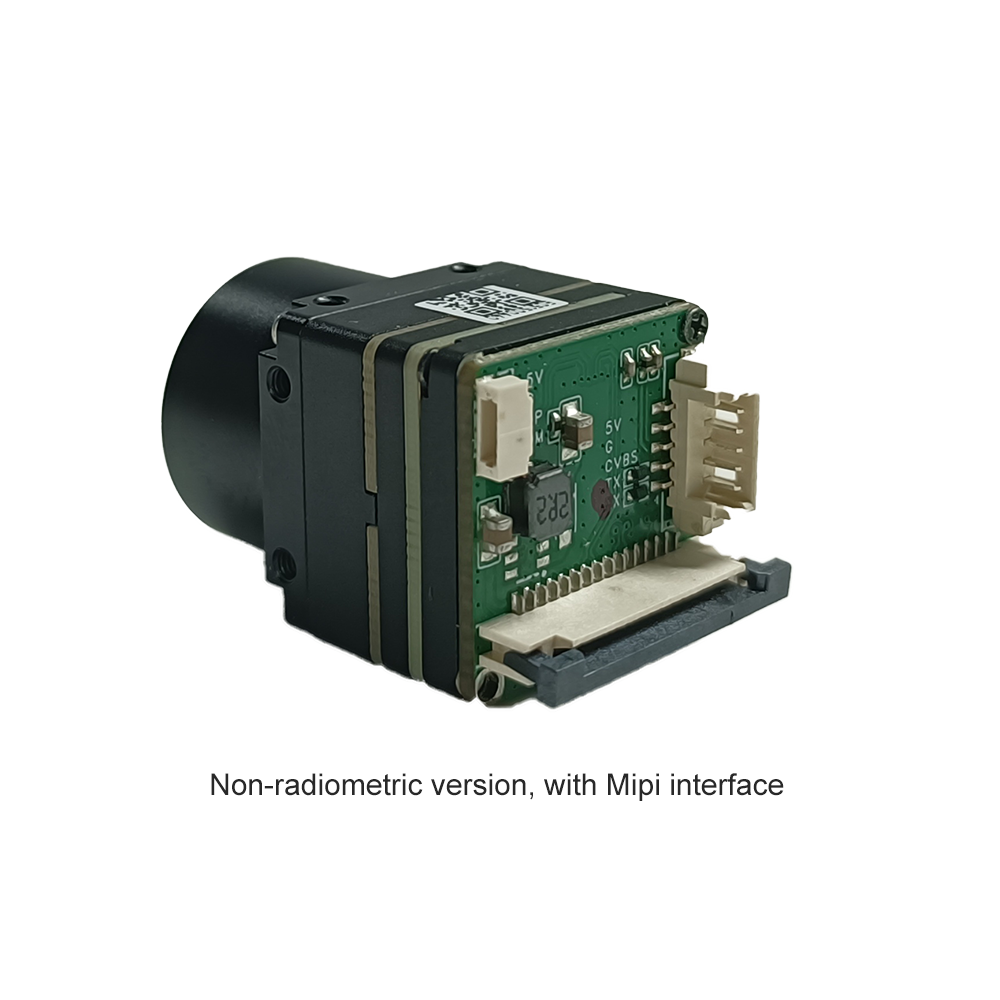
| Interface | USB (plug-and-play) |
| Lens Options | 5 / 9 / 13 / 18 / 35 / 50 / 75 / 100 / 150 mm |
| Image Quality | Sharp, crisp, low-noise presentation |
| Environmental Adaptability | Strong, stable across varying conditions |
| Edge AI Support | Yes |
| Best For | Drones, industrial inspection, security, Pi projects |
| Comparable To | DJI thermal payloads |
| Customization | Lens, interface, housing |
View Product Details & Pricing ➔
Edge AI & Real-World Applications
Pair a high-resolution thermal core with a Raspberry Pi and you unlock genuine intelligent imaging at the edge — processing data locally without leaning on the cloud.
Thermal + AI on the Pi
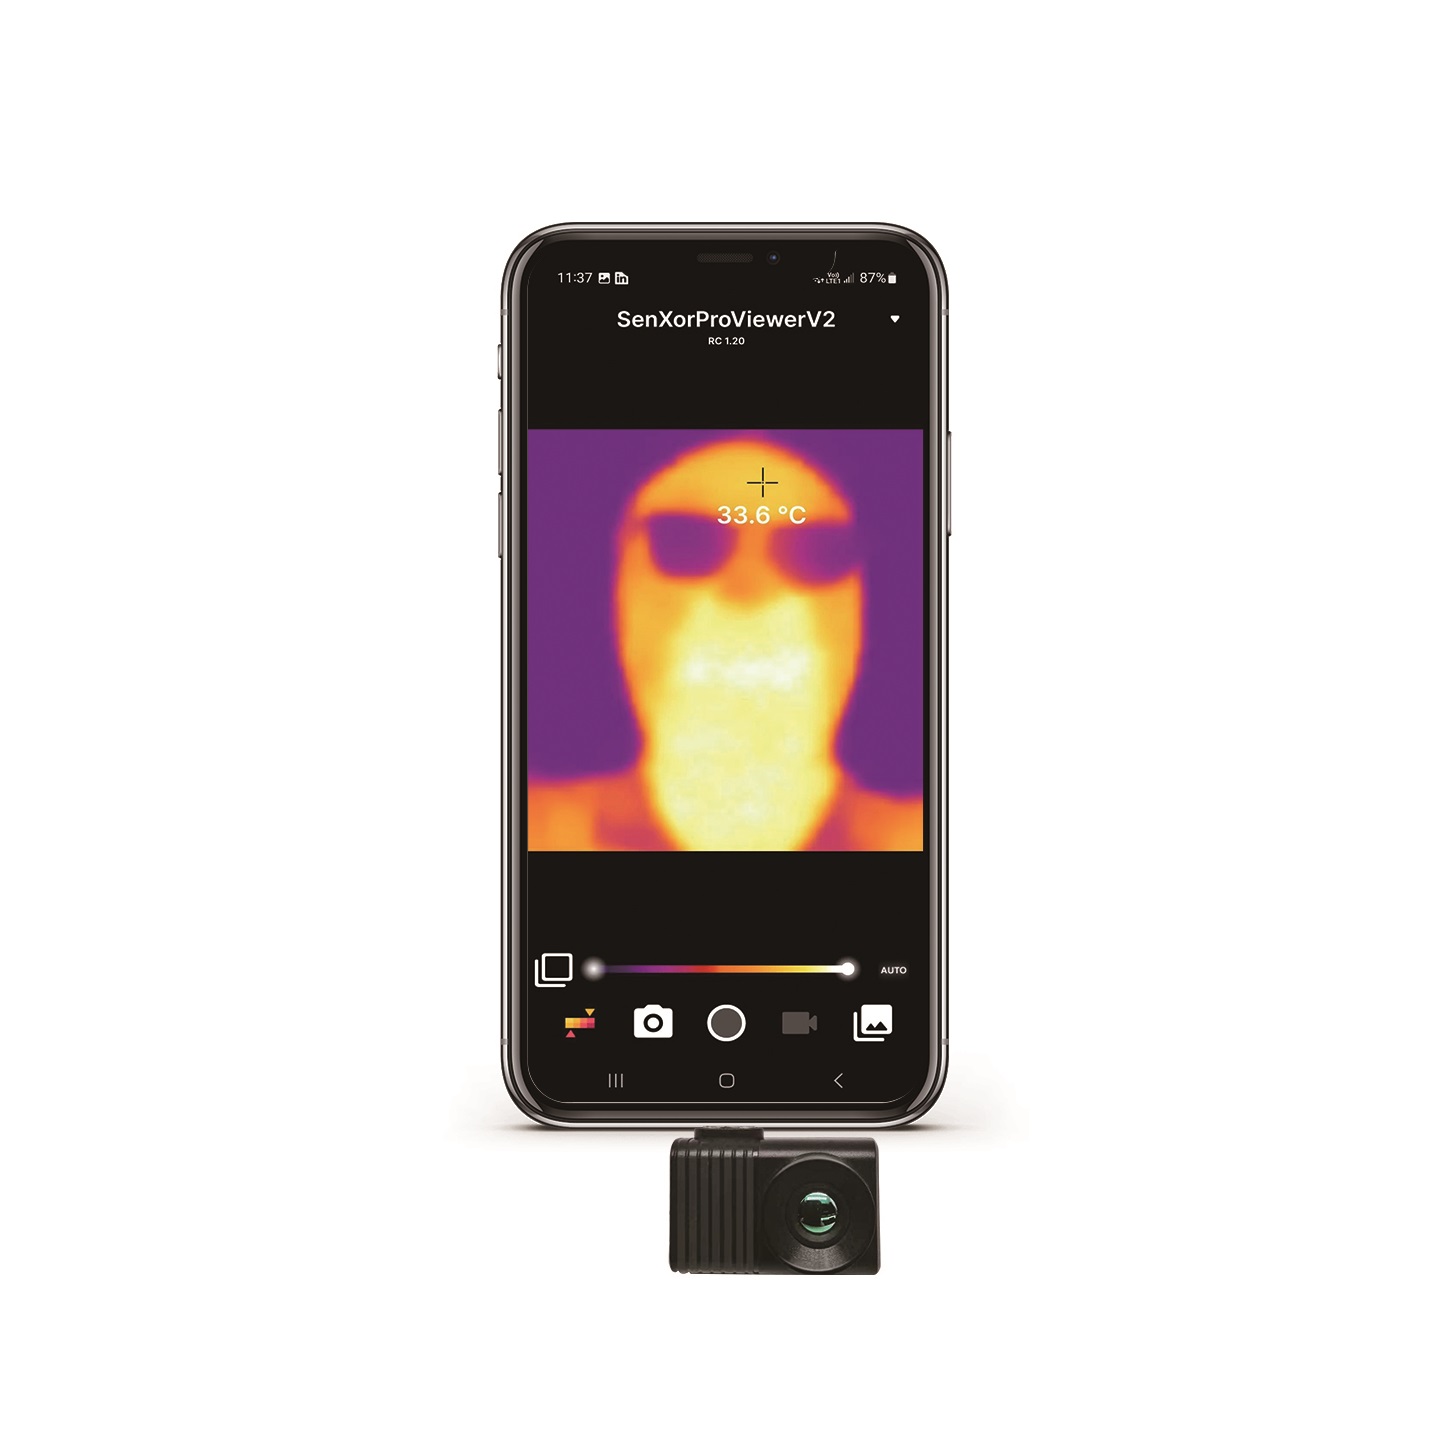
With a real 640×512 feed, frameworks like TensorFlow Lite and OpenCV can do meaningful work: automated hotspot detection, human presence recognition, and real-time anomaly alerting. The high pixel count hands neural networks the detail they need to make accurate classifications — something a 32×24 sensor can never deliver.
Industrial Inspection
In maintenance and manufacturing, thermal vision exposes problems invisible to the naked eye: overheating electrical panels, failing components on a PCB, and early warning signs for predictive maintenance. A Pi-mounted thermal core becomes an affordable, deployable inspection station you can throw at the problem.
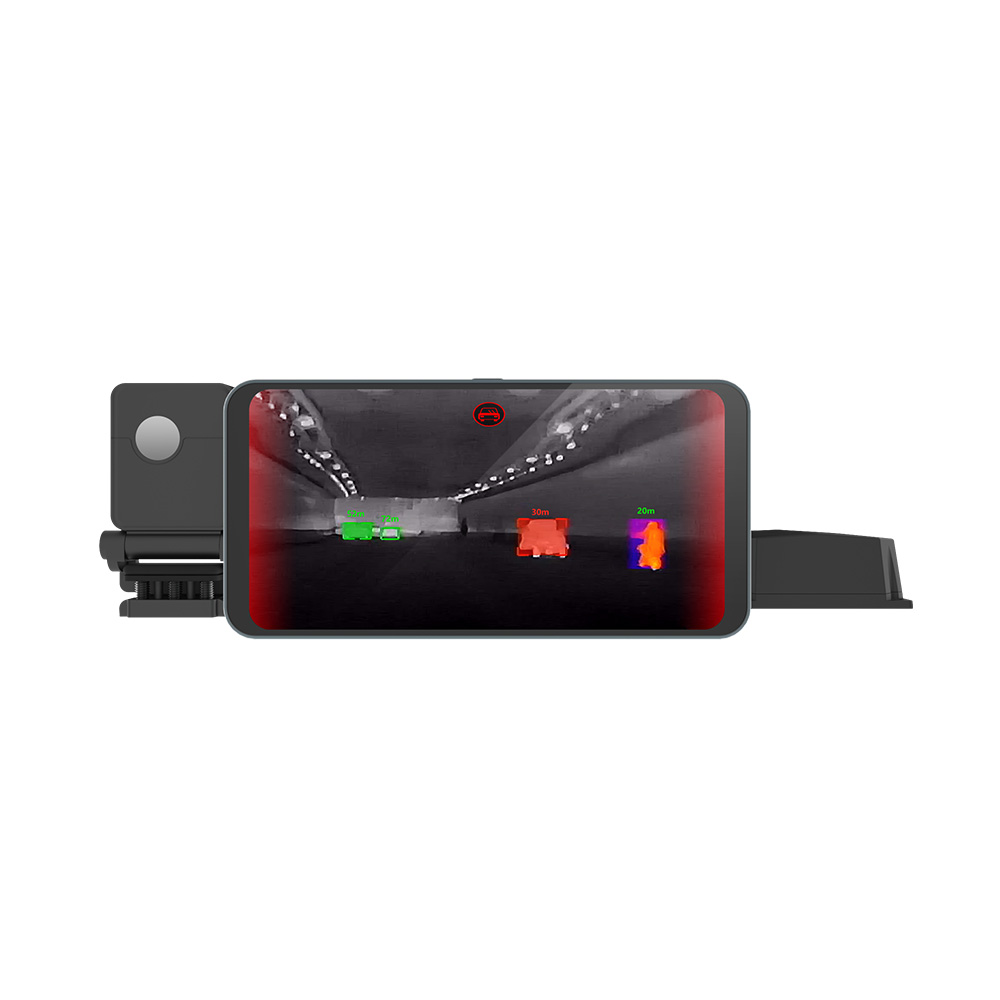
Security & Perimeter Monitoring
Because LWIR detects emitted heat, it works in complete darkness, making it ideal for night-time security and perimeter monitoring where conventional cameras fail flat. Intruders can't hide their thermal signature.
Drone & UAV Integration
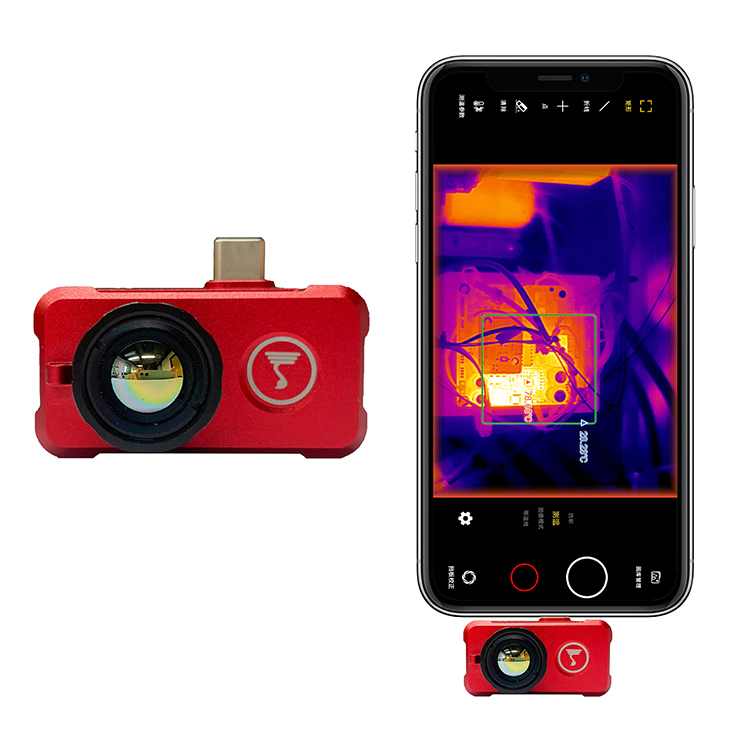
The ultra-compact 21mm×21mm footprint and low weight of the recommended module make it perfectly suited to drone and UAV integration, delivering capabilities comparable to far pricier DJI thermal payloads. For teams deploying across multiple platforms, our temperature-measurement LWIR thermal camera for Android phones extends the same imaging quality to handheld mobile use.

Step-by-Step Integration Roadmap
Here's the practical path from parts on your bench to a live thermal stream running on your Raspberry Pi.
Hardware Checklist
⚙️ Raspberry Pi 4 or Pi 5 — for the best USB 3.0 bandwidth.
⚙️ USB thermal module — the Uncooled LWIR Mini 640 core.
⚙️ Reliable power supply — stable delivery under sustained load.
⚙️ Adequate cooling for the Pi while it grinds through processing.
Software Setup
Boot your Pi, plug the module in via USB, and confirm the operating system detects it as a UVC video device. Use standard V4L2 utilities to verify the device node and supported formats — this proves the camera is recognized before you write a single line of code.
First Stream Test
Open a simple OpenCV capture session that grabs the video device, reads frames in a loop, and tosses them up in a window. Within a few lines, you should see a live, crisp thermal feed — your proof that the full pipeline is working end to end.
Scaling to Production
Once your prototype checks out, move toward deployment with protective housing, customized lens and interface selection, and the technical support available from the manufacturer to lock in long-term reliability out in the field.
Frequently Asked Questions
What is the best thermal camera for real-time high-resolution streaming to a Raspberry Pi?
Why does my DIY Raspberry Pi thermal camera look blurry or low-res?
How hard is it to integrate a hi-res thermal camera module with a Raspberry Pi?
📚 References & Further Reading
- Industry Standard: Raspberry Pi Official Documentation
- Industry Standard: Arduino Official Resources
- Related Guide: Can We Convert a Regular Camera Into a Thermal Imaging Camera?
- Related Guide: Mini 640 Uncooled LWIR Thermal Camera Module Deep-Dive
- Related Product: Temperature-Measurement LWIR Thermal Camera for Android